Chattahoochee River Hikes: Island Ford

Atlanta is well known for traffic, a massive airport, CNN, Coca-Cola, conventions, and Gone with the Wind.  It seems almost cliche-ish when defined in these terms and I can certainly understand that these form or inform people’s image of the South’s “Gate City,” as it was known in the mid 19th century.  What local residents and frequent visitors know, though, is that the city is a vibrant and diverse collection of areas.  The international farmer’s market by I-285 is a great example of this diversity that visitors don’t often get to see.

Another fact that may be surprising is how this city, so built up and loaded with cars, is actually in the midst of the great outdoors.  I shared already about how close Sweetwater Creek State Park is to the city (only 15 miles).  Here I want to shared another great nature spot, right within and right outside the city’s ring road (I-285):  the Chattahoochee River National Recreation Area, part of the U.S. National Park Service.Chattahoochee River, National Recreation Area, National Park Service, hiking, Atlanta, Georgia, photo

The lay of the Chattahoochee River

The Chattahoochee River, or the “Hootch“, starts up in the North Georgia mountains where the Buford Dam was established to control its flow and accumulate water to provide for the city.  It then makes its way to the Gulf of Mexico via western Atlanta then Alabama, then Florida.  The river does not cross the modern city center as rivers tend to do in other cities.  The city’s location was driven by railroad lines connecting the Gulf, the Atlantic ports and the Midwest back in the first half of the 19th century.  So, we did not end up with a river going through the city center (a shame!).

However, it does go through urban areas right outside the city of Atlanta proper and we were lucky that it became a protected area in the 1970s so we could enjoy this bit of nature.  All along the river, as it courses through metro Atlanta, there are parks and trails, offering great walking, running, mountain biking, hiking, picnicking, etc.  Here I want to share with you about one of them and hope to continue sharing other spots in the future.

Island Ford, Chattahoochee river, hiking, outdoors, nature, photo, Olympus, woods, National Park Service

Island Ford, Chattahoochee river, hiking, outdoors, nature, photo, Olympus, woods, National Park Service

I bet it looks very different in the middle of summer!

Island Ford

A few miles outside of I-285, as you head up on GA-400, you reach the headquarters of the Chattahoochee River National Recreation Area’s headquarters.  As with many parks, friendly staff and rangers are a phenomenal source of information and advice, both of which we enjoyed getting.

Island Ford, Chattahoochee river, hiking, outdoors, nature, photo, Olympus, woods, National Park Service

Park rangers are a great source of information to those visiting the park

Again, as with other parks like scene, they park service charges a nominal fee for use of the park in the form of a parking permit that costs only $3.  Bring singles as you make payment by putting the three dollars in an envelope and drop it in a box!

Island Ford, Chattahoochee river, hiking, outdoors, nature, photo, Olympus, woods, National Park Service

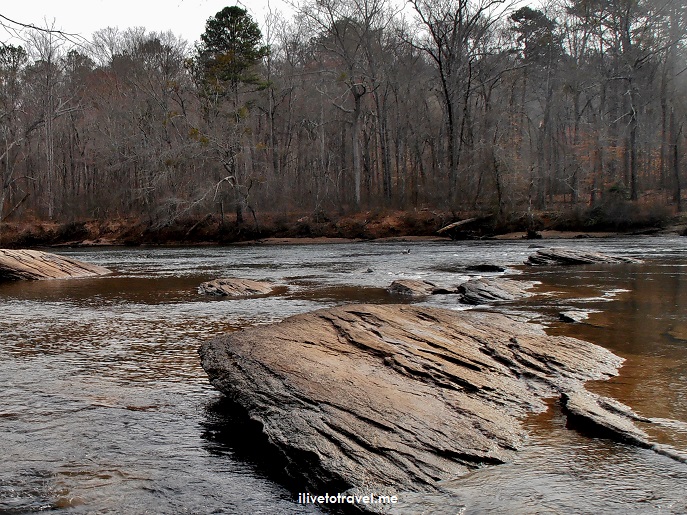
Incredible stones everywhere in the area, including in the river!

The trails around Island Ford provide both flat areas as well as steep hills to challenge hikers.  The circuit of trails here could take around 1.5-2.5 hours (depending on how many of the trails you hit and your speed!) and they are suitable for beginners.  Apparently, it is also a good spot for trout fishing – who knew!

trout, fishing, Chattahoochee River, Island Ford, Atlanta, Olympus, photo, hiking

Trout fishing fun

The trails ford a couple of creeks that feed the river and offer great views of the river but also of rock formations that natives are said to have used for shelter as far back as 1,000 years ago!Chattahoochee River, rock shelters, hiking, National Park Service, Olympus, photo, nature, outdoors Chattahoochee River, rock shelters, hiking, National Park Service, Olympus, photo, nature, outdoors

Island Ford, Chattahoochee river, hiking, outdoors, nature, photo, Olympus, woods, National Park Service

The star of the show working his way over a log

The Chattahoochee Parks Conservancy supports parks along the river in many ways to ensure our enjoyment of these natural areas.  Visit their site and become a member or supporter!   


Read about these other great hikes in Georgia:

Sope Creek

Panther Creek

Sweetwater Creek

Tallulah Gorge

… and more to come!

A Great Hike Right Near Atlanta: Sweetwater Creek State Park

Atlanta may not be what comes to mind when thinking for a place to go to enjoy the great outdoors. But our little known secret is how close we are to any number of incredible spots to be “with” nature and enjoy the great outdoors. I recently got to explore Sweetwater Creek State Park, a short 15 minute ride west of Atlanta, and was impressed at the place and shocked that I have been a resident of this city for close to three decades and I had never been.Sweetwater Creek State Park, mill, hiking, nature, outdoors, Atlanta, Georgia

The park sits along a reservoir (with all sorts of water activities possible, like fishing and paddle boats) and a creek flowing from it into the larger Chattahoochee River, as it makes its way down to Alabama, Florida, and eventually, the Gulf of Mexico.Sweetwater Creek State Park, mill, hiking, nature, outdoors, Atlanta, GeorgiaSweetwater Creek State Park, mill, hiking, nature, outdoors, Atlanta, GeorgiaSweetwater Creek State Park, mill, hiking, nature, outdoors, Atlanta, Georgia

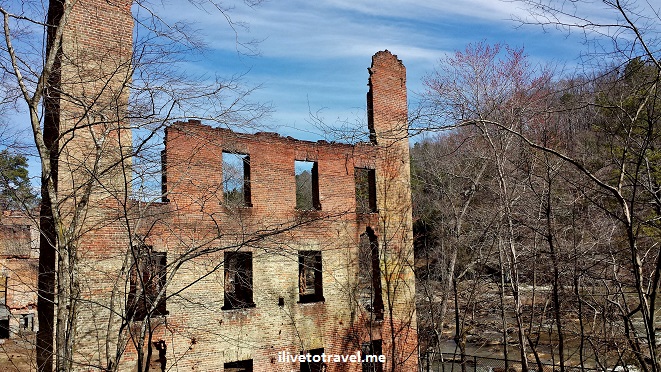
A lot of work is being done around the park and its visitor center looks to be quite new.  It has some exhibits, a gift shop, and very helpful folks to answer any questions.  We got a map and were told to be sure to do the red trail as it has the more scenic views of the creek and the old mill.  Yes, as any self-respecting creek in the South must, Sweetwater Creek was the former home of a mill for the New Manchester Manufacturing CompanyNew Manchester Manufacturing Company, Sweetwater Creek State Park, mill, hiking, nature, outdoors, Atlanta, Georgia

The ruins of the mill, burnt down during the Civil War are still standing which makes for some great photo opportunities.  The fact that its ruins are still there helps transport one to the times not long ago (maybe a century ago?) when mills and ferries were commonplace in this area.  So much so that many streets in Atlanta bear names like Howell Mill, Paces Ferry, Sewell Mill, Montgomery Ferry, etc.New Manchester Manufacturing Company, Sweetwater Creek State Park, mill, hiking, nature, outdoors, Atlanta, Georgia New Manchester Manufacturing Company, Sweetwater Creek State Park, mill, hiking, nature, outdoors, Atlanta, Georgia New Manchester Manufacturing Company, Sweetwater Creek State Park, mill, hiking, nature, outdoors, Atlanta, Georgia

After doing the shorter red trail, we connected to the longer white trail.  At some point the white trail departs the shores of the Sweetwater Creek and head inland and uphill.  The whole circuit was around 5 miles and it took us about an hour and forty minutes.  It was a glorious morning in late winter in Atlanta and my first visit to Sweetwater Creek State Park could not have been any better!  And some folks planned ahead exactly how they were going to enjoy the weather and the view!Sweetwater Creek State Park, mill, hiking, nature, outdoors, Atlanta, Georgia, hammocks


————————————————————————————————

Read about these other great hikes in Georgia:

Sope Creek

Panther Creek

Island Ford

Tallulah Gorge

… and more to come!

Photo of the Week – The Alps of Transylvania

This scene was what we were rewarded with after arriving at the Cabana Curmatura in the Transylvanian Alps in Romania and hiking on for another hour.  I dream of returning to amazing Transylvania.  Too bad people’s only notion of it is the legend of Dracula:  there is SO much to enjoy and explore there!

Romania, Transylvania, Transylvanian Alps, hiking, nature, outdoors, travel, photo, Canon EOS Rebel

My First Real Hike: to Pawnee Pass in the Rockies

When I went to Boulder, Colorado for my first summer internship, my college roommate drove with me the 24 hrs. it took us to get there almost non-stop (except for the St. Louis Arch from where we got a great view at night time).  It was a wild drive in a way but we made a pact to pull over if while driving we felt sleepy and the other one was asleep.  It worked well and we made it safely to Boulder.  We had dinner and downed almost a pitcher of beer each.  Then we slept about 14 hrs. straight!

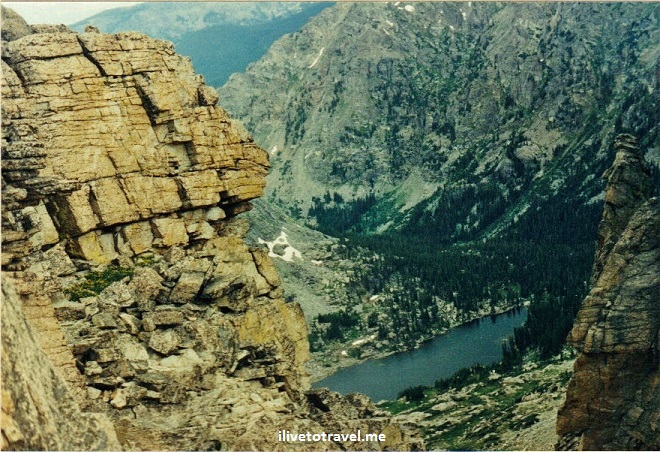
My roommate had family in Boulder and I got to meet them which was very nice.  It turned out to be my introduction to hiking.  My friend’s uncle invited me to go hike with him and his not-quite-a-teen son up to Pawnee Pass passing Long Lake and Isabelle Lake along the way to get to our destination at 12,550 ft in altitude, right at the Continental Divide.  I had no training for hiking and had only spent a couple of weeks at Boulder altitude.  This was going to be FUN.National Park, Colorado, Long Lake, Rocky Mountain, hiking, view, vista, photo

The views along the way were like nothing I had seen before.  While I had just driven around the Rocky Mountain National Park a couple of weeks before, these views were more pristine as this was a hiking trail, not for visiting drivers!

National Park, Colorado, Long Lake, Rocky Mountain, hiking, view, vista, photo, nature, outdoors  National Park, Colorado, Long Lake, Rocky Mountain, hiking, view, vista, photo, nature, outdoors National Park, Colorado, Long Lake, Rocky Mountain, hiking, view, vista, photo, nature, outdoors National Park, Colorado, Long Lake, Rocky Mountain, hiking, view, vista, photo, melting snow, nature, outdoors

National Park, Colorado, Long Lake, Rocky Mountain, hiking, view, vista, photo, Pawnee Pass

My hiking partners and I reach Pawnee Pass

I felt the altitude and the exertion but pushed myself through all that.  Oh, to be 24 again!  “Juventud, divino tesoro, te vas para no volver…” as the famous poet wrote mourning youth’s departure to never return…

Photo of the Week – Approaching Stella Point in Kilimanjaro

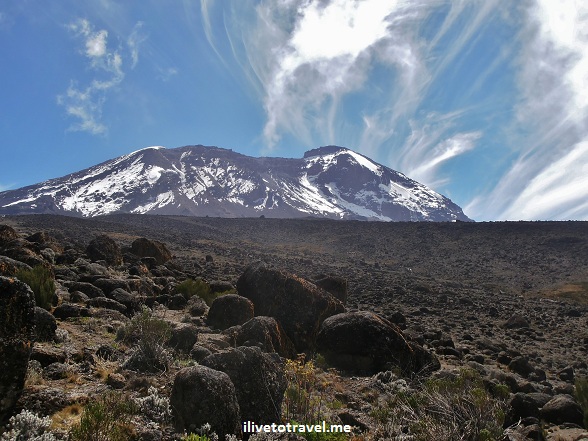
You may have already tracked my hike of Mt. Kilimanjaro via the Machame Route through my prior posts (if not, you may want to check them out starting with Day 1!).  One of the most spectacular moments in the climb of the roof of Africa is the approach to Stella Point.  See, Stella Point is one of the entry points to the rim of Kilimanjaro from which the final push to the summit (less than an hour away on less sloped terrain) takes place.  For many people, like me, arriving at Stella Point is a moment of celebration even if you are not done yet.  I just KNEW I would make it to Uhuru Peak (the summit) even if there is no guarantee really as you still have to climb 600 ft or so crossing the 19,000 ft threshold along the way to Uhuru.

But not only is reaching Stella Point a key milestone, you also approach it right as the sun breaks the horizon which makes it a priceless moment for sure – one I will never forget…

Approach to Stella Point in Mt. Kilimanjaro on the way to Uhuru Peak sunrise roof Africa

Climbers on the final approach to Stella Point under a beautiful sunrise(Photo credit: A. Ruppert) 

The Real Heroes of Kilimanjaro

Kilimanjaro, while not a technical hike, is still a very challenging climb.  Anyone who has climbed it should be quite proud of the accomplishment.  I am privileged to have had the chance to attempt it and lucky to have succeeded!  And so for the other 15 trekkers in our group who also climbed it.

Trekkers at Kilimanjaro's Uhuru Peak

The 16 trekkers and our lead guide, Luis

The average age of our group of 16 was 42 (with the median at 46, in case that tells you something!).  And we all made it thanks to many factors:  our training, our willpower, our support of each other, the collegiality of the group, etc.  But just as important were the leadership and support our guides provided.  Minding our safety first, they also bonded well with us at different times and in different ways.

With Said, who helped me during summit night and then sped me down the scree field!

With Said, who helped me during summit night and then sped me down the scree field!

With Buga, one of the liveliest of our guides - always smiling, singing and taking care of us

With Buga, one of the liveliest of our guides – always smiling, singing and taking care of us

The trekkers and the guides can certainly call their efforts heroic or near-heroic.  We had a trekker climb with a broken hand for 3 days unknown to anyone but herself.  Another had bronchitis.  And another had severe nausea during the ascent.  They ALL made it.  They -Liz, Laura, and Olivia- are definitely heroes to me.  The guides worked SO hard on behalf of us. Not only minding our safety but also helping us during summit night ANY way they could.  And, for a couple of us, also on the descent through the scree.  They certainly are heroes to those of us whom they helped achieve this fantastic feat!!

Local hike guides Kilimanjaro, Tanzania

The local guides

However, all that said, the real heroes of Kilimanjaro are the folks who make everything happen seamlessly in the background so that trekkers like myself can have a wonderful trek, a comfortable camp experience, and good food and water to sustain us.  The real heroes of Kilimanjaro are the porters.

Many of those porters, we never got to meet.  They worked behind the scenes.  They didn’t hike along us.  They carried our main luggage, tents, and everything else needed at camp.  They brought water to camp.  They cooked our meals.  They set up and took down tents.  They set up and cleaned the portable toilets.  They hauled trash away so we would leave the mountain as unscathed as we found it.

As we walked up the mountain, porters from our group or other groups passed us along the paths carrying their loads.  They moved fast and many did not have the right gear.  These men work hard and do hard work to earn a living.  Many of them are just picked up at the start of the route by the local lead guide to be hired for the trek right before we get going.  Some become part regulars.  And some eventually become guides.

As porters passed us along the path, we always cleared the way so they could pass us and not be bogged down by us.  Partly this was, admittedly, self-serving as the earlier they got to camp, the more ready the camp would be when we arrived.  But when we started doing this, that was not what we were thinking about.  We were strictly thinking about making things easier for them in appreciation for all they do.

Porter carrying load up Kilimanjaro

Porter carrying a load up Kili

The evening after we came off the mountain, after we all cleaned up, we all met at our hotel to celebrate and thank our guides and porters for their great work.  The video clip below is of very amateurish quality but I think the joy these guys live with is self-evident.  We loved their singing during the hike and we enjoyed celebrating!

The porters of Kili are the real heroes for me.  To this anonymous group (we knew some of them but not most), I say ASANTE SANA!  Our Kili experience would not have been possible without you.  If you climb Kili, be sure to clear the way as they try to pass you!!

———————————————————————————————————-

Other posts about climbing Kilimanjaro:

–  Day 1 (getting started)

–  Day 2 (the moorlands and my favorite camp)

–  Day 3 (reaching the Lava Tower at 15,000 ft)

–  Day 4 (Barranco Wall and a big challenge)

–  Day 5 (getting to summit camp)

–  Day 6 (summit night)

–  Day 7 (the long descent)

–  The Machame Route

Descending from Kilimanjaro’s Summit | Kilimanjaro Day 6 and 7

Descending from Kilimanjaro’s summit, Uhuru Peak – the roof of Africa, began around 20-30 minutes after we had arrived at the summit.  Such is the story of ascending Kilimanjaro for many.  Wouldn’t it be wonderful if you could picnic up there or, at least, at Stella Point and soak in the achievement taking it all in??

Yes, it sure would be nice.  Except the thin air would begin doing a number (a deadly number, potentially) on most people so it is not recommended.  Being well-led, we began the descent from the summit of Kilimanjaro as soon as all the picture-taking at the summit was completed.  All sorts of photos with the famous sign (since replaced from the one in my pics):  individual photos, group photos, and best friends/couples photos.  Our group and everyone else who had shown up at the summit at that time competed for the real estate in front of the sign but, it was orderly and people were considerate of those waiting.  And those waiting were happy to have made it there so they were patient.  All-around feel good moment for everyone on top of this massive rock!

Outline of the descent of Kilimanjaro

As I wrote this post, I struggled with what to name the post as I had been using “day X” in every post leading up to this moment in the hike.  How should I count the days to properly cover the descent?  I chose day 6 and 7 based on how things took place for the final push to the summit and the ensuing descent:

  • On day 5, we arrived at base camp in the early afternoon.
  • At midnight, or the very start of day 6, we left base camp to start the ascent towards the summit, Uhuru Peak.
  • In the early morning, we arrived at the summit.
  • Then, we started the descent from Kilimanjaro’s summit – still day 6.
  • The descent went on until we got to the final camp where we would stay at during this climb, Mweka Camp.
  • On day 7, we left Mweka Camp for the final stage of the entire adventure to get off the mountain.

So, this post covers the full descent – from leaving the summit until leaving the mountain, hence “Day 6 and 7” on the title.

How long does it take to come down Kilimanjaro?

In total, coming down from the summit was a process that would take us about eight hours that day 6.  YES, that SAME day we had just walked up 8 hours without a full night’s sleep to each the summit.

Plus, add 3 to 4 hours the next day (day 7).

Think about it:  5 days and 8 hours to ascend to the summit but about 12 hours to come back down all the way.

In reality, altitude issue aside, Kilimanjaro can be climbed within a day or two if you are fit enough (like, you had been at the summit the day before!).  But altitude acclimatization (and common sense to combat a Darwin award nomination) requires time if one wants not just to make it to the top, but to survive the experience to be able to tell (or blog!) about it.

Descending from Kilimanjaro’s summit is a bit like skiing

We passed Stella Point again on the way down but, this time, without much fanfare – or picture-taking; a case of been there, done that.  We were now on a mission to lose altitude quickly and stop the brain cells from dying.  And our guides REALLY meant “quickly”!!  I had not been prepared for what came next (I probably missed the explanation during the prep talk the night before, a nightly thing with our guide to ready us for the following day).

We supposedly had crossed a field of scree (small pebbles) on the ascent (I mentioned not remembering that part; or perhaps there was another path up without scree?  I doubt we walked on scree on the way up).  Well, it was time to come DOWN the field of scree whether we had gone on it before or not.  I was very unprepared on what technique was required here to succeed without injury.  All I knew is that it was like skiing except you had to watch out to not pop out a knee (a terrifying thought, really).

So I began to walk down the scree, putting one foot down, using my hiking pole to stop its slide (as you step on the scree it shifts down, taking your footing with it), then moving the other foot and repeating the process.  Well, this was taking quite a bit of time and other trekkers were passing me fast.  After maybe five minutes of this, the same guide who had carried my daypack on summit night locked arms with me and proceeded to take me down the scree.  Drive me down maybe is more like it.  It was an exhilarating and scary ride!!  We were going very fast and we were mainly sliding downhill, much as you would do when skiing.

At any given moment, either of us would lose his balance but Said, the guide, would ensure neither one of us fell.  That continued to be true pretty much for the next 3 hours.  With the exception of certain patches where there were rocks and the sliding paused for a stretch.  The only people moving faster down that field was a trio consisting of a guide and two trekkers (husband and wife).  One of them had begun to have severe nausea.   So the other two were on either side of the trekker taking her down the mountain STAT in case it was a symptom of something worse.  Thankfully, it was not and she was fine by the time we got to base camp for our lunch stop.  They flew past us and continued the high-speed scree-field crossing at that very fast pace.

I have never experienced this mix of thrill and almost-panic at the same time.  Looking back, it was rather fun and there was no risk to my knees – unless I had suffered a spectacular fall.  If I were to do it again, I think I would see it as something fun and highly recommend you go with that perspective.

View of Barafu Camp on Mt. Kilimanjaro

Our approach to Barafu Camp


Read more what about preceded descending from Kilimanjaro’s summit!

  • Want to start on day 1 of this hike?  Start the series here.
  • Back to the night we climbed the summit?  Click here.
  • Read about what to wear during this trek here.
  • And, check out the top 14 items to take on this hike here.

Coming down Kilimanjaro:  a break at Barafu Camp, just a break

Soon enough we sighted Barafu Camp from where we had departed not quite 12 hours before.  A break was coming!  This was where we were going to have lunch, change out of the warm clothes we had worn for the ascent, replenish water bottles, etc.  There was a little delay in the lunch being prepared so the stop was about an hour longer than expected.  No complaints from me…

On my way down the scree, based on the drama of the descent, I failed to pay attention to my feet and two-thirds of the way down, I realized I had a blister and was at risk of acquiring two more.  I stopped, got some duct tape, and took care of the potential blisters-to-be, as I learned from the Trekking for Kids lead when I hiked in Romania last summer.  Duct tape over a burning sensation anywhere on the feet helps prevent further development of a blister – if caught on time.

Once I was at camp, a fellow trekker had some magical thing she had bought at REI and she SO kindly took care of fixing the blister I had developed.  Whatever it is she had gotten at REI worked like magic (I have never had to use moleskin before but she said this was better).  The remainder of the hike after lunch, I did not even feel my blister!!  I felt awful a fellow trekker had to deal with my dirty feet but she said she sees worse every day at her job:  she is a dental hygienist!  Plus my feet don’t smell… 🙂

Taking care of a blister earned while climbing Kilimanjaro

Thanks, Melanie!!

Should I stay or should I go?

Though we were tired, we had to keep going to reach our camp for the evening:  Mweka Camp.  Mweka Camp is named for being the first camp on the same-named route for those who enter the Kilimanjaro through the Mweka Gate.  Some were asking why we could not stay in Barafu that night and get some well-deserved rest.  I was quite happy not staying for several reasons.  Here are the reasons that I was OK not staying in the Barafu Camp:

  1. We had arrived before noon.  Staying would represent a loss of an entire afternoon of moving and getting closer to exit the mountain.  While I needed rest, I figured we could knock out some distance.
  2. Getting to a lower camp than Barafu meant that day 7, the last day on the mountain, would be a short one.  A downhill hike of 3 or 4 hours and – bam! – off to the hotel, a great lunch, and most important:  the first shower in a week!
  3. But my most important reason not to want to stay at Barafu Camp was that I hated its inhospitable environment, being so rocky and so dusty. The latter bothered most of us the most.  I was done with the dust. And didn’t want to have a fall like I almost had suffered the day before when I tripped on a tent cable while minding the uneven rock terrain I was trying to navigate.

So I was quite happy with moving on.  If I had only known what was coming our way, I may have held a different opinion…

From Barafu Camp to Mweka Camp:  a rocky road…

Pretty quickly after leaving Barafu Camp the second part of our descent from Kilimanjaro’s summit on day 6 became a nightmare of sorts.  Though the views were great most of the time, the terrain was so rocky that you had to navigate carefully (at least for those of us not super experienced) and you could not really enjoy the vistas.  Some of us started feeling that our knees were being hit hard (read:  pummeled) and had to slow down some.  My legs were extremely tired at this point. And my knees, though not hurting yet, were wearing out with every step.

Descent to Mweka Camp in Kilimanjaro

The rocky way down that never seemed to end

A glimmer of hope!

After a couple of hours or more, we saw in the distance a colorful array of tents.  Yessssss!  We weren’t terribly far!  As we cheered our good luck, our guide quickly (all too quickly…) replied:  “That’s not our camp, that is base camp for the Mweka Route ascent and we are not allowed to stay there since we are no longer on the ascent.  You see that piece of metal over there (he pointed to a structure far, far away)?  That’s where we are going.”  Our collective jaws dropped (and almost hit the rocks, I am sure).  NO WAY, José!  (OK, his name was Luis, not José.)  That was a massive bummer.

Not quite a trail of tears but it may have been close at that moment

We continued our descent and, at times, it felt that that piece of metal was actually getting further away (I swear that it did look that way).  A couple of times our path became a smooth dirt trail which would thrill us tremendously only to turn a corner and resume the very rocky terrain.  It was an exhausting, frustrating, and demanding-on-the-knees 4.5 hours walk down.

I almost wished I were back in the Barafu Camp, resting and breathing dusty thin air at 15,000 ft+ altitude.  But not quite.  Remembering that helped me push forward knowing that what we were doing was the best approach and the camp we were going to was much better than Barafu.

Trekker in Kilimanjaro after 6 days of no shaving

Though exhausted, I trekked on. Or was I just considering jumping off the nearest cliff??  (This is what 6 days in the mountain look like!)

The most difficult part of MY climb – the descent from Uhuru Peak

Most of these 4.5 hours actually were the most mentally and physically difficult part for me of the entire 7 days.  For sure, the accelerated heart rate on day 4 slowed me down and made me worry.  Yes, on ascent night, I wondered if I would make it when I surrendered my backpack to my guide.

Yes, we were getting more and more oxygen on the descent as we went.  To the point where, somewhere along these 4.5 hours, we must have reached an altitude to which our body had acclimatized to already.  I am sure were not adjusted to 15,000 ft though we had spent part of the day on day 5 there so it was possible.

But, I just didn’t see an end to the rocky path on day 6 and the Mweka Camp kept looking very far away any time we spotted it.  It was a true test of will power for me to finish that path.  At this point, the group was not together.  It had splintered some but always in small groups with one or two guides along them so never not-taken-care-of.  I walked with a fellow trekker most of these last few hours and one or two guides (it varied).  I took some Advils (ibuprofen) along the way to lower my knee pain and prevent it from getting worse.  That helped with the physical part but I was mentally running out of gas.

Finally, camp!

But, all good things (ha!) come to an end, and we reached our destination for the day:  Mweka Camp.  It is certainly not the most amazing camp in the mountain.  But, at that precise moment, it was heaven.  The customary “signing of the guestbook to prove we had been there” done, we approached our tents for a final night of camping.  Hot water was brought to us and I happily washed off my face and did what I could to clean myself before having dinner.  One final night of dirty Raul. LOL…

Dining tent in Kilimanjaro

Our mess tent was a palace that night!

That meal may not have been spectacular by most standards but we were exhausted and we loved sitting around that mess tent one last time on the mountain, eating and reflecting on what we had just done.  The amazing feat and experience that was reaching the summit of Mount Kilimanjaro, of getting to the roof of Africa.  I didn’t linger though, I was tired and wanted to get everything ready and go to bed.

Dining tent in Kilimanjaro camp

Happiness in a tent

Getting off the mountain

On day 7, we woke up all ready to go:  This was our freedom day!  Don’t get me wrong, I was eager to climb Kilimanjaro and enjoy the mountain.  But once we had reached the summit, we were ALL about getting to the hotel and a nice shower.

We trekked down for maybe about 3 hrs from an altitude of 10,000 ft or so to the Mweka Gate at an elevation of 6,000 ft (3,800 m).  The climate zone went to full forest again, as we had experienced on day 1 and the moorlands were done.  The clothing was lighter and so was our mood.  Someone even rode the emergency stretcher that was laying about during one of our breaks…

Uproote tree in the Mweka Route on Kilimanjaro, Tanzania

I found my happy place:  the Mweka Gate hut!

Finally, the sight we wanted and were ready to see.  The Mweka Gate hut where we would sign in one last time.  That signature proving we made it to that gate.  The gate also being the place where we would sit around for an hour+ to wait for the certificates that would prove we HAD climbed Kilimanjaro (though there was no book to sign at Uhuru Peak…).  We were not getting those certificates just yet as that took time.  Our local outfitter, Zara Tours, would also be issuing us a certificate since their guides knew we did make it.  We would receive both certificates that evening at the celebration with our guides and porters.

Exiting the Mweka Route trail to hiti Mweka Gate in Kilimanjaro

About to leave the trail!!! I found a happy place!

While waiting to leave the mountain, folks would come by selling us stuff but we knew we could get all that cheaper elsewhere.

At Mweka Gate waiting for our certificates for our climb of Kilimanjaro

Waiting leaning against the wall and sitting in the shade. With a beer in hand. Heavenly. (I am sitting to the right with the red t-shirt)

Kilimanjaro trekkers from Utah

Trekkers from Utah wishing that the park was using a computerized system…

However, one of my fellow trekkers eyed a beer seller.  He looked at me and, of course, I wouldn’t leave a buddy drinking on his own.  Especially after a week of no alcohol and a hike of 3 hours… That’s when the first beer was bought.  Others in the group looked at us like “really?”  Fast forward 20 minutes and most everyone had a beer in their hand!  And off we went to the bus, to get to the Springlands Hotel and back to being clean!!!

Trekkers leaving Mweka Gate after climbing Kilimanjaro

On the way to the hotel! (Photo courtesy of K. Shuman)

The descent, as you can see, was a mixed set of emotions and terrains.  It is amazing how little time it takes to descend.  The feeling of accomplishment once you get to the Mweka Gate is incredible.  And so is the entire experience of spending seven days on this incredible mountain, home to the roof of Africa:  Kilimanjaro!

If you are planning your own climb of Mt. Kilimanjaro, I would appreciate letting me know via the comments if the info here (or in my other posts about Kili) has been helpful or what else may help you dream of or plan for the hike!  I have described what descending from Kilimanjaro’s summit felt like to me.  Would really enjoy reading how that went and felt for others.  I am sure there are different experiences!

One final look up at Kilimanjaro from the final stretch of the Mweka Route

One final look up at Kilimanjaro from the final stretch of the Mweka Route… I was up THERE!!!!


Looking down after the scree field crossing towards our former basecamp (Barafu Camp) where we would stop for lunch.  Pin this image and stay focused on this as your goal after reaching the summit!

descent Kilimanjaro, coming down Kilimanjaro, barafu camp, mweka camp

Reaching Kilimanjaro’s Summit | Kilimanjaro Day 6

Here we go, the BIG day.  Day 6 of the Mount Kilimanjaro climb!  The day we hope to reach and pass Stella Point on the rim of Mount Kilimanjaro to get to Uhuru Peak, the highest point of the mountain – the highest point in Africa!!!  Or, I should say, the day we attempt to reach and pass Stella Point to get to Uhuru Peak.  I will do my best to convey how reaching Kilimanjaro’s summit climb feels like on day 6 but the physical and mental efforts are hard to put into words that do it justice and help anyone comprehend the experience well.  But I will do my best as it is worth reading about it whether you are planning to do summit Kili or are just curious about it…

Why there are not a lot of photos from the summit attempt

You will notice how the middle of this post is devoid of photos.  First, do not worry, there are pictures towards the last third of the post!  Secondly, that matches what happened for me in the ascent.  Much of what happened in the middle of summit night was not captured by a camera because I was too focused on going up and, for part of it, even my mind did not capture any images.

 Uhuru Peak in Kilimanjaro

The goal: Uhuru Peak

Breaking down summit night

I will break down this most important of days during our climb of Mount Kilimanjaro to -hopefully- make it easier for me to organize myself and make sense.  Day 6 consisted of four parts – it was to be one LONG day in chronological time and mental time.  The four key parts are:

  1. Going from Barafu Camp (base camp) to Stella Point (at the rim of the volcano that is Mount Kilimanjaro) – expected to be about 7 hours of trekking
  2. Going from Stella Point to Uhuru Peak (the actual summit point of Kilimanjaro) – expected to be a short 45 mins to one hour fairly “flattish” walk
  3. Coming down from Uhuru Peak back to our base camp (Barafu) for a brief rest, removing inner layers, and having lunch – about 3 hours
  4. Arriving to Mweka Camp where we were to spend our last night on the mountain – about 4.5 hours of a downhill, easy walk.

I will cover in this post only the ascent on day 6 (#1 and 2 above) and not the descent that happened later that day.  I will cover the descent on day 6 (#3 and 4) with the final descent of day 7…

Leaving Barafu Camp to reach Stella Point

Barafu Camp at 15,100 ft (4,600 m) was a hard camp to like.  I write about it in my narrative for day 5.  Yet, I could have stayed there a few more hours sleeping that night…  Four of our group left at 11 PM to have an extra hour to reach the summit.  The rest of us saw them leave camp, and then we finished prepping and ate a snack prior to heading out for our attempt at the summit.  At midnight, we left the relative comfort of this camp to do what we came here to do:  tame Uhuru Peak!

I was pumped even while wondering (and perhaps feeling a little nervous about) what would happen, how it would end 8 hours later.  Ah, the fool… I was to learn the end was NOT reaching the summit, but reaching our camp for the night.  More on that later…

What did I wear on the way to Kili’s summit?

I wrote about the particular items to wear for this climb here but a quick recap here.  Though it was very cold at base camp given the altitude and the time of day we were leaving the camp, we were instructed to dress such that we were slightly cold upon setting out since we would warm up as we exercised during the climb – great tip as I would not have thought of it in that state of sleep-deprivation…

So, I wore my two tight woolen tops, then my merino wool light jacket, and my hard shell jacket (which protected me against wind and water though, mercifully, we did not have precipitation).  The synthetic down jacket would wait until we took breaks (when, since you are at rest, you do not want to lose the heat your body has generated) or until it finally got too cold even while walking (which it did at some point).  In terms of my legs, I wore my long wool underwear (all the wool layers by the skin helped wick moisture away from the skin) under my convertible hiking pants and then my hard shell pants.

Still, it was VERY cold on summit night in Kili!

The only place on my body where I felt really, really cold was my toes though I was wearing sock liners and the thickest wool socks I could find.  It is amazing to think that it actually can be much colder than I experienced.  We had milder temperatures than normal up there per what our guide told us.  Ahead of the trek, I had been told I would be exceedingly cold and it did not quite feel that way (feet aside).  Boy, am I glad that was the case on this particular night!

Time is a funny thing

During the climb up to Stella Point, it is amazing how time flowed – or how I felt it flowed…  The hourly five to ten minute breaks we took (a lot shorter than the breaks we got to take on prior days) provided a little bit of rest from the effort and allowed for drinking some water, eating a little something, and handling nature calls.  During one of those breaks, probably as we were beginning to zone out and wear out, they surprised us with hot tea – one of the happiest moments in those seven hours!

Handling nature calls was a little more of a pain than it had been other days of the climb because it was dark.  But when nature calls, it calls.  And no pee bottle here.  In any case, I worked my way up by focusing on each hour’s walk, not on the totality of what was ahead of me.  I was not looking at my watch at all but when the break came, I knew an hour had passed and that was an hour off the seven-hour count…  Keep the focus on the next sixty minutes…

And who said it would be a piece of cake?  No one.  They were right.

After the first hour of the climb, my heart rate starting racing and I was out of breath a lot like on day 4 after we had passed the Barranco Wall.  We had been climbing bigger rocks (requiring big steps) which was exactly what had caused my troubles on day 4 – except now I was four or five thousand feet higher…

That issue was going to slow me down and, tonight, falling behind could mean being turned around.  The guides had been clear with the first subgroup that if we got to Stella Point at the same time as them, they would have to turn back at Stella Point and head back to basecamp.  It meant they would take a lot more than an hour reaching Uhuru and, having already been at that altitude an extra hour than us, it would have been too much time up there.  So, I knew that if I fell behind too much in my own group, that I could miss getting to UhuruThat realization really hit me hard.

Guide wisdom.  Trust it.  Don’t fight it.

One of guides, Said, told me to give him my daypack.  My heart sank.  Was that an early indicator that I would not make it to the top?  As soon as the path became less “pronouncedly” rocky, I told Said I could take my daypack back because I was back to “normal.”  He shook his head and said he would keep it.  At first, with pride stepping in, I said no, I could take it.  And then I realized that it may be the worst thing I could do.  I needed to save every last drop of my energy for the big rocks ahead.  I resumed my climb, “daypackless.”  Boy, am I glad I did…

I believe I was the second or third person to lose their daypack in our group.  I felt this would take away from the feat should I reach the summit.  I had nothing to fear.  Within a few hours, more than half (including the four guys in this subgroup) had lost their daypacks too, including our star athlete who had run across deserts and had been carrying a daypack every day of this climb loaded at 30-40 lbs.  I have to digress and mention that this guy, a dentist from northwestern Canada, would carry all sorts of candy in his daypack and, all throughout the week’s hike, would pull out a DIFFERENT bag of candy (gummy bears, sour patches, etc.) to pass around at breaks.  Needless to say, he became everyone’s friend fast!

It is worth pointing out how carefully our guides were watching each one of us even after we surrendered our daypacks.  Clearly, ensuring no one exhibited dangerous signs of altitude sickness (the ones that represent life-threatening danger like cerebral edema).  But they REALLY wanted us to make it to Uhuru Peak as long as we were not exhibiting any serious symptoms and did everything they could to assist us in reaching our objective.  I felt very safe among these great men.

The lights are not always at the end of the tunnel…

Though we had a full moon, we still needed to illuminate the path ahead by wearing headlamps.  I remember that I would look up ahead on the trail and see what was becoming a downer for me:  a long trail of headlamps ahead of us zigzagging the slope of the mountain.  And then you didn’t see any.  That point would get closer and closer, and it felt good to know we were reaching a “milestone” of sorts.  But once we reached the milestone, I would look up and see, yet again, another LONG trail of headlamps going all the way up to a point far up the mountain.  After this, I decided not to look up anymore…  It was disheartening!

Sleep and memory loss – all in a Kili climber’s night!

Maybe halfway up to Stella Point, I was dozing off.  No, not during breaks.  This was as I moved my feet up that mountain and as my arms moved the hiking poles.  The lack of oxygen and being tired had everything to do with that.  (Through chats post-facto, I learned others were also dozing off as they walked up.)  It was insane.

I decided that I needed to occupy my mind but I was too tired to alphabetize countries or come up with some other mental activity.  I was that exhausted and my brain was likely not able to function well.  I want to say that the thought that I was reaching Kilimanjaro’s summit was very clearly driving me.  I was so tired, I may have half forgotten why I was there.

Keeping my mind occupied

Looking at the Southern Cross, which someone pointed out, gave me something think about (or try to look at without tripping).  Some folks had music in their portable devices but I had not brought mine.  That was on purpose.  I actually wanted to listen to the folks stepping on the mountain, focus on the quietness of the surroundings, not being cluttered with noise.  I like not feeling “trapped” within myself when it comes to sounds and that felt more important to me that night.

Give it up, baby give it up

Towards the end of the third hour, our lead guide, Luis, told us that we needed to be sure we were not spending our every last drop of energy in the remaining part of the climb.  I thought to myself  “huh?”.  He said that coming down would be very hard too.  Therefore, it was crucial we managed our exertion level.  I was not sure how we would do that.  But then I started thinking maybe he was trying to subtly tell some people to give up their daypack…

A “happy” place.  Say what?

Then, he said, “guys, the next few hours are going to be very hard; find your happy place because you are going to need it”.  I remember thinking, in my tiredness, “my happy place?  my happy place?  what IS that??  a beach?  no.  wine?  no, wine is not a place.”  I had no energy to conjure a happy spot I didn’t have previously.  And then, all of a sudden, the faces of my sister’s, cousins’ and friends’ kids came to mind.  Their smiley, happy faces.  So I started calling roster on all of them seeing those smiley faces.  I had found my happy place.  And it kept me distracted easily for another hour.  I say “easily” because I think it is after an hour of that that my memory goes blank…

Yes, what happened in the last 2-3 hours prior to Stella Point are a big blank.  I have no idea what happened, when we stopped, what was I thinking, nothing, nada, nil.  Comparing notes with others later, I am not the only one to whom that happened.  We had been told the last bit before reaching Stella Point would be scree (small pebbles).  So for every step forward, there would be a step back.  I have no recollection of scree, of steps forward, or steps back.

And then it happened… Steeeeeeeellllllaaaaa!

So I was in some zone when all of a sudden, to my right, I see a glimmer of light on the horizon.  Sunrise is beginning!  It was like an injection of adrenaline straight to my heart – and mind.  Watching the sun rise and trying to take good pictures became the priority as we continued walking up.  I was awake!

Sunrise from Kilimanjaro as we neared Stella Point

Glorious!

The sun finally broke through the horizon and we could see that Stella Point was just like 20 minutes away.  It was one of THE most incredible moments in my life.  You see, at that moment, I had no doubt I would make it. Though, how could I really tell how the higher altitude and serious lack of oxygen would hit me 20 mins later?  It didn’t matter, I just knew I was A-OK!

We hit Stella Point and I couldn’t believe how quickly it came upon us.  I don’t think I could see it from the final approach.  This was unbelievable.  I was at over 18,000 ft and would only have one more hour up to Uhuru Peak after a short break at Stella Point.  We laughed, hugged, and even teared up some.

Some of the trekkers and guides at Stella Point on Kilimanjaro

Some of the trekkers and guides at Stella Point (I am on the far left)

The view around Kilimanjaro’s crater

My eyes couldn’t believe the view outside of the mountain and INTO the mountain.  Remember the top of Mount Kilimanjaro is a crater from a long-extinct volcano.

Kilimanjaro crater

Looking around the top of Kili

Immediately the picture-taking began in front of the brand-spanking-new green sign with yellow letters.  TERRIBLE design… you had to be RIGHT IN FRONT OF IT for the letters to show well in a photo.  Thankfully, they changed the sign since I summitted per the photos I see now.

In any case, pictures were taken and then we proceeded to get to Uhuru Peak…  Time was of the essence.  At that altitude, you do not want to linger despite the fact that we noticed tents in the crater.  In any case, we had to mosey to the peak and we couldn’t dilly daddle.  We had to move.

Reaching Kilimanjaro’s summit:  Uhuru Peak

Mt. Kilimanjaro used to be covered in glaciers.  Today, the glaciers are there but they are not as dominant as they must have been.  Sadly, they are expected to disappear completely in a few decades.  Still, seeing them from a distance was impressive with the African horizon behind them.  Yes, a glacier in Africa.  So mind-boggling.  We knew we were close to meeting our objective of reaching Kilimanjaro’s summit !

Glaciers atop Kilimanjaro

Glaciers atop Kilimanjaro

The hour walk (or maybe 45 mins?) up to Uhuru was much easier and less steep than the prior few hours though we still went up 660 feet (200 m) or so to reach it.

Trekker and guide walking up to Uhuru Peak in Kilimanjaro

Said and I headed to Uhuru Peak

Everyone was in great spirits as we attempted reaching Kilimanjaro’s summit.  And then, we saw it, the big green sign marking Uhuru Peak!!!  WE WERE THERE!  Laughter, smiles, even some jumping-for-joy all around.  We caught up with the first group. It was so awesome to see all of us together at the peak.  The probabilities were that they would be already on their way down when we got to Uhuru or that they wouldn’t reach it.  Consequently, the fact that we all were there together, this group that had been together for about 10 days, was truly priceless.

At Uhuru Peak

One of the many celebratory photos taken: here with Liz and Len Stanmore

Immediately we got close to the sign to wait our turn to stand in front of it and capture the moment in a photo.  Phenomenal moment of joy for all of us.  And just as happy as we were, our guides were beaming that we had all make it – asante sana, guys!

And so reaching the summit of Kilimanjaro comes to an end

The story of the descent is for another post – and the descent was painful.  However, I will share one reflection here about having reached the summit.

Even if I had surrendered my daypack no one moved my legs forward and upward for me, as Luis our lead guide told us once at base camp.  Every step I took on that blessed mountain was my own.  That is the real achievement here for each trekker:  the strength of will and of body to push forward and upward. The strength when you think you don’t have it all together.  When you feel the next big rock may be the one that tips the climb over for you and sends you back to camp.  When you don’t know what is your “happy place”.  I will treasure what I learned that early morning the rest of my life.

At Uhuru Peak, the summit of Kilimanjaro

A very happy trekker at Uhuru Peak!

Back to Day 5

… On to the descent


Pin this image of us reaching Kilimanjaro’s summit to your own Pinterest board!

Kilimanjaro summit, climbing, Uhuru Peak

View from the top of Kilimanjaro on the way from Stella Pt. to Uhuru Peak

—————————————————————————————————————————

Other posts about the Kilimanjaro trek:

–  Preparing for the hike is more than training and gear

–  The Machame Route:  our way up

–  7 things you will not see me without as I climb Kili

–  Day 1 of the hike (starting the climb!)

–  Day 2 of the hike (getting to Shira Camp)

–  Day 3 of the hike (the Lava Tower and hail)

–  Day 4 of the hike (Barranco Wall)

–  Interview with fellow Kili climber and Ultimate Global Explorer

Hike to Kilimanjaro Summit Base Camp | Kilimanjaro Day 5

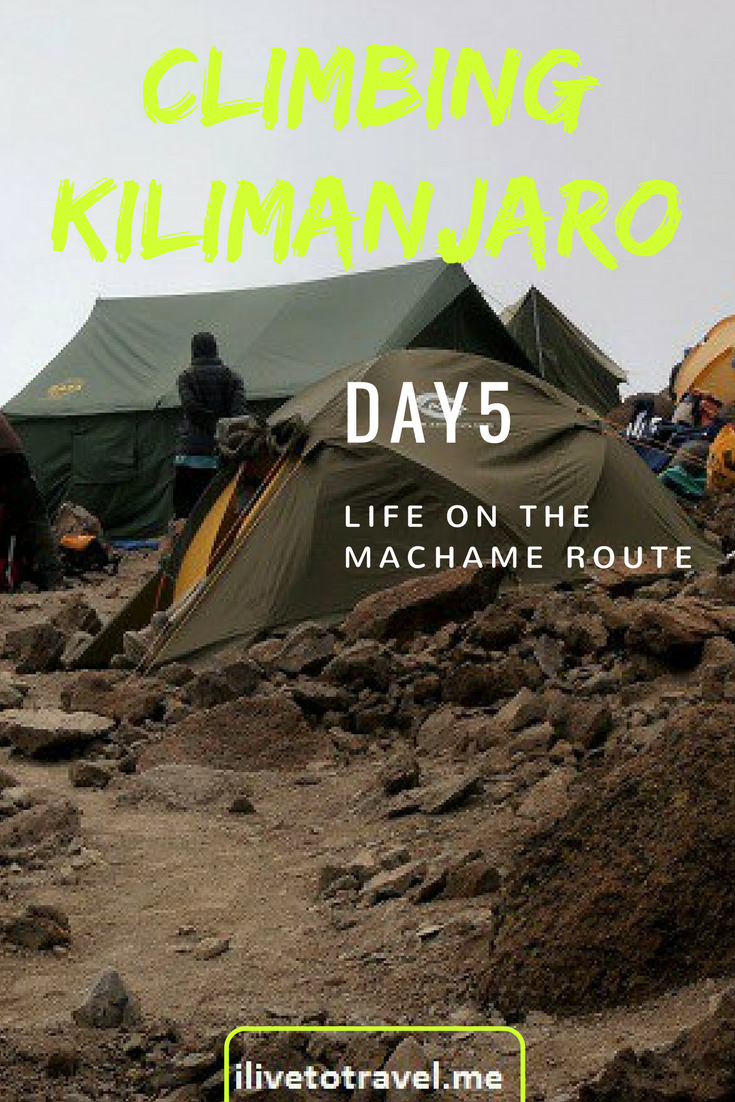
Ah, the final day before summit, day 5.  Very important, the day that would take us to the promised land:  Kilimanjaro summit base camp on the Machame Route.  And, not a day too soon.  Sure, one more day of acclimatization would have only helped.  But, after four spectacular days, now I was beginning to crave reaching the summit.

Day 5 begins at Karanga Camp

As usual, the day began as every day with the morning routines that set us up for the day’s hike.  I took care of all the tedious, the necessary, and the helpful.  Sidebar.  Did I mention that after all these days of sleeping bags, tents, daypack, large backpack, jackets, zippable hiking pants, rain gear, etc. one gets REALLY tired of zippers?  Velcro all the way, bay-bee!!!  (Thanks, Sarah, for your help fixing zippers!)

Then, I was ready to leave Karanga Camp at 13,800 ft (4,200 m) with the group.  The distance we were going to cover seemed to be just a short 3.7 miles (6 km) hike up to the Barafu Camp at 15,100 ft (4,600 m).  But, remember, at that altitude, short walks are challenging.

Rocky terrain on the Machame Route headed to Barafu Camp on Day 5 of the Kilimanjaro climb

Me helpfully pointing the way, like a modern Columbus. Rock on trekkers, so to speak  (Photo courtesy of K. Shuman)

Day 5 Headed to Barafu Camp on the Machame Route over rocky terrain in Mt. Kilimanjaro

Happy that I showed them the way (lol!), I trail with the stylish plastic bag over my daypack. Not sure why. Not a cloud on the sky.  (Photo courtesy of K. Shuman)

On the Machame Route from Karanga Camp

Finally, on our way.  At this altitude, the route was devoid of vegetation.  Rocks everywhere.  Small rocks though.  Like debris almost.  Like that helps, huh?  However, there were some really neat views, as usual, on this mountain.

Great view of Mt. Meru, close to Mt. Kilimanjaro in Tanzania

Great view of Mt. Meru as the group treks on.  (Photo courtesy of K. Shuman)

Mt. Mawenzi, one of the 3 peaks on Kilimanjaro

Mt. Mawenzi, one of the 3 peaks on Kilimanjaro; it peaks at over 16,000 ft.

Our time at the Barafu Camp

The Barafu Camp was a camp of sorts for us.  OK, it is officially a camp.  Though we were setting up as usual, we were NOT going to spend the full night at this camp.  You see, at night, midnight specifically, we would be leaving this camp to head to summit.  But that, my friends, is the story of day 6.  And, guess what?  Day 6 in Kili is out of scope for this post!

Approach to Barafu Camp in Mt. Kilimanjaro

Our final approach to Barafu Camp (Photo courtesy of K. Shuman)

Signing in at Barafu Camp

At the camp hut to sign in. The stylish looking guy with a plastic bag, an orange jacket, a buff sipping water through a hose… That’s not me…

A painful camp

I so did not like this camp.  You see, this camp was VERY rocky.  I had to mind almost every single step to not trip or step on a rock that would give way from under me.  To walk around our tent to reach the vestibule on the back (vestibule is a generous term; it was a place to put our bags zipped away and protected from any rain), we had to be extremely careful.

Believe me, no distance was too short for an accident.  And, at this stage of the game, I was NOT going to twist my ankle.  I walked very carefully even if it seemed like overdoing it to be so careful.

Barafu Camp in Mt. Kilimanjaro

Me trying to make my way around all the darned rocks! (Photo courtesy of K. Shuman)

The latter part of the stay at Barafu Camp

Once it was dark, I woke up in the middle of one of my afternoon naps to go to the toilet-tent.  It was a beautiful night.  Though there was a full moon, while minding the rocks, I missed noticing the cable holding another tent down.  Consequently, my face almost met a rock that would have likely broken my nose or jaw.  And that would have ended my attempt of reaching the summit.  Luckily, as I started falling, I caught my balance and didn’t hit the ground.  BIG whew.  And, added respect for the camp…  A few hours were left before departed Kilimanjaro summit base camp and I was hoping I’d survive…

In any case, this camp was a little bit surreal because of the landscape.  We were also on a steeper slope than we had been at any other camp (which also meant the tent’s “floor” was not flat (not that it was flat at most of the camps).  However, and always looking for the bright side, some of us concluded that at least we were towards the “exit” of the camp on the way to the summit so we would save, oh, about 4 minutes once we started heading up to the summit…  Gotta find happiness somehow!

Barafu Camp in Mt. Kilimanjaro's Machame Route

Barafu Camp – see what I mean about the slope??!!

Though we were not staying overnight, this camp was very important.  We were to have a nice late lunch and then do two very important things:

1.  Pack/Prepare for departing for the summit at midnight.

2.  Resting/Sleeping whatever we could to have more energy for the climb that night and to also allow our bodies to get as used as possible to the higher altitude.

Trekkers happy in Mt. Kilimanjaro

Three very happy -if tired- trekkers at Barafu. Myself with the awesome Laura and Kristin!

Spending time at Kilimanjaro summit base camp

While exercising at altitude helped get acclimatized to altitude, being active after getting to this camp was not the best thing to do.  The reason?  The body would not get to recover and it would be energy we would need in a few hours for summit night.  So, our leads suggested that, whether we actually napped or not, that at least we lay down for as long as possible to conserve energy and rest.  Not being one to ignore advice from experts, after lunch I did all I could do to prep for that night’s departure (we were stopping at this camp after coming down from the summit) and then proceeded to get comfy (or as comfy as I could) and lay down.

I was VERY pleased that I napped.  Frankly, I can’t recall how long a nap but it was long.  Not once, but twice.  Fortunately, the final nap took me all the way to waking time around 10:30 PM – which was great.  I was able to say bye to the first group of four from our group to depart.  That is because they were leaving an hour early to be sure they had ample time to make it to the summit by sunrise.  Afterwards, I took care of a few things before sitting back down at the same mess tent where I had just said goodbye to our first group, an hour before to wait for our own departure around midnight.

To be honest, I was beginning to get a little anxious.  I couldn’t wait to get going and leave Kilimanjaro summit base camp.  But, wait, that’s midnight so that story is part of day 6!

Mt. Kilimanjaro in Tanzania

The summit beckons…

———————————————————————————–

If you enjoyed reading about what it was to be in Kilimanjaro summit base camp, you can go back or forward in my narrative of this wonderful experience!

Back to Day 4

…  on to Day 6 – summit night !

———————————————————————————–

Other posts about the Kilimanjaro trek:

–  Preparing for the hike is more than training and gear

–  The Machame Route:  our way up

–  7 things you will not see me without as I climb Kili

–  Day 1 of the hike

–  Day 2 of the hike

–  Day 3 of the hike

–  Interview with fellow Kili climber and Ultimate Global Explorer

Pin this image to your board for your future climb and to remember Kilimanjaro summit base camp!

Barafu Camp, Kilimanjaro, basecamp to summit

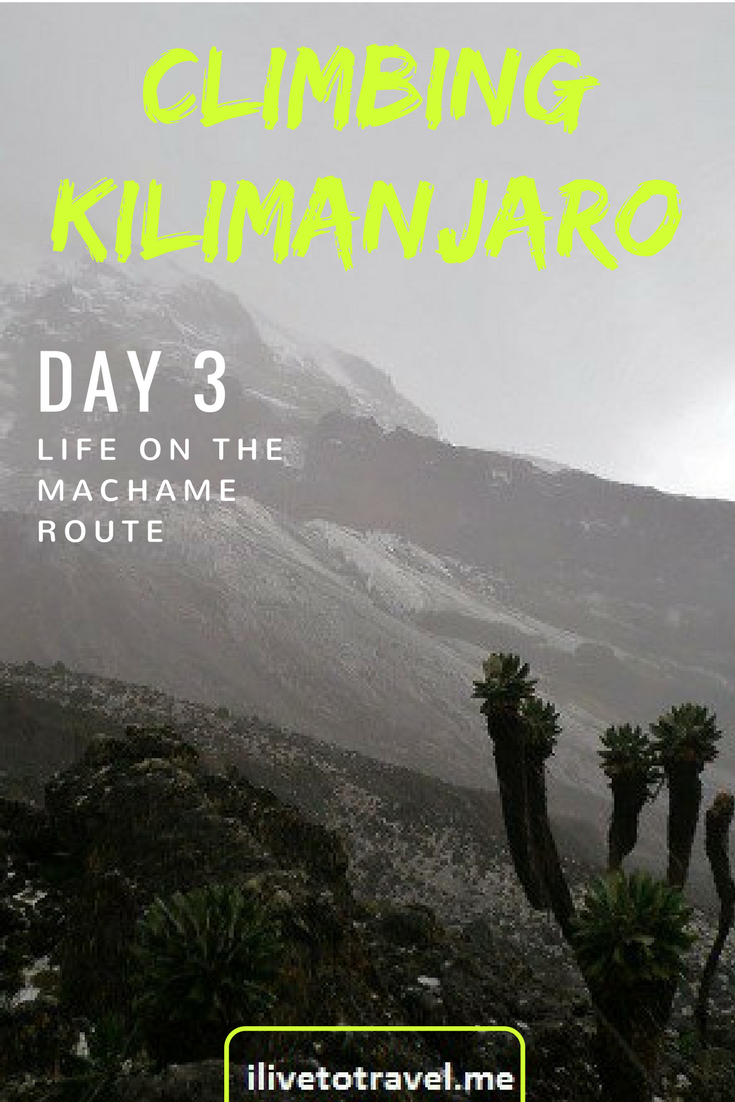
Reaching the Lava Tower | Kilimanjaro Day 3

Day 3 would take us pretty high, to the Lava Tower of Kilimanjaro, and leave us at the base of the infamous Barranco Wall.  We were greeted by the day at Shira Camp where we had arrived on day 2 of our climb of Mount Kilimanjaro.  The day’s hike began around 8:45 AM to the famous.  The climax of the day would be arriving at the famous (though, admittedly, I had not heard of it before I signed up to do this trek) Lava Tower.  There, we would stop for lunch before continuing on to descend to the Barranco Camp. Barranco Camp would be out stop for the night before attempting the Barranco Wall on day 4…

Lava Tower, here we come

Excitement combined with anxiety that morning as I got ready to depart the awesome Shira Camp (my favorite of the entire climb).  I was wondering how I would perform at the higher altitude we would get to that day.  Prior to this trek, I had never climbed higher than 12,000+ ft.

Our hike on day 3 started at 12,600 ft (3,840 m) and would peak at the Lava Tower at 15,200 ft (4,630 m).  I had not been that high before (airplanes aside!).  The highest place I had ever gone to (whether climbing or by ski lift) was Pawnee Pass in the Colorado Rockies when I was in college, over twenty years earlier, and that was 50 ft shy of the starting altitude on day 3 on this trek…  Day 3 would not bring the longest climb up to that point (that was on day 1 of the Machame Route) but given the altitude we would reach at the Lava Tower, I expected a challenge.

Climb high – and then come back down?  Seriously?

So, the plan for the day was to go up to 15,200 ft.  I remember reading the itinerary and thinking “wow, only 4,000 ft more to go to the summit!”.  And then I read we would end the day at 12,700 ft, barely above our starting point, once we arrived at the Barranco Camp.  “Say WHAT??!!!,” I asked  myself.  I quickly learned how smart this approach was to acclimatizing to the higher altitudes of Kilimanjaro.

The “climb high, sleep low” approach allows for the body to exert itself at higher altitudes where the air is “lighter” while allowing sleep at a lower altitude where more oxygen in the air would help the body recover from the day’s exertion.  As I mentioned,  this would help the body acclimatize to altitude better.  I am not sure one fully adjusts to the altitude in the mountain but you are closer to that with this approach.  That is, perhaps one reduces a little bit the probability that altitude will cause problems later on, especially summit night when one really does not want to suffer any serious condition (e.g., edema) from the body’s reaction to low oxygen levels…

Mt. Kilimanjaro with a beautiful blue sky and clouds

This view early on Day 3 certainly motivated us to tackle Day 3’s challenge

The way to the Lava Tower

So off we went, walking in semi-desert terrain, along an inclined or sloped trail that did not present any serious challenges, increasing altitude aside which did require a little slowing down (nothing extreme).

It is amazing how the terrain is so different every day of this climb.  It keeps it interesting and me distracted!  I had heard the Machame Route is the best in terms of seeing a diversity of landscapes and views and, as far as I could tell, it was definitely true of the route (though I cannot personally attest to the other routes).  (I had also heard the initial part of this route would be a little less crowded than other options.)

Alpine desert in Mt. Kilimanjaro near the Lava Tower

Some little vegetation…

Alpine desert in Mt. Kilimanjaro near the Lava Tower

… gives way to no vegetation in no time!

Reaching the tower – and lunch!

As the day went on, the skies darkened and, at different times, fog or clouds passed us, like right after we arrived at the Lava Tower (around 1 PM).  The Lava Tower, one can safely assume, is made from the rocks that the mountain spewed during its volcanic heyday.  But for me, what was more important when we got there was the fact I had managed things OK to get to this altitude. “OK” does not mean piece of cake.  But it does not mean “barely made it” either.  I felt victorious enough to not mind the fog or the darkness it brought with it.

Lava Tower shrouded in clouds

Clouds coming in to the Lava Tower camp area

At the Lava Tower in Mt. Kilimanjaro

Celebrating arriving at the Lava Tower with my hiking buddy for the day, Melanie

Making it to 15,200 ft is a celebration-worthy moment.  For us, that meant a warm lunch in our dining tent.  Just one word:  awesome.

DIning tent while hiking Mt. Kilimanjaro

Our dining room on the mountain

Every day, our porters would set up the tent at camp and serve our dinners there.  However, normally, lunch was taken on the trail during a break so seeing our dining tent set up for lunch at the Lava Tower was a nice tough and a welcome one to stay warm.  I don’t know if the food was as good as I thought it was or if we were just starving from the exertion??  I think it was a little bit of both – and that’s OK by me!


Descending from the Lava Tower to the Barranco Camp – piece of cake

After having succeeded in climbing to over 15,000 ft and surviving the thinner air during the one-hour lunch break, it was time to go down to our camp for the night (and more oxygen density!).  We felt at this point we had this covered.  Everyone was in great spirits: talking and laughing as we left the Lava Tower.  We exited the Lava Tower Camp area by going between two very large rock formations and proceeded to descend.

Exiting the Lava Tower Camp area in Mt. Kilimanjaro

Exiting the Lava Tower Camp area

Well, Mother Nature had a new experience in store for these hikers.  Just after we cleared the rock formations and had proceeded down the rocky terrain some, the weather turned.  A little rain began to come down and we all got geared up (covering our daypacks, putting on the hard shell pants, etc.).  I guess it was a good thing we had all these things handy.  My stuff was the easy-put-on kind which did not require me taking my boots off, for example, to put the rain pants on (more on what I wore and why here).

Daypacks covered during a storm in Mt. Kilimanjaro

Stormy weather in Kilimanjaro

The umbrella person was not one of ours, for the record. They may have just been blown away by the winds after this photo was taken…

Hail, not lava rained down

And then it started to hail.  At first, we actually kind of liked it.  Cool was the word.  Until it started hailing harder.

Our collective recollection days later was that the average hail was the size of a small motorized vehicle.  That day, if you had asked us, we would have said they were the size of mansions.  Upon closer examination of the pictures taken, the hail was the size of small pellets.  However, this group of trekkers had been spoiled -er, blessed- with awesome weather up to that point.  So we can be forgiven for talking about this hailstorm for a day or two as if it had been a preamble to the Apocalypse.  The Apocalypse in the slopes of Kilimanjaro.  Toto just watched the rains down in Africa.  We watched the Hail-calypse down in Africa.

Hail on Mt. Kilimanjaro

See the MONSTROUS pieces of hail?? The humanity!

Camp.  Finally.  And a truth revealed.

We got to camp (still raining some) around 4:45 PM.  Quite a few folks had to make a run for number one or number two since we had not made any stops during the hail/rain to get past it and to camp quickly.  No one will forget our guide’s impression of one of our trekkers who was suffering more from an urgent number two run…  As we discussed the day over dinner, we all kept talking about the storm.  Until our guide, Luis, proceeded to tell us that the storm had lasted exactly 1 hr 47 mins.  He then added that, on a scale of 1 to 10 in terms of bad weather in the mountain, this ranked as a 0.5.  We pondered his point for a brief moment (surely self-pegging ourselves as wimps).  Then, I believe, someone asked for the mango plate to be passed and the topic was nicely changed…

E.T., phone home

The Barranco Camp, where we were going to spend the night, was my second favorite camp after the Shira Camp.  I think it was the sense of proximity to the summit combined with a nice setting (though not the expansive vistas of the Shira Camp).

Barranco Camp in Kilimanjaro

One of our trekkers managed to get mobile network signal at this camp.  She generously offered the phone for quick calls home for anyone interested.  Having a Cuban mother, I decided I had to take advantage of the opportunity to tell her I was eating well and alive. I think those are her priorities for me, in that order!  She was ECSTATIC to hear my voice, that I was eating food, and that I was alive.  Thanks, Annie!!

The Barranco Wall the following day was in a lot of people’s minds for sure.  The wall was expected by many to be super scary, super dangerous.  But I think I speak for all or most in our group that just sitting there and soaking in the views of the summit reigned supreme in our minds that late afternoon / early evening until off to our sleeping bags we went to “sleep low” and give our bodies a good night’s sleep.

More of the scenery

Barring the summit, my favorite vistas were coming to a close.  That does not mean there were not going to be other great views.  But the best views for me had been day 2 and day 3, in that order.  Before you close this browser window, a couple more pictures of the scenery of day 3.   Day 4 will be bringing the Barranco Wall – that story comes next (see below for the link forward!).

If you have not yet, subscribe to this blog so you can get notifications when new posts come out.  Also like ilivetotravel’s page in Facebook where announcements and other items are posted.  Don’t worry, I won’t inundate your wall with posts – one or two at most per week.

Kilimanjaro

Kilimanjaro

Kilimanjaro

Back to Day 2

On to Day 4

Pin one of these beautiful images from day 3!

climbing Kilimanjaro, Barranco Camp climbing Kilimanjaro, Barranco Camp

—————————————————————————————————————————————————

Other posts about the Kilimanjaro trek:

–  Preparing for the hike is more than training and gear

–  The Machame Route:  our way up

–  7 things you will not see me without as I climb Kili

–  Day 1 of the hike

–  Interview with fellow Kili climber and Ultimate Global Explorer

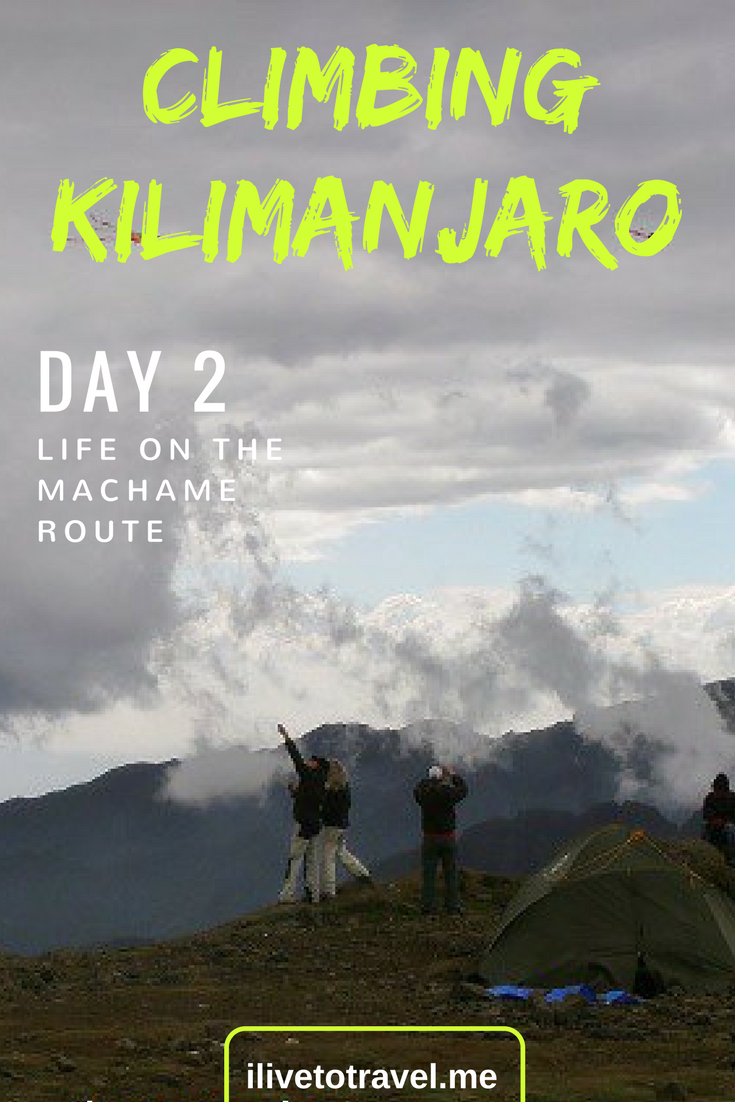
The Moorlands and Shira Camp | Kilimanjaro Day 2

While the excitement of getting going on the climb of Mount Kilimanjaro made day 1 a great day, day 2 was no less exciting thanks to the moorlands and Shira Camp.  For many of us in the Trekking for Kids group, that was mainly due to the change in the landscape we were to experience (and maybe having one day under our belt?).  Day 1 on the Machame Route had us hike through the forest zone at the base of Mt. Kilimanjaro; nice but not terribly interesting (at least to me).  We had heard day 1 could be tough if it were raining or had just rained with the mud, etc.  But we had good luck on the weather front.

In any case, on day 2, we moved into what is called the moorlands.  It was a landscape I really liked, offering interesting plants and great views as well.  But before we got going on day 2, I took a look around when I got out of my tent at the Machame Camp (at 10,200 ft / 3,100 m) and this is what was waiting for me!

The summit of Kilimanjaro from Machame Camp
The top of Kili!

A moorland?  What is that?  Where at the moors?

I had no idea what moorlands were prior to the hike.  So I looked the term up. It said it was a climate zone at elevation with low-growing vegetation and fog.  In the end, the descriptions I had found didn’t really help me conjure a good mental picture though the Wikipedia article actually had a picture of Kili’s moorlands.  No worries, I was about to spend a whole day hiking the moorlands of Kili.  So I stopped trying to get that mental picture.  And these are some of the sights of the moorlands!  (Hope they give you a better sense of the moorlands than Wikipedia gave me.)

Plant in the moorlands terrain of Kilimanjaro with fog behind it
One of the most interesting plants we saw on the climb
Plant in the moorlands terrain of Kilimanjaro
Another interesting plant of the moorlands zone
Moorland terrain in Mt. Kilimanjaro
Great example of the terrain and sky that day! Here a guide walks in front of me
Moorland terrain in Mt. Kilimanjaro
The trekkers making their way in the low vegetation and fog typical of the moorlands zone

Great vistas were part of our reward on day 2!

After the morning routine was done (eating breakfast, filling up with water, packing up our bedding and other stuff, etc.), we left the Machame Camp.  We departed early in the morning around 7:45 AM under a great and beautiful blue sky.  As we left, we could see neighboring Mount Meru in the distance which served as a great backdrop to our photos of the scenery around us.

View of Mt. Meru from Mt. Kilimanjaro, Tanzania
Mt. Meru in the distance
View of Mt. Meru from Mt. Kilimanjaro
I told you it was a photo opp spot!

The trail that day was pretty rocky but not in an intense way as other days; not terribly hard, I’d say. “I can do this!,” I thought often, with a lot of relief.  Some more unique-looking larger rocks set there by nature along the way also made for photo opps that the group did not let go to waste.  (This group let NO photo opp go to waste!!)

Rock in Mt. Kilimanjaro's moorlands
Hikers on Mt. Kilimanjaro
Everyone trying to get their photo taken on this scenic spot

A beautiful place to spend the night:  Shira Camp

We had had a great day but it was to get better after the 5.5 mile (9 km) hike:  Shira Camp at 12,600 ft (3,840 m) (a gain of 2,400 ft in the day), where we were going to stay that night, was one of the most beautiful spots I saw on the entire climb.  The Shira Camp overlooked a ridge (the Shira Ridge) and, if you turned 180 degrees around from admiring the ridge, you would find yourself facing the summit of Kilimanjaro.

The summit was breathtaking, especially at sunset.  Three of us huddled together to take in that view, fully aware of how blessed we were to have the chance to enjoy it…  We were also fortunate because we arrived to the camp (around 2 PM) about six hours after we started off which allowed us ample time to not only soak in the views but also to get good rest before the challenge of day 3.

Approaching Shira Camp on Mt. Kilimanjaro
When we first spotted the camp – notice the fog
Shira Camp in Mt. Kilimanjaro
We entered the camp and looked for the green tents of Zara Tours
Shira Camp in Mt. Kilimanjaro - Zara Tours tents
Found our tents and everyone proceeded to settle in. We had THE BEST location in camp!

One of our trekkers had brought, of all things, a couple of small kites, and it was neat to watch her and others fly them.  I am not sure I know what made her think to bring some but I was so happy she did.  I did not get to fly them but I think I enjoyed more watching the scene unfold in front of me than actually flying one of the kites…  Myself? I joined fellow trekkers Olivia and Austin in doing some stretches after the long day of hiking – but enjoying the great views while stretching.

Flying kites in Mt. Kilimanjaro!
Kites on Kili

Cell phone signal on Kilimanjaro

One of the spots with the best view of the Shira Ridge was not only a great spot for a photo opp but it also seemed to be the best spot for a cellphone signal as a few guides would sit on the nearby rocks and text away for a while.  This spot also happened to be like within 10 ft (3m) from the toilet-tent nearest to my sleeping tent; the toilet-tent being a place I would visit a couple of times during the night as Diamox (the med you take to help prevent altitude sickness) is a very effective diuretic…

The toilet situation on Kilimanjaro

One of the best pieces of advice we got pre-trip was to bring a so-called “pee bottle.” With this, one could relieve oneself within “the comfort” of one’s own tent…  Easier for guys than gals, I am sure.  However, I hear women have a tool called a “pee funnel.”  This simple tool assists in the proper channeling of the liquid into the bottle.  I never saw one or heard of anyone in our group using it.  Of course, if the bottle runneth over or a case of bad aiming struck, neither would not be a good situation (not alluding to ANYONE in the group…) so care must be taken in the use of said bottle…

Sometimes, though, the bottle did not have enough capacity for a given night’s “production.” So one still had to go outside to the toilet-tent (“going” somewhere else in camp is a no-no).  Going out in the middle of the night was a slight to moderate pain as one had to put on the shoes, maybe a jacket and long pants, find the headlamp, undo a few zippers, etc.  But I never failed to fall asleep easily upon returning from these small nighttime outings, mercifully…

I am not sure how this post took such a turn, so I will bring myself back to the more pleasant topic of the hike…  Since I have already brought the topic up, allow me to share a gratuitous photo.  The portable toilet in the toilet-tent. (I know some of my friends and family are DYING to see a pic of one of these.)  Are you glad I went “there”? 

Toilet in a tent in Mt. Kilimanjaro
At least I made the picture smaller than the rest…

I will add that this tent and toilet combo was super clean.  Our porters carried our toilet-tents from camp to camp.  Additionally, they took great care to clean it and disinfect it very well.  For this, we made sure to properly thank not only during the hike but at the end with a great tip!

Lunch during the day’s hike

So, quickly switching topic… On day 2 we had one of our many favorite lunches of the whole climb: grilled tomato, cheese and cucumber sandwiches!  The picture below will not do these sandwiches justice.  They were a real treat and we gobbled up all these babies up happily!  We also likely were served a soup (we typically were in every meal).  However, the type changed every time they served it and I did not jot down what accompanied these beauties below.

Grilled sandwiches during our Kilimanjaro trek
Grilled sandwich goodness!

When it is all said and done…

So the moorlands and Shira Camp, along with the great lunch, make for great memories.  But below are the images that really capture the awesomeness of day 2 for me.  I would happily head back to Kili simply to stay in this camp – and stay there a couple of days.

Sunset at Shira Camp with clouds going by hikers
Shira Camp with Mt. Kilimanjaro as its backdrop
A happy if tired hiker by his tent and the roof of Africa!

Back to Day 1

On to Day 3

—————————————————————————————————————————————————

Other posts about the Kilimanjaro trek:

–  Preparing for the hike is more than training and gear

–  The Machame Route:  our way up

–  7 things you will not see me without as I climb Kili

–  Day 4 of the hike: the dreaded Barranco Wall

–  Interview with fellow Kili climber and Ultimate Global Explorer

view Shira camp, climbing Kilimanjaro, peeing in Kilimanjaro

On the Machame Route | Kilimanjaro Day 1

Writing about my hike to the top of Mount Kilimanjaro along the Machame Route is no easy task.  What to share?  Clearly the “facts” of the route, camps, durations, altitude, acclimatization, weather, gear, the day-to-day routine, etc. are all important elements of the story.  But the more I thought about how to write about this experience, the more I realized I wanted to share how it felt first and foremost.  And also covering some of the elements listed earlier as they fit into the overall story, instead of making those the focus of each story, making this more a log of the climb.  As I mentioned in another post, preparing for Kili is more than training and gear.  I hope that you will see, over the series of writeups, that an emotional element also applies to actually doing the climb.  Let’s get going with day 1!

The Machame Route and the climb

One second… before getting into the hike itself, a quick word about the route that we took for this climb.  Our group went up the Machame Route, known for its vistas and for not being as crowded as other routes.  Also, the Machame Route is a route with a higher likelihood of success than the so-called “Coca-Cola Route” (the Marangu Route).  That is because it offers better altitude adjustment or acclimatization to the ever higher elevations the trek would face (climb high, sleep low; 6 days of ascent; etc.).

The climb itself is to Uhuru Peak.  Mt. Kilimanjaro actually refers to the entire mountain, the tallest free-standing mountain in the world.  Uhuru Peak is the highest point on the mountain and, therefore, in Africa!  Whereas Uhuru Peak is the goal, the entry point to the goal on the Machame Route is called Stella Point.  Once you get to Stella Point, there is about one more hour before reaching the actual summit.  Making to Stella Point, though, is no guarantee that one will reach Uhuru Peak though… More on summit night in another post.  Let’s go back to day 1 itself.

Starting day 1:  waiting at the Machame Gate

Day 1 starts full of anticipation.  The trekkers finish prepping the daypack they will carry on their backs.  And packing the other piece of luggage that will be taken from camp to camp by the porters accompanying our group.

Backpacks ready to go up Mt. Kilimanjaro

Daypacks waiting for their trekkers!

We got up at the crack of dawn to head from our hotel (the awesome Honey Badger Lodge) to the hotel from which the mountain trek would leave, the Springlands Hotel, home base of Zara Tours who Trekking for Kids had hired to do our trek.  So add 20-30 minutes to the lead time… (I would have rather stayed at Springlands the night before but I imagine it was booked since there were a few buses loading that morning to go to the mountain.)

The ride to the Machame Gate, entry point to the Machame Route, could not start quickly enough.  As with many things, one gets ready and then one waits.  After we finished leaving some of our non-trek stuff in storage at the Springlands, our bus arrived and the process of loading up our trek bags began.  Finally -and not soon enough- we were on our way to the Machame Gate.  It seemed to take forever but it couldn’t have been more than 1 hour or hour-and-a-half.  We were just so ready to get the climb going!

At the Machame Gate

Once we arrived at the Machame Gate, we proceeded to, you guessed it perhaps, sit and wait for about an hour.  The reason, though, was quite simple:  the permits had to be purchased by the lead guides.  This process takes time as we were not the only ones there (fancy that!).  This would be a reality throughout the trek:  others are there with you.  Not that we expected to be alone, mind you.  Just that one never stops to consider that fact until one gets to this departure gate.  While it could have been chaotic, it really was not; everything was fairly orderly.  We proceeded to eat our boxed lunches while we waited and took a few pictures to commemorate the start of our climb.

At the Machame Gate at the base of Mt. Kilimanjaro

ilivetotravel doing the obligatory photo at the Machame Gate, looking ready and clean!

Another thing you can do while you wait is read the few signs posted with instructions and warnings for those starting to climb Kili.  Good reading.

Sign on Machame Gate at Kilimanjaro

We cheered when we saw our guide come over with paperwork – it meant we were ready to go.  The funny thing is that we saw other guides come out around the same moment with their papers.  You would think the first-come, first-serve approach would have led to guides coming out gradually and sequentially.  Nope.  It seems all permits were issued almost at the same time for all the groups waiting!  That meant, everyone got going at the same time creating a little bottleneck at the entrance gate.  We got to pass quickly through without waiting long so we were FINALLY on our way!!

The hike on day 1

Day 1 was mainly going through a forest habitat starting at 6,000 ft (1,830 m) and ending at the Machame Camp at 10,200 ft (3,100 m).

Day 1 of the Machame Route of Kilimanjaro

Typical of the day 1 Machame Route. Notice the porters on the trail.

It may have been the built-up anticipation but, for the most part, I didn’t feel the altitude wear on me as the day went on.   We were fortunate it did not rain that day.  So, the gaiters were not really needed (those green things I am wearing on my legs in the earlier photo to help prevent mud or pebbles from getting into our boots).  This part of the trail is about the nicest one with some work done to create a good trail for part of the way.

Arrival at the Machame Camp

Our arrival at camp was about 4:30 PM, five hours after we started that day.  We were thrilled at having completed our first day of 6 to get to the summit.  While we knew we still had a lot of challenges ahead, it felt SO good to have one day under our belt!  At this point we did our first book signing to show we were there.  This is a key requirement if we wanted to be issued an official completion certificate at the end of the hike.

Register at camp in Kilimanjaro

The Machame Camp sits in an area with plenty of vegetation.  This means we had more smaller animal life than we would have higher up; read, mice.  Key here is to keep the tent zipped up when not coming and going!   The Machame Camp has a toilet building that is pretty new.  I heard it had both Western toilets and Turkish toilets, if those are the proper names for the fixture types.  We also had a pair of portable toilets-tents and I preferred those… (less smelly).

In any case, getting to camp means setting up the sleeping tents and the mess hall tent.  Normally the porters who carry these items and set them up get there ahead of the trekkers and the guides but on day 1 we got there at the same time.  So this day we got to watch them at work.

Camp being set up in Kilimanjaro

Setting up camp

Wrapping up our first day on the mountain

Once the tents were set up and before dinner was ready, I, like some of the other trekkers, got organized by washing up, taking out the items needed for the night (headlamp, etc.), and preparing the daypack for the next day.  Oh, and the getting drinking water and treating it (Steripen worked wonderfully!) – a staple of the every day life on the mountain!

Trekker at camp in Kilimanjaro

Yours truly getting ready for my first night camping ever!

We enjoyed a beautiful sunset that night before heading to the mess hall tent for dinner.  I took advantage of an early bedtime so I could be well-rested for day 2 – NICE!  Dinner included a hot soup, potatoes, fried fish, vegetables, and small bananas along with tea and hot chocolate.  On to my first night camping ever and day 2!

Tents at Machame Camp during sunset in Kilimanjaro

Our tents with a beautiful backdrop courtesy of the African sunset

On to Day 2 on the Machame Route…

Kilimanjaro hike, climb Kilimanjaro, day 1 on the machame route

—————————————————————————————————————————————————

Other posts about the Kilimanjaro trek:

–  Preparing for the hike is more than training and gear

–  The Machame Route:  our way up

–  Day 3 of the hike

–  Day 4 of the hike

–  Day 5 of the hike

–  Day 6 of the hike (summit night)

–  7 things you will not see me without as I climb Kili

–  Interview with fellow Kili climber and Ultimate Global Explorer

%d bloggers like this: