Hiking in Nepal: On the Way to Namche Bazaar! (Day 2)

On Day 2, we left our teahouse in the tiny spot of Tok Tok (9,000  ft / 2,800 m) at around 8:45AM to head, following the route to Everest Base Camp, to Namche Bazaar, a rather bigger town than most in the area (actually, THE biggest).  This would have us climb over 2,000 ft in the last 2.5 hours of the hike that day, a rather ambitious and challenging effort (except for the super fit and those used to the altitude, perhaps – I fell under neither success category…).

Leaving our spot in Tok Tok, we stood for a group photo as one of the trekkers was not continuing beyond Tok Tok.

Tok Tok, trekkers, Everest Base Camp, Nepal, Himalayas, trekking

Group photo!

Nepal, Himalayas, trekking, hiking, Tok Tok, bridge, river, Everest Base Camp

Our first bridge of the day was right outside the teahouse – watch out for the pack animals!

On the trail to Everest Base Camp…

Soon thereafter, off we went walking on terrain that was becoming familiar to us:  rocks, dirt, steps, pack animals, farms, debris from the earthquake, reconstruction, and the river.  It is a rugged but peaceful terrain; except when the pack animals come – at that point you make a quick move towards the inside of the trail, not the side facing the steep dropoff!  On this day, we would cross the river four times if memory serves me right.

Everest Base Camp, trail,trek, trekking, terrain, hiking, Nepal, Himalayas, outdoors, adventure, Olympus

Steep climbs every day!

Everest Base Camp, trek, trekking, terrain, hiking, Nepal, Himalayas, outdoors, adventure, Olympus

Pack animals: these were carrying a very light load

Everest Base Camp, trail,trek, trekking, terrain, hiking, Nepal, Himalayas, outdoors, adventure, Olympus

Typical stop for trekkers

Entering the Sagarmatha National Park

Later that morning, we officially entered the Sagarmatha National Park (which is the park where Mt. Everest sits) via the Jorsalle gate (which is right outside of Monju on the way to Jorsalle).  There was signage offering good advice for trekkers in dealing with acute mountain sickness (there are always those who are unprepared…).  More importantly we passed a traditional kani gate which incorporates prayer wheels and colorful paintings on the walls and ceilings.  This gate marks our entrance in the sacred valley of the Sherpa (a term that refers to an ethnic group, not a job, as we learned…):  the Khumbu.  I loved the rules suggested to those who enter the valley (see photo).

kani gate, Jorsalle gate, Sagarmatha, National Park, Nepal, Everest Base Camp, tradition, Buddhist, sacred valley, Khumbu

The kani gate marking the entrance to the sacred valley

Sagarmatha, Kani gate, Jorsalle, Nepal, Himalayas, Buddhist painting, art, color, photo, travel, Olympus

Ceiling painting

Sagarmatha, Kani gate, Jorsalle, Nepal, Himalayas, Buddhist painting, art, color, photo, travel, Olympus

Wall painting and the ever-present prayer wheels at the kani gate

Acute mountain sickness, Nepal, Sagarmatha, warning sign

Warnings about acute mountain sickness

Sagarmatha, National Park, Nepal, kani gate, Jorsalle, park rules, travel

Follow these rules!

Breaks from the trail:  tea and food

While the actual walk is rewarding despite the challenging parts, one of my favorite moments is when we stop 🙂  Yes, it is about getting a break from the effort.  But it is also about the camaraderie over that cup of tea, lemon or mint with the latter being my favorite.  As we all have different paces, non-walking time is when we get to share with those we don’t keep up pace with (or those who can’t slow down easily!).  After tackling the first mile (which was not a walk in the park), we made a restroom stop at Benkar but did not even sit-  this was not our morning break for tea.

Everest Base Camp, trail,trek, trekking, terrain, hiking, Nepal, Himalayas, outdoors, adventure, Olympus

Brief stop to use the ‘facilities’ and take a snack out

Everest Base Camp, trail,trek, trekking, terrain, hiking, Nepal, Himalayas, outdoors, adventure, Olympus

Resuming our hike with a nice downhill

So we trudged along and, after we entered the Sagarmatha NP, we later hit our morning break at Monju (or Monzo) at a place that I would stop at on the way back to Lukla.  The outdoor terrace was very spacious and comfortable (perhaps because we were the only ‘crowd’ there) and the temperature was great so we enjoyed sitting in the terrace sipping our tea!

Everest Base Camp, trail, route, Monju, Monzo, Nepal, Himalayas, Trekking for Kids, travel, outdoors, adventure, Olympus

Tea time in Monju!

And then we proceeded to Jorsalle where, not 30 minutes later, we would have lunch outdoors by the river at a teahouse there.  It was a great stopping point right by the trail (as most are).  It was a good break before the final push, and I mean PUSH, to Namche Bazaar – we would be starting a serious vertical climb over a rather short horizontal distance.  Heaven help me!  We left our lunch ‘resting place’ at around 1 PM.

Jorsalle, Khumbu, Nepal, Himalayas, Everest Base Camp, trekking, trail, Dudh Koshi, river

Approaching Jorsalle, our lunch ‘town’

Jorsalle, Khumbu, Nepal, Himalayas, Everest Base Camp, trekking, trail, Dudh Koshi, river

Lunch time in the sun!

Bridges crossing the Dudh Kosi River

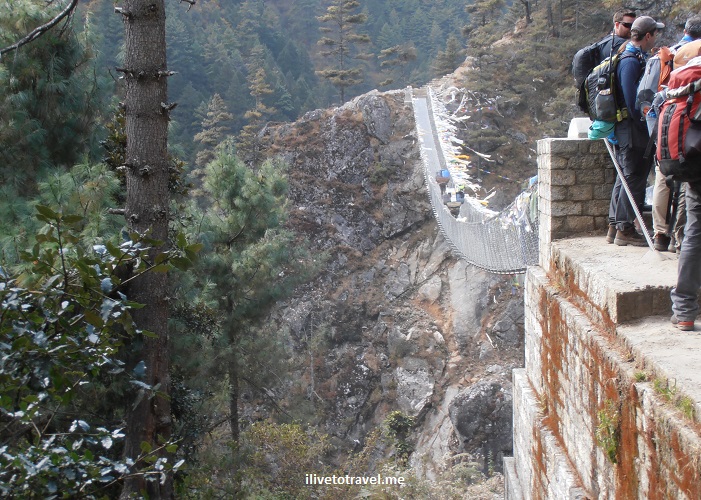
Before I get to the monster climb…  This day was made fun by the many bridges low and high, short and long we would cross.  If you are not a fan of suspension bridges, this may not be your favorite day but the most important thing to mind are the pack animals, not the height of the bridges!  Here are some images from the “day in bridges.”

bridge, Nepal, Dudh Koshi, river, Everest Base Camp, route, Olympus, travel, outdoors, trekking, hiking, Khumbu, Sagarmatha

Pack animals have right of way – if you are smart!

bridge, Nepal, Dudh Koshi, river, Everest Base Camp, route, Olympus, travel, outdoors, trekking, hiking, Khumbu, Sagarmatha

Lovely scenery from the bridge’s vantage point

bridge, Nepal, Dudh Koshi, river, Everest Base Camp, route, Olympus, travel, outdoors, trekking, hiking, Khumbu, Sagarmatha

One of the smaller bridges we dealt with

bridge, Nepal, Dudh Koshi, river, Everest Base Camp, route, Olympus, travel, outdoors, trekking, hiking, Khumbu, Sagarmatha

Beautiful spot (notice the prayer flags)!

bridge, Nepal, Dudh Koshi, river, Everest Base Camp, route, Olympus, travel, outdoors, trekking, hiking, Khumbu, Sagarmatha

Loved walking this close to the Dudh Koshi River

bridge, Nepal, Dudh Koshi, river, Everest Base Camp, route, Olympus, travel, outdoors, trekking, hiking, Khumbu, Sagarmatha

And then we got to this… (the bottom bridge is closed now)

bridge, Nepal, Dudh Koshi, river, Everest Base Camp, route, Olympus, travel, outdoors, trekking, hiking, Khumbu, Sagarmatha

And we are about to walk across the highest one!

bridge, Nepal, Dudh Koshi, river, Everest Base Camp, route, Olympus, travel, outdoors, trekking, hiking, Khumbu, Sagarmatha

View down from the highest suspension bridge

bridge, Nepal, Dudh Koshi, river, Everest Base Camp, route, Olympus, travel, outdoors, trekking, hiking, Khumbu, Sagarmatha

View down from the highest suspension bridge

And our awesome endpoint:  Namche Bazaar

The route to Everest Base Camp is not a steady uphill.  No place ever is (even Mt. Kilimanjaro has its downhills as you climb) but this was as much going down as you have gone up in many stretches.

In fact, this day, on a 5.3-mile (8.5 km) route, our net climb was around 2,300 ft (about 800 m) – we climbed much more (upwards of 4,000 ft) and descended a good bit.  But after lunch what we faced was mostly a severe uphill, especially after the last suspension bridge (the highest one).  And the trail was very rugged to boot.  Hard stuff.  I didn’t know how I could finish it.  And remember, we were climbing to our end point at over 11,300 ft (3,400 m) so the thin air was having an impact (as a reference point, once in Namche Bazaar, we would be at 67% oxygen level vs. sea level!!).  I had to stop every now and then just to catch my breath especially after a stretch where the ‘steps’ (rocks) were higher. Not knowing how much more I really had was both a blessing and a curse.  Certainly I would not want to know how much more most of the way but maybe during the last 30 minutes I would have wanted to know that Namche was THAT close.

With the incredible climb at the end, Namche Bazaar could not have come sooner.   So, it was awesome when we rounded a corner about 2.5 hours after lunch and we saw this town incredibly nested in what looked like mother nature’s own amphitheater:  Namche Bazaar!  It was a photo op moment for sure and we had earned the rest day coming up on Day 3!

Namche Bazaar, Nepal, Everest Base Camp, trail, route, Himalayas, trekking, hiking, outdoors, adventure

I shall name this photo: “The first time I saw sweet Namche”

Namche Bazaar, Nepal, Everest Base Camp, trail, route, Himalayas, trekking, hiking, outdoors, adventure

The moment I stopped when I rounded the corner – best moment ever!

Namche Bazaar, Nepal, Everest Base Camp, trail, route, Himalayas, trekking, hiking, outdoors, adventure

My trek roommate and I celebrating we had survived

——————————————————————————————

Check out other related posts!

Hiking in Nepal: Lukla to Tok Tok (Day 1)

My trek in the Himalayas followed the route to Everest Base Camp.  I only had two weeks’ vacation so I was short one week to make it all the way to “EBC” since my visit to Nepal included an extra number of days to help in the re-building of a school that was destroyed during the April 2015 earthquake in the village of Kumari.  It was a great trip and I did not want to miss seeing Mount Everest in person.  Making that decision was not the hardest part, figuring out what I need to take was!  (Read here for how I packed for the trek!)

However, I went on this trek with Trekking for Kids because I knew some of the folks going and it was not a bad time to be away from work (is there ever a good time??).  So my trek was going to be from Lukla to Deboche, past the Tengboche monastery.  As it turned out, that ended up being a good choice since my stepfather died back home the day before I left Nepal for home.  But, before that turn of events, I was already glad I had chosen to not go all the way.

Day 1 took us from Lukla (2,860 metres (9,383 ft)) to Tok Tok (2,760 metres (9,o55 ft)). While an overall descent, there were plenty of climbs and descents along the way!

Nepal, Himalaya, route, Tok Tok, Lukla, map, trekking, Everest trek, adventure

Our starting point and ending point for day 1

Starting the trek:  getting to Lukla

Starting the trek in Lukla required first getting to Lukla.  As I shared in an earlier post, either one does a local bus and then a few days’ hike to get to Lukla or one flies into one of the “most dangerous” airports in the world:  Lukla (LUA).  I did the latter for a couple of good reasons:  that was what was pre-planned by Trekking for Kids and I didn’t have enough vacation time anyway!

You can read the details in the earlier post but the short of it is:  I made it to Lukla alive and without too much suffering 🙂

Lukla, Nepal, airport, runway, travel, adventure, Samsung Galaxy

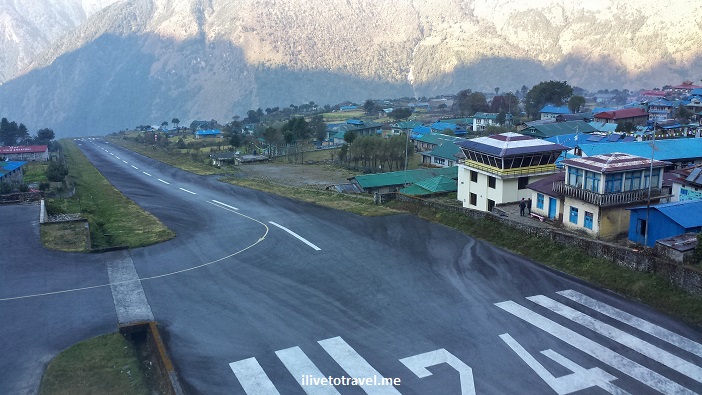
The Lukla airport – a very short and dramatic runway!

Getting the trek going:  leaving Lukla

After we landed in Lukla, getting our bags was a piece of cake (the airport is tiny, after all).  From there to our breakfast stop (at a hotel we would return to at the end of the trek) was a very short walk (Lukla is tiny, after all).  We got there and, as we had left Kathmandu at the literal crack of dawn, we proceeded to have some breakfast before heading out.  Our guides had to sort our things with the porters we were picking up in Lukla so we had ample time.  I can’t really recall what I had but nothing too heavy as we were leaving for a few hours’ hike.Everyone was itching to go and, when we finally did, I think we had a little bit of adrenaline flowing!  Close to leaving Lukla, we came to our first gate and prayer wheels and the backdrop was phenomenal in the deep blue sky ahead.  It was a sign of the great day ahead!

Though we started the hike at over 9,000 ft, we warmed up pretty quickly as the hike progressed.  It felt so good!  Hamlets in this part of Nepal are charming probably because of the color applied to the window and door frames and we started noticing this early on.

Nepal, Himalayas, house, hamlet, blue, travel, Olympus, trekkers

Approaching a hamlet

Nepal, Himalayas, house, hamlet, blue, travel, Olympus

House along the trek route

We crossed our first hanging bridge on this day (one of two hanging bridges that day).  It was not too high (I am not afraid of heights, thankfully) and it was certainly long.  We would follow this river all the way to near Namche Bazaar.  We also crossed another bridge, a truss one, that day.  I noticed that some parts of the route, as it passed through small “hamlets,” were paved with stones while others were dirt paths.  It was nice to have the variation in the route – just like it was nice to have all the uphills and downhills mixed.

Nepal, Everest trek, Dhudh Kosi, river, trekking, Olympus

Approaching the Dhudh Kosi River and the hanging bridge

River, Dudh Kosi, Nepal, glacier water, Everest trek, trekking, nature, outdoors

Beautiful waters, courtesy of glacierland!

Buddhist faith along the route

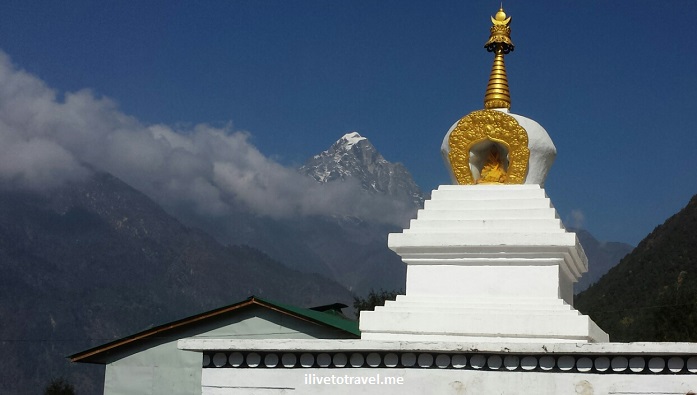
Along the way we passed different-sized prayer wheels and collections of Tibetan tablets (in sanskrit) that are so iconic and that speak to the concreteness of the faith in that region of Asia.  I tried to not miss spinning prayer wheels and we certainly made sure we passed the “monuments” on their left as tradition/faith requires.

stupa, Buddhism, sanskrit tablet, stupa, Himalayas, Everest trek, Nepal, travel, outdoors, faith, religion, photo, Olympus

Sanskrit tablets and a stupa

prayer wheel, Buddhism, sanskrit tablet, stupa, Himalayas, Everest trek, Nepal, travel, outdoors, faith, religion, photo, Olympus

A prayer wheel asking to be spun

A hiker has to eat!

Along the way we stopped for lunch at a beautiful spot where the route made a 90-degree angle.  The place, the Wind Horse Lodge and Restaurant was a perfect spot, idyllic, for the stop.  We sat outside at tables on the small lawn, graced by marigolds along the edges.  Until clouds rolled over and it started getting cold.  We promptly found tables indoors and the lunch was pretty darn good:  fried noodles and rice along with fried mini empanadas (my Latin roots betray me as that is not what they call them there!).

Nepal, Everest trek, food, fried noodles, travel, trekking, teahouse

Lunch!

Ending our hike in Tok Tok

Bellies full and feet rested, we proceeded on our hike.  I try on these treks to not study the route we are going to take as I don’t want to be “expecting” the next stop or calculating how much longer we have to go – I want to enjoy the moment though, I admit, at times when I am feeling tired, I start trying to figure out how much longer I have to go 🙂

We arrived at our teahouse in Tok Tok (River View Lodge) and, as usual, it is a great feeling to hear the words “We are here” when we arrive at our resting place for the night!  It was a tiny spot nestled between a hill and the river.  I wish it had been a tad warmer to stay outside in the evening.

teahouse, room, Everest trek, lodging, Nepal, Himalayas, travel, trekking, travel, Olympus, photo

My room at the teahouse

teahouse, room, Everest trek, lodging, Nepal, Himalayas, travel, trekking, travel, Olympus, photo

The dining room (aka, hanging out room) at the teahouse

In the end, it was a spectacular first day trekking in the Himalayas and I slept well that night!  I leave you with one of my favorite views from that day!

stupa, Buddhism, stupa, Himalayas, Everest trek, Nepal, travel, outdoors, faith, religion

Just magnificent


Other posts related to this hike:

Flying into Dangerous Lukla Airport in Nepal

I recall seeing a few years ago a TV show about the world’s ten most dangerous airports. Tegucigalpa, St. Maarten and a few others made the list.  And so did Lukla, Nepal.  Lukla is the typical starting point for anyone trekking along the route to Everest Base Camp, or to other points in the Himalayas. The alternative to the 35-min flight to Lukla (LUA) from Kathmandu is a long bus ride plus a few days of trekking to reach Lukla. I was not thrilled at the prospect of landing in one of the most dangerous airports but there really was no choice.

Heading to Lukla

The Lukla airport was built by none other than Sir Edmund Hillary himself in 1965 to facilitate developing the trekking business that he felt the local population needed.  The Lukla airport , officially named Tenzing-Hillary Airport after the first two people to have summitted Mt. Everest, was a dirt airstrip until just 1999.  Lukla is a town of a few thousand inhabitants perched high at around 2,840m / 9,300 ft above sea level.  Flights in and out of Lukla mainly fly in the morning when the weather and the visibility are what they need to be for a successful flight (read: does not crash).  Only planes that can handle short takeoffs and landings can operate from Lukla as the runway is only 1,700 ft (500m) long (or so) – that ain’t long at all!  Flights can easily be canceled for the day if the conditions are not right which could be more than one day in a row, leaving hundreds stranded in this small hamlet in the highlands of Nepal…  So beyond the flight involving a “dangerous” airport, one gets to worry about will the flight even go and what happens to the rest of the itinerary if the day is bust…

In any case, there are several airlines that run flights continuously in the morning to and from Lukla.  It is like a bus service of sorts with planes making quick turnarounds at either airport (Lukla/Kathmandu) to take advantage of the right weather.

Lukla, Tara Air, boarding pass, Nepal, flight, airline, travel, Everest

Boarding pass to Lukla

The domestic terminal in Kathmandu is small and easy once you get past the chaos of getting to the airline counter and checking in.  We had no real problems, thanks to our local guides that were going to be traveling with us – they knew their way around!  After being dropped off, we walk along a covered walkway to a building in the back past a new building under construction.  The old building was old indeed but it was functional.  Once the flight is called (other Lukla flights were called too), we stepped out and there were 2-3 buses awaiting to take people to their planes.  It was a bit confusing and finally someone pointed us to our bus based on our boarding pass.

The plane sat maybe 20 people and the flight was not full.  I got a seat on the left so I would be facing north (towards the Himalayas).  Unfortunately, the windows were very dirty which assured that photos would not be National Geographic kind of material (that is my excuse anyway…).  Gosh, if I’d known and they’d let us, I would have gotten off the plane pre-takeoff and cleaned my window!

Himalayas, Nepal, window seat, airplane, flight, Tara Air, Lukla

The taller Himalayas via dirty window

Himalayas, Nepal, window seat, airplane, flight, Tara Air, Lukla

At times, the ground was not far below us…

Himalayas, Nepal, window seat, airplane, flight, Tara Air, Lukla

Small village – one can see the local stupa left of center

Before taking off, the flight attendant (yes, there is one) checked that our seat belts were fastened and handed out hard candy (to choke on when the plane jumped?? no, thanks) and cotton balls for our ears – yes, I guess it was to be a noisy flight!  Those tasks and getting us in and out of the plane was all she had time to really do on such a short flight.  But I still appreciated her for taking care of us!

Dangerous Airport?

The danger reputation stems from the fact that the runway starts at the edge of the mountain and runs uphill (a 12% grade) until either the plane has stopped and turned or, it has met the wall.

Lukla, airport, Nepal, dangerous, Himalayas, travel, flight, airplane, landing, takeoff, runway

The full runway (control tower on the right)

I have read, and was also told by a pilot, that part of the issue with landing is the uphill nature of the runway with the far end being higher than the end nearer to the pilot – this situation can trick the eye, giving the pilot a false sense of the aircraft’s vertical position before landing, potentially leading to accidents.

Lukla, airport, accident, danger, Nepal, runway, flight

A plane meets the wall

On the reverse (the takeoff out of Lukla), either the plane catches air at the end of the runway where the runway meets the cliff’s edge, or it drops when the runway runs out until the plane catches lift (which I would hope it does…).

Lukla, airport, flights, Nepal, runway

See what I mean about “up or drop” (Source: www.theaustralian.com)

Truthfully, and maybe naively, neither landing nor takeoff worried me much. What worried me the most was the turbulence that can be encountered on the way to and from Lukla.  Not helping things was the name of our Nepalese airline:  Tara Air.  I was happy until someone pronounced it, making it sound like “terror air” (pronounced with a thick Boston accent) which sent images flying (pardon the pun) all across my brain of a small plane jumping around due to high winds – a terror inducing ride ahead?  Hopefully not!!!Tara Air, Lukla, Kathmandu, Nepal, flight, airline, airport, Himalayas, trekking

Upon boarding, I looked into the seat pocket in front of me and found the air sickness bag which left no doubt as to what its purpose was…  I should have taken it with me but at least I took a picture of it.Tara Air, Lukla, Nepal, air sickness bag, vomit bag

The flight into Lukla had gone very smoothly – no turbulence at all!  And then we started circling.  I was thinking to myself:  “so close and now we start circling” – was it weather-related, I wondered?  The delay turned out to not be about fog or weather issues and we experienced no turbulence.  The issue was that, since the Lukla airport only has four parking spots for planes and they were “taken,” we had to wait for a plane to take off before we were allowed to land.  That was a new one to me!  The flight back from Lukla was also completely smooth giving me a 2-for-2 no-turbulence flights so I may consider never going back since I had such good luck on my first visit to Lukla!

Back to landing in Lukla:  it was pretty darn cool as the small plane’s cockpit was open for us to see what was ahead – including seeing the runway ahead as we landed – or the mountains we were flying into before that.

Lukla, airport, flight, Nepal, cockpit, cockpit view, Himalayas, airplane

The view out of the cockpit – how cool is that!

Leaving Lukla, the plane actually took off the ground before the runway ended so no drop was experienced, maybe to the chagrin of those in the plane who love roller-coasters – but not me!  Here is a video of my own takeoff – notice when we leave the runway, right before it ends (it is a noisy video so make sure you are not at max volume!).

In the end, as you may surmise, this was a far better choice than the bus and the walk 🙂  And now I can say I “survived” one of the world’s most dangerous airports!

ilivetotravel, Raul Pino, flying, window seat, travel, Lukla, Nepal, Tara Air

Happy flyer – and dapper too!


Pin this crazy airport to your travel board!

most dangerous airport, scary flight, flying into Lukla, Nepal, airport, Everest

Trekking the W Circuit at the Torres del Paine: Day 5

After the fun of day 4 with all the wind and beautiful views of the lakes and the Torres del Paine, the big day finally arrived:  no, not because it was the last day of hiking but because it was the day we were trekking up to the lagoon to see the peaks close and personal.  But it would all depend on the weather as there could be rain or cloud coverage over the iconic conical (alliteration!) peaks.  The morning light showed everything looked good – and majestic!

Torres del Paine, mountains, Patagonia, Chile, sunlight, morning light, Samsung Galaxy, photo, trekking, travel, Refugio Chileno

View of the top of the range

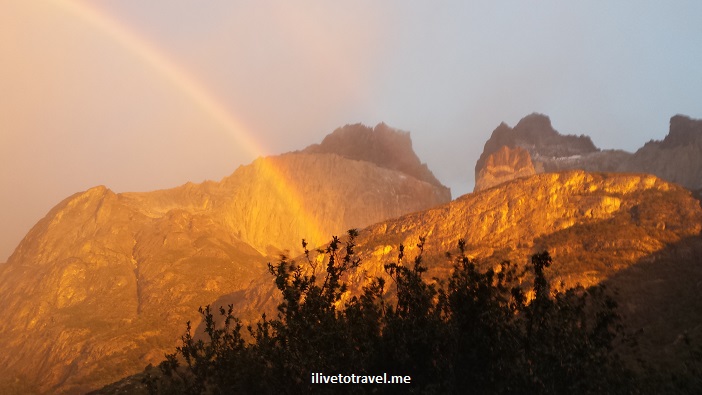
About an hour later, the light had changed and a rainbow appeared.

Torres del Paine, mountains, Patagonia, Chile, sunlight, morning light, Samsung Galaxy, photo, trekking, travel, rainbow

Rainbow nicely framing the massif

The Refugio Chileno

Trekking from the Refugio Chileno, where we had stayed overnight, back to our exit point at Hotel Las Torres would be about 9 kms.  But before starting on that, we would go up to the Mirador Las Torres, about 4 kms away and mostly going up about 380 m to reach the lagoon at around 875 m above sea level.  So, in total, this day would be 17 kms worth of distance covered.

Torres del Paine, mountains, Patagonia, Chile, sunlight, morning light, Olympus, photo, trekking, travel, Refugio Chileno

The main lodge at the refugio (nearest to us, the dining room)

Torres del Paine, mountains, Patagonia, Chile, sunlight, morning light, Olympus, photo, trekking, travel, Refugio Chileno

The refugio also offers space for camping, if that’s your thing!

I have not mentioned how the refugios work.  They usually have rooms with several bunk beds (stacks of 2 or 3), shared bathroom facilities (with private showers), and communal dining (usually scheduled as not everyone fits at once).  I am not saying they are super clean but they were generally better than expected.  The meals were acceptable if not good and wine and beer were always available.  I gained weight in this 5-day hike!

Getting to the Mirador Las Torres

Alright, back to the hike.  The route up was not always a nice path, there were a couple of spots with makeshift wooden bridges to cross small streams.  But that all added to the fun of the climb.

bridge, creek, Torres del Paine, mountains, Patagonia, Chile, sunlight, morning light, Olympus, photo, trekking, travel,

Rickety bridge…

bridge, creek, Torres del Paine, mountains, Patagonia, Chile, sunlight, morning light, Olympus, photo, trekking, travel,

Another bridge

bridge, creek, Torres del Paine, mountains, Patagonia, Chile, sunlight, morning light, Olympus, photo, trekking, travel,

Enjoyed all these bridges!

Of course, going up was more fun due to the expectation of arriving to the top mirador (viewing point), of getting as close to the Torres as possible.  Returning to the Refugio Chileno, by comparison, was slightly less exciting but probably more tranquil.

hiking, Torres del Paine, mountains, Patagonia, Chile, sunlight, morning light, Olympus, photo, trekking, travel,

Peaceful trails

creek, hiking, Torres del Paine, mountains, Patagonia, Chile, sunlight, morning light, Olympus, photo, trekking, travel,

Roaring waters

tree, hiking, Torres del Paine, mountains, Patagonia, Chile, sunlight, morning light, Olympus, photo, trekking, travel,

A very unique tree

So, while the weather had been iffy in the morning, it improved as the climb up happened.  Sadly, we did have some cloud coverage at the top of the towers as you can see in the photos.  We heard that they cleared up later – just the nature of the weather down in Patagonia:  you never know!  Though mildly disappointed, it was still a great feeling to make it up there.

hiking, Mirador Las Torres, Torres del Paine, Patagonia, Chile, Olympus, photo, trekking, travel

For those who may need coordinates…

hiking, Mirador Las Torres, Torres del Paine, Patagonia, Chile, Olympus, photo, trekking, travel

The beautiful lagoon and cloud-covered peaks of the Torres del Paines

hiking, Mirador Las Torres, Torres del Paine, Patagonia, Chile, Olympus, photo, trekking, travel

My roommate Dave and I – ’til the next trek!

And then leaving the Torres del Paine National Park…

Once we returned to the refugio, we did the usual (pit stop, eat something, etc.) and then picked up our stuff and started to make our way out of the park and our phenomenal 5-day hike of the W circuit of the Torres del Paine.  The vistas continued to be breathtaking all the way until the end of the hike, pretty much.

Torres del Paine, mountains, Patagonia, Chile, sunlight, morning light, Olympus, photo, trekking, travel, Refugio Chileno

Looking along the creek/gorge near the Refugio Chileno

Torres del Paine, mountains, Patagonia, Chile, sunlight, morning light, Olympus, photo, trekking, travel, Refugio Chileno

Just beautiful!

Torres del Paine, mountains, Patagonia, Chile, sunlight, morning light, Olympus, photo, trekking, travel

Leaving the gorge area

Torres del Paine, mountains, Patagonia, Chile, sunlight, morning light, Olympus, photo, trekking, travel

One final bridge and it is over… 🙁

Torres del Paine, Patagonia, Chile, sunlight, morning light, Olympus, photo, trekking, travel

Looking back before the final short stretch…

I was on the front group and I ran into the Hotel Las Torres, where the bus was picking us up, to make a pit stop when I spotted the bar.  And that’s when I remembered how, upon finishing descent from Mt. Kilimanjaro, one of my fellow trekkers, Len Stanmore, and I grabbed a beer (I wish I could have added “cold” as an adjective but it wasn’t…) to celebrate.  So I ordered a beer for me and fellow trekker Paula who was there with me and we celebrated completing the W circuit in proper form!

trekker, beer, hiking, Mirador Las Torres, Torres del Paine, Patagonia, Chile, Olympus, photo, trekking, travel

Done and cheers!

With this, I end the series of the hike in the Torres del Paine National Park.  It is as beautiful a landscape as there exists in this planet:  the Chilean Patagonia.  I have been blessed with seeing it once as more of a tourist (in 2010) and again, fulfilling a wish I had since 2010, of returning to trek the W circuit so I could see everything further up close than in 2010.  I am lucky guy indeed.

lagoon, hiking, Mirador Las Torres, Torres del Paine, Patagonia, Chile, Olympus, photo, trekking, travel

A happy trekker


Go back to day 4 of this Patagonia trek!

——————-  Check out other treks    —————–

Kilimanjaro

Romania

Camino de Santiago

Nepal

Save

Trekking the W Circuit at the Torres del Paine: Day 4

A windy night at Refugio Los Cuernos

I woke up around 7 AM on day 4 after a night thinking the place we were staying at was going to blow away at any moment.  On top of that, something right outside our window kept hitting the window on and off throughout the night (we discovered in the morning that the window was perfectly shut and it was making the noise).  I am told the gusts we experienced overnight were between 80-100 km/hr!  I wanted to go outside to look at the lake as the wind was howling to perhaps take video or a photo – I did but ran back inside!  A little later, the skies cleared a little and we were rewarded with a view of the cuernos (towers) of the Torres del Paine graced by a rainbow!

rainbow, Refugio Chileno, lodging, Torres del Paine, national park, Chile, Patagonia, nature, outdoors, photo, Samsung Galaxy

Rainbow over los cuernos

It was still very windy…

The wind along Lake Nordenskjold howled

But, it wasn’t just the refugio!  We started our hike and it was windy for a good bit of the first half of the hike along Lake Nordenskjold!  We could see white top waves on the surface of the lake.

Lake Nordenskjold,Torres del Paine, national park, Chile, Patagonia, nature, outdoors, photo, Olympus

The white tops of the lake’s waves

Lake Nordenskjold,Torres del Paine, national park, Chile, Patagonia, nature, outdoors, photo, Olympus

The wind created some beautiful sights

Lake Nordenskjold,Torres del Paine, national park, Chile, Patagonia, nature, outdoors, photo, Olympus

And with a rainbow to boot!

Until we turned a corner around a small peninsula.  Then that part of the lake was flat as it could be!

Lake Nordenskjold,Torres del Paine, national park, Chile, Patagonia, nature, outdoors, photo, Olympus

On the top and right of the lake in this photo, you see the wind’s effect. The rest is flat!

Lake Nordenskjold,Torres del Paine, national park, Chile, Patagonia, nature, outdoors, photo, Samsung Galaxy

From then on, nice and flat!

The winds and gusts along the way were so strong that they would throw you off balance.  We learned to crouch quickly at the first hint of a gust (or after it hit others first!).  I believe one of our guys was lifted up an inch even with his backpack!  It was surreal.

Refugio Chileno, lodging, Torres del Paine, national park, Chile, Patagonia, nature, outdoors, photo, Samsung Galaxy

Not even the wind can stop my friend Bridgit!

Maybe a tiny bit scary but, actually, more thrilling than scary (except when it threw me sideways once…).  Don’t believe me?

Check out this one minute video I took at the refugio and along the way!  (turn down the volume as it is noisy but don’t mute your speakers!)

Despite the winds (constant at around 40-50 km/hr with gusts exceeding that), hiking along the lake was quite a neat experience.  It was just beautiful! Lunch was shredded chicken sandwich on bread that was actually “stamped” with the name of the refugio we had left, “Los Cuernos“!

sandwich, bread, Los Cuernos, Torres del Paine, Chile, food, photo

An authentic “Los Cuernos” sandwich!

Past the wind and on to the Campamento Chileno!

The hike (about 15km / 9mi) took us about six hours counting our stops and towards the end got away from the lake and went through some private lands.

Refugio Chileno, lodging, Torres del Paine, national park, Chile, Patagonia, nature, outdoors, photo, Samsung Galaxy

Two of my fellow Morocco/Camino trekkers: Always good to see friends!

Refugio Chileno, Torres del Paine, national park, Chile, Patagonia, nature, outdoors, photo, Olympus

I guess we have to be careful, Mick Jagger may be around!

Torres del Paine, national park, Chile, Patagonia, nature, outdoors, photo, Olympus

The massif

Lake Nordenskjold,Torres del Paine, national park, Chile, Patagonia, nature, outdoors, photo, Olympus

Plenty of photo opps along the way!

Torres del Paine, national park, Chile, Patagonia, nature, outdoors, photo, Olympus

Cool bridge – right before our lunch stop!

The final stretch of the trail heading to the Campamento Chileno was gorgeous, along what I would call a sort of canyon or gorge (but maybe not as narrow as a gorge?) but it had some very steep hills toward the end!  I will end this post with photos after we left the shores of the lake and heading inland to our refugio for the night!

Refugio Chileno, Torres del Paine, national park, Chile, Patagonia, nature, outdoors, photo, Olympus

Leaving the lake behind

Refugio Chileno, Torres del Paine, national park, Chile, Patagonia, nature, outdoors, photo, Olympus

Neat landscape

Refugio Chileno, Torres del Paine, national park, Chile, Patagonia, nature, outdoors, photo, Olympus

The canyon or gorge looking towards the Campamento

Refugio Chileno, Torres del Paine, national park, Chile, Patagonia, nature, outdoors, photo, Olympus

The canyon or gorge looking towards the lake

Refugio Chileno, Torres del Paine, national park, Chile, Patagonia, nature, outdoors, photo, Olympus

The canyon or gorge looking towards the lake

——————  More about this trek!  ——————

Back to day 3.

And on to the last day:  day 5!

——————-  Check out other treks    —————–

Kilimanjaro

Romania

Camino de Santiago

Nepal

Save

Trekking the W Circuit at the Torres del Paine: Day 3

Day 3 started with me looking out the window from my room at Refugio Paine Grande to the tents that some slept in.  It is incredibly hard to believe anyone could sleep in those with the high winds experienced.  But, some did!

Refugio Paine Grande, Torres del Paine, Chile, hiking, trekking, Patagonia nature, adventure, photo, travel, Olympus

The campsite at Refugio Paine Grande on a wet morning

It was a nice start to the day though it would not remain so for the entire hike that day.

Refugio Paine Grande, Torres del Paine, Chile, hiking, trekking, Patagonia nature, adventure, photo, travel, Olympus

Sun rising…

Refugio Paine Grande, Torres del Paine, Chile, hiking, trekking, Patagonia nature, adventure, photo, travel, Olympus

Looking towards the torres at Refugio Paine Grande

Refugio Paine Grande, Torres del Paine, Chile, hiking, trekking, Patagonia nature, adventure, photo, travel, Olympus

Looking at one wing of the refugio

Headed to the Campamento Italiano and the French Glacier

We left camp around 9:15 AM.  Our next meal would happen about 3 hours later…

Skottsberg Lake, Torres del Paine, Chile, hiking, trekking, Patagonia nature, adventure, photo, travel, Olympus

Walking along Skottsberg Lake headed to Campamento Italiano

The main attraction for the day would be to see the valley of the Glaciar Francés (French Glacier).  To get there, we would detour from the main route taking us from Refugio Paine Grande to our destination for the night:  Refugio Los Cuernos.  It would imply a very long day of hiking to the Campamento Británico (British Camp) and back out requiring a steep climb.  I was not sure I would have the energy for the very long day that would result from the hike (a total of 15 miles in about 10 hrs) but was not going to miss it if the group went (always a good motivator!).  But the weather made the decision for us.  Visibility was going to be too low for the trek to the valley to be worth it.  However, our leads suggested that we hit the “mirador” spot from which one could, at least, see the glacier.  After a lunch stop at the Campamento Italiano (Italian Camp), we left for the mirador, despite slight rain, and it was a nice compromise worth the trouble (about an hour roundtrip – not bad!).  We also saw the Paine Grande Glacier above the French Glacier.

Campamento Italiano, Torres del Paine, Chile, hiking, trekking, Patagonia nature, adventure, photo, travel, Olympus

Arriving at the Campamento Italiano

Campamento Italiano, Torres del Paine, Chile, hiking, trekking, Patagonia nature, adventure, photo, travel, Olympus

Upon arrival at the Campamento Italiano

ilivetotravel, Glaciar Frances, French glacier, Torres del Paine, national park, Chile, Patagonia, nature, outdoors, photo, Olympus

The view of the French glacier

rocks, Torres del Paine, national park, Chile, Patagonia, nature, outdoors, photo, Olympus

Beautiful smooth rocks

On to Refugio Los Cuernos

The remainder of the hike went smoothly though the weather was not spectacular.  It was very muddy at spots and there were a few places were boards had been placed to walk on since it got too muddy.  On one of those, I lost my balance as the planks were not quite horizontal and I fell off.  Luckily for me, I nailed the landing (2 ft down).  Wish there were a video of it!  Still we enjoyed the closer views of the torres as we headed to our resting place for the night (and a hot meal!).Torres del Paine, national park, Chile, Patagonia, nature, outdoors, photo, OlympusTorres del Paine, national park, Chile, Patagonia, nature, outdoors, photo, OlympusTorres del Paine, national park, Chile, Patagonia, nature, outdoors, photo, Olympus

And finally… at the Refugio Los Cuernos!

Towards the last part of the hike, we hit Lake Nordenskjold and by 4 PM, we made it to the refugio.

Refugio Los Cuernos, lodging, Torres del Paine, national park, Chile, Patagonia, nature, outdoors, photo, Olympus

Welcome to Refugio Los Cuernos!

We enjoyed white fish for dinner, wine and games.  I was out like a light before 10:30 PM!

Refugio Los Cuernos, lodging, Torres del Paine, national park, Chile, Patagonia, nature, outdoors, photo, Olympus

Typical room at the refugio

Refugio Los Cuernos, lodging, Torres del Paine, national park, Chile, Patagonia, nature, outdoors, photo, Samsung Galaxy

Dinner was always a good time to chat!

Refugio Los Cuernos, lodging, Torres del Paine, national park, Chile, Patagonia, nature, outdoors, photo, Samsung Galaxy

Outdoors at the refugio – it was very windy!

We were one happy bunch, and not forgetting why we were doing this:  for the kids!

nature, outdoors, travel, photo, Refugio Los Cuernos, lodging, Torres del Paine, national park, Chile, Patagonia, nature, outdoors, photo, Samsung Galaxy, Torres del Paine

Trekkers and the supporting crew

——–  Read more about the trek ———

Day 1 at Torres del Paine

Day 2 at Torres del Paine

On to day 4 at Torres del Paine!

Hiking around Fitz Roy in Argentina

Save

Hiking the Torres del Paine W Circuit | Patagonia Day 2

After a successful day one in the Torres del Paine National Park, in southern Chile, we were ready to embark on day two.  This day would have re-trace our route from day one in reverse to get us to Refugio Paine Grander where we would spend the night.  It would be the only trail we would do a round-trip on. However, this day would start with a real treat.  It would include a Grey Glacier hike!

Good morning from Refugio Grey

As the group was too big to go as one onto the glacier, the group was split into two groups.  To my disappointment, I got assigned to the group that was leaving earlier that morning.  I like my sleep when I can get it.

I woke up 30 minutes earlier than I needed to, not on purpose.  Electricity had not yet been turned on at the refugio at that time in the morning, something I had not known (or stopped to think about) so it took me by surprise – and I had not been ready with my headlamp so I went out of the room in the dark.  Off I went, fumbling my way to the restroom down the hall…  Fun times!

Crossing the lake to get to Grey Glacier

After we all had breakfast, etc. we left the building to get going on the glacier hike.  We broke up into our two groups and off we went to the shores of the glacier.  The boat ride was uneventful, very short – around 20 minutes.  Getting off the boat was tricky as there was a big gap.  We had to jump to a narrow ledge on the rocks that was wet.  Happy to report that we had no accidents in either group!

On the moraine

At that point, we had to walk some along the moraine in order to get to the ice proper.  It took about 2 hours under a constant drizzle.  It made me nervous that the rocks were wet with the soft rain so I probably went slower than my normal.  The rock was slate which was surprisingly not slippery but the “doubting Thomas” in me wouldn’t take risks 🙂  I did not get to appreciate how beautiful this part of the hike was was until the return hike back to the boat when I was more awake, it was not raining, and I was riding high after the time on the glacier!

Grey glacier, Chile, Torres del Paine, W circuit, glacier hike, Olympus

Our group after making it to the edge of the icefield

Give me my crampons and set me off

In any case, we got on the glacier proper and we were excited to get to the spot where we would enter the ice field.  At that spot, the gear was waiting for us.  A brief presentation showed us how to walk on ice and not die – or something like that.  Then, we proceeded to put on the crampons (mine looked like Peary or Amundsen used them over 100 years ago in their epic hikes through ice…), learned to use the ice pick, and climbed onto the ice.

Grey glacier, Chile, Torres del Paine, W circuit, glacier hike, Olympus, crampons

My crampons – antiques!

Finally on the real Grey Glacier hike

It had stopped raining shortly before getting to the ice.  The timing was great so we could enjoy being on the ice and not deal with water falling on us.  It did not rain again during the rest of our glacier hike – at least my group which went first. But it rained at the end of the hike of the second group. A good reminder to always be prepared for rain!  Fortunately, the sun was out most of the time which made for beautiful pictures.

We greatly enjoyed looking down crevices (I have to admit being a little gun-shy of getting too close to the edge)  Also, it was neat to see pools of water on the ice that looked like mirrors.  In total, we spent somewhere between an hour and hour-and-a-half on the glacier itself.  The hike on Grey glacier was a really neat experience that I would recommend as part of the W Circuit hike.  Or, actually, anywhere else in the world you can do a glacier hike!

Grey glacier, Chile, Torres del Paine, W circuit, glacier hike, Olympus

My friends Mira and Kim – real explorers!

Grey glacier, Chile, Torres del Paine, W circuit, glacier hike, Olympus

Beautiful colors!

Grey glacier, Chile, Torres del Paine, W circuit, glacier hike, Olympus

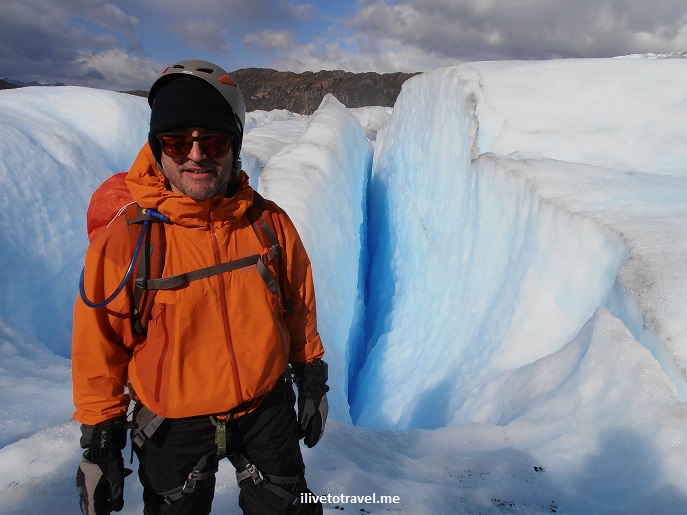
Posing with all my Grey Glacier hike gear on

Grey glacier, Chile, Torres del Paine, W circuit, glacier hike, Olympus

Trekking along the glacier – so cool!!!

Grey glacier, Chile, Torres del Paine, W circuit, glacier hike, Olympus

Coming off the ice field onto the moraine under MUCH better weather!

Comparing the Grey glacier hike to my Franz Josef glacier hike in New Zealand

I couldn’t help but compare this glacier hike to my helicopter ride onto the Franz Josef glacier in New Zealand.  On the one hand, flying the heli to the glacier saved time so we spent more time on the glacier.  Plus just the thrill of flying in a helicopter and enjoying a magnificent approach to the glacier.  On the other hand, climbing the moraine at Grey Glacier was a fun experience.

However, I have to say I’d prefer doing Franz Josef over this one as we got to crawl in ice caves and do things like that over there.  But I enjoyed the Grey Glacier hike nevertheless because glaciers are amazing.  And I was with good friends, out on a beautiful day walking on ice!

glacier hike, blue ice, outdoors, adventure

Fun at the Franz Josef glacier

A brief stop at Refugio Grey

We made it back to the Refugio Grey after the glacier hike.  There we enjoyed some lunch prior to getting going on part two of our day:  hiking back to Refugio Paine Grande, where we had landed by boat the day before.  The lunch was a delicious plate of spaghetti and meatballs as you can appreciate from the picture below!

spaghetti, Refugio Grey, lunch, Chile, Torres del Paine, trekking

Delicious!

The main hike of day:  headed to Refugio Paine Grande

We started off on our hike at 3 PM which felt late.  It rained a good bit on the trail that day so I did not take as many pictures as I would usually do.  The good news was that the rain was hitting us from behind vs. the front which is way more annoying.  Not being able to take photos was not a big disappointment, though, because we were on the same trail we had walked the day before in the other direction to get to Refugio Grey.  Things finally cleared up when we were getting to the end of the trail (around 7 PM) which was nice.  I got a couple of pictures in anyway to remember the end of the day.

Torres del Paine, Chile, trekking, hiking, South America, Olympus

Not ideal weather but it was not hard rain either…

Torres del Paine, Chile, trekking, hiking, South America, Olympus

The weather was beginning to clear up…

Torres del Paine, Chile, trekking, hiking, South America, Olympus

My hiking partner that afternoon was Mira. We were thrilled to see the refugio ahead and blue skies!

The end of a fun but long day in Patagonia

Day 2 on the W Circuit was almost one for the books.  In spite of the rain, it was a pretty incredible day on good account due to the Grey Glacier hike!  And after a great meal (meat with mashed potatoes, red wine and a brownie!), the time to rest came.  I gladly climbed on my bed as the wind howled outside – nice to be dry and warm inside!!

Torres del Paine, Chile, trekking, hiking, South America, Olympus

My bed was the bottom one!

——–  Read more about the trek ———

Day 1 at Torres del Paine

Day 3 at Torres del Paine

Hiking around Fitz Roy in Argentina

Hiking the Torres del Paine W Circuit | Patagonia Day 1

My first visit to Patagonia left me wanting to go hiking the Torres del Paine National Park.  That was 2010.  Luckily, the opportunity arose in 2015 to return to Patagonia to trek the W Circuit, the set of trails that goes around the Torres del Paine peaks in the park.

Back in 2010, I was not into hiking but I recall seeing people who had just finished the hike.  I was left wondering what it would be like and wishing I got to do something like that.  So, the wish became true when the opportunity arose with my friends from Trekking for Kids.  And now here I was on day one of the five day trek!

Getting to the starting point at the Torres del Paine NP

We had made it to Puerto Natales, the gateway to the Torres del Paine, from Argentina where we had gone hiking around Fitz Roy.  That was one long and mostly forgettable drive – hours and hours.  At least the bus the group had was fairly comfortable.  And the group was fun.

In any case, on day 1, we left Puerto Natales early in the morning.  We had to cover the 2-hour+ route to get to the port where we would take a catamaran to cross Lake Pehoé.  The boat ride took about 30 minutes. But, before getting on the boat, we got a preview of the majesty we would be getting ourselves into and explore during our hike.

The peaks or towers of the Torres del Paine stood before us in simple but great majesty.  Do you agree??

Chile, Patagonia, Torres del Paine, W circuit, hiking, trekking, travel, photo, lago Patos,Olympus

The Paine Grande on the left and the towers/peaks on the right. Awesome view!

Chile, Patagonia, Torres del Paine, W circuit, hiking, trekking, travel, photo, lake Pehoe,OlympusThis boat ride would take us to the Refugio Paine Grande, the starting point in our hike.  Right at the departure “port,” we saw evidence of the fires that ravaged the area a few years ago.  The trees were reminders of the fragility of the environment there (or anywhere, for that matter).Chile, Patagonia, Torres del Paine, W circuit, hiking, trekking, travel, photo, dead tree,OlympusThe map below shows where we took the catamaran (A), where we landed at near Refugio Paine Grande (B), and where we were going to hike that day, Refugio Grey (C).  The next day we would return to and stay at Refugio Paine Grande again.Chile, Patagonia, Torres del Paine, W circuit, hiking, trekking, travel, photo, map,Olympus

But, before hiking the Torres del Paine, let’s have lunch

The ride was smooth and the views were awesome, especially because the day was so beautiful.  By the time we got to the refugio, it was about lunch time so we had lunch at the refugio.  The meal was simple but pretty tasty and, certainly, hefty enough to help us with the trek ahead.  However, by the time I was done eating the lentils and rice dish, I was longing for a nap, not a hike 🙂

Chile, Patagonia, Torres del Paine, W circuit, hiking, trekking, travel, photo, refugio Paine Grande, lentils, food, Olympus

My first lunch on the trail!

Off to Refugio Grey

We got on our way to Refugio Grey around 2 PM.  The landscape started a little on the bland side and then we moved through forest of burnt trees before stepping back into the beauty of life with purple, pink and yellow flowers as we bordered lakes.Chile, Patagonia, Torres del Paine, W circuit, hiking, trekking, travel, photo, refugio Paine Grande, OlympusChile, Patagonia, Torres del Paine, W circuit, hiking, trekking, travel, photo, dead tree, Samsung GalaxyChile, Patagonia, Torres del Paine, W circuit, hiking, trekking, travel, photo, wild berries,Samsung Galaxy Chile, Patagonia, Torres del Paine, W circuit, hiking, trekking, travel, photo, dead tree, flowers, flora,Samsung Galaxy Chile, Patagonia, Torres del Paine, W circuit, hiking, trekking, travel, photo, flora, flowers,OlympusApproaching a high point overlooking Laguna Los Patos, we got our first taste of strong winds – and our first long break.  The route is not overly signed but I did like the signs located along the way.

At this point, we had covered 1/3 of the total hike for the day as the sign at Laguna Los Patos shows.  We would encounter a couple more of these signs before reaching our destination.Chile, Patagonia, Torres del Paine, W circuit, hiking, trekking, travel, photo, OlympusSoon after we could see the end of the lake facing the Grey glacier.  In 2010 I had visited that edge of the lake and walked it, resigned to see the glacier from a distance.  This time, I would get to walk on it!!

Chile, Patagonia, Torres del Paine, W circuit, hiking, trekking, travel, photo, Grey glacier, Samsung Galaxy

Behind me, the grounds I walked on 2010!

One of our vantage points, the Mirador Lago Grey, was close to the highest point on this trail sitting at around 250m over sea level.  By virtue of its location and altitude, it offered phenomenal view of the glacier straight ahead.  And it was WINDY up there!!!

Chile, Patagonia, Torres del Paine, W circuit, hiking, trekking, travel, photo, Grey glacier, glaciar,Olympus

About to have the best views of the glacier at this point

Chile, Patagonia, Torres del Paine, W circuit, hiking, trekking, travel, photo, Grey glacier, glaciar,Olympus

Our first full frontal view of the Grey Glacier

Chile, Patagonia, Torres del Paine, W circuit, hiking, trekking, travel, photo, Grey glacier, glaciar,Samsung Galaxy

The next day, we would be hiking on the glacier (the left corner in this pic)!

Chile, Patagonia, Torres del Paine, W circuit, hiking, trekking, travel, photo, Grey glacier, glaciar,Samsung Galaxy

Chile, Patagonia, Torres del Paine, W circuit, hiking, trekking, travel, photo, Grey glacier, glaciar,Samsung Galaxy

Fellow trekkers Jose and Kat fighting the wind to take photos of the glacier

Chile, Patagonia, Torres del Paine, W circuit, hiking, trekking, travel, photo, Grey glacier, glaciar,Olympus

At some point, one must pose for a photo with the glacier!

Among the beautiful scenes I saw was this marsh or bog (not sure what it was, technically) which sat, across the lake, the Grey glacier.  Out of a movie!Chile, Patagonia, Torres del Paine, W circuit, hiking, trekking, travel, photo, marsh, bog peat,OlympusChile, Patagonia, Torres del Paine, W circuit, hiking, trekking, travel, photo, marsh, bog peat,Samsung GalaxyAnother neat spot was when we crossed the small but quite powerful Rio Olguin.  We were getting close to the destination!Chile, Patagonia, Torres del Paine, W circuit, hiking, trekking, travel, photo, Rio Olguin, Olympus Chile, Patagonia, Torres del Paine, W circuit, hiking, trekking, travel, photo, Rio Olguin, Olympus

Overnight at the Refugio Grey

And finally, we arrived, 4 hours and 15 minutes later!  The Refugio Grey was very welcoming and a great place to rest and relax.  The outdoor seating area hosted us as we sipped some wine after showering.  Eventually we made it inside for a great meal (carne mechada and rice chased by chocolate mousse!) and camaraderie.

Soon thereafter, I crashed, ready to let my body recover before our fun-filled day 2.  The sights from this day confirmed for me that hiking the Torres del Paine National Park was a great thing to have aimed for!

Chile, Patagonia, Torres del Paine, W circuit, hiking, trekking, travel, photo, Refugio Grey,Olympus

Welcome to Refugio Grey!

Chile, Patagonia, Torres del Paine, W circuit, hiking, trekking, travel, photo, Refugio Grey,Samsung Galaxy

Outdoor porch – very nice!

———————————————————————————–

Read more about hiking the Torres del Paine NP


Pin this image to your Pinterest board for -perhaps- a future trip to go hiking the Torres del Paine!  

hiking the Torres del Paine, W circuit, Patagonia, Chile

Fitz Roy and Glacier National Park: Nature at Its Best

My recent trek with Trekking for Kids in Patagonia, the southern part of the continental Americas, had two components:

  1. A day hike and a glacier visit in the Argentinian side of Patagonia, and
  2. A 5-day hike in the Chilean side of Patagonia, including a glacier hike.

Here, I will cover the day hike in Argentina.  A later post will cover the glacier visit to Perito Moreno glacier and further posts will cover the 5-hike along the W circuit in the Torres del Paine Park in Chile.

Hiking in Argentina:  Fitz Roy and its siblings

The day hike in Argentina took us to a beautiful setting north of the town of El Calafate in the large southern provide of Santa Cruz:  the National Glaciers Park and Reserve (Parque y Reserva Nacional Los Glaciares).  After landing in El Calafate from Buenos Aires (about 3 hour+ flight time), we headed to the small town of El Chaltén (established in 1985 mainly to serve as a border town and entry point to the area we were going to hike in).  From El Chaltén we would start our day hike anchored on the majestic Fitz Roy peak.  What makes this area magnificent is not just Fitz Roy (which used to be called El Chaltén) but the series of peaks that go with it along the glaciers that sit in the spaces in between.

Fitz Roy, Chaltén, glacier national park, parque nacional glaciares, Patagonia, Argentina, hiking, trekking, photo, travel, Samsung Galaxy, mountains, clouds

The peaks and the town of El Chaltén as we approached at the end of a day

Approaching Fitz Roy taking Senda El Pilar

We left our hotel, El Barranco, on a vehicle to take us to the entry point for our hike.  It was not the typical entry point as we had to cut through a small hotel (Hostería El Pilar) that sits right by one of the entrances to the park (we had permission to do so!).  We reached the trail we were looking for, Senda El Pilar, which we took and followed the Río Blanco facing first Torre Eléctrica and its glacier, then moving on to see the Marconi glacier.Fitz Roy, Chaltén, glacier national park, Senda el Pilar, Patagonia, Argentina, hiking, trekking, photo, travel, Olympus,

Fitz Roy, Chaltén, glacier national park, Patagonia, Argentina, hiking, trekking, photo, travel, Samsung Galaxy, Torre Electrica

Torre Eléctrica initially blocks full view of Fitz Roy upon starting the hike

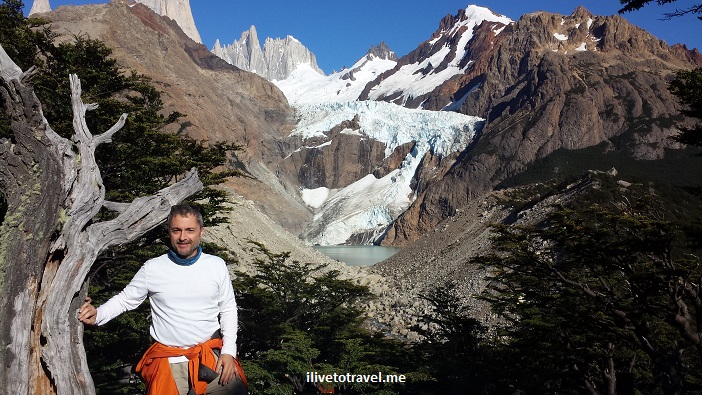
There are quite a few spots to stop for great pictures but Fitz Roy and its siblings are ever-present.  In no time, we got to a point with a great view of Fitz Roy and the Piedras Blancas (“white rocks”) glacier:

Fitz Roy, Chaltén, glacier national park, parque nacional glaciares, Patagonia, Argentina, hiking, trekking, photo, travel, Samsung Galaxy, mountains, blue sky

One of the great views from Senda El Pilar

Fitz Roy, Chaltén, glacier national park, parque nacional glaciares, Patagonia, Argentina, hiking, trekking, photo, travel, Samsung Galaxy, mountains, blue sky

Gotta play with the camera’s features sometime…

Fitz Roy, Chaltén, glacier national park, parque nacional glaciares, Patagonia, Argentina, hiking, trekking, photo, travel, Samsung Galaxy, mountains, blue sky

Headed to Poincenot camp

Fitz Roy, Chaltén, glacier national park, parque nacional glaciares, Patagonia, Argentina, hiking, trekking, photo, travel, Samsung Galaxy, mountains, blue sky

Enjoying a break and the view (Fitz Roy is the tallest and Poincenot peak second tallest)

Soon after that, at Poincenot camp, Senda El Pilar would end and we would then turn to take Senda Fitz Roy to return to El Chaltén.  Poincenot has camping grounds that have latrines if people prefer using those.  From Poincenot, trekkers can go up to Laguna de los Tres but we did not do that portion.

Fitz Roy, Chaltén, glacier national park, parque nacional glaciares, Patagonia, Argentina, hiking, trekking, photo, travel, Samsung Galaxy

Markers were strategically placed along the route

We proceed to take Senda Fitz Roy for the second and longer part of our hike.  On that trail, we hit the Capri Lake where some enjoyed cooling off their feet – or even a quick dip!

Fitz Roy, Chaltén, glacier national park, parque nacional glaciares, Patagonia, Argentina, hiking, trekking, photo, travel, Samsung Galaxy, mountains, blue sky

Lake Capri and the peaks behind it

This was one of the last great vantage points for admiring the peaks and glaciers.  We entered different terrain as we proceeded to the last part of our hike.

Glacier National Park, Patagonia, Argentina, trekking, hiking, photo, travel, Olympus, El Chalten

Along Senda Fitz Roy

Glacier National Park, Patagonia, Argentina, trekking, hiking, photo, travel, Olympus, El Chalten

Along Senda Fitz Roy

Glacier National Park, Patagonia, Argentina, trekking, hiking, photo, travel, Olympus, El Chalten

Along Senda Fitz Roy:  these rocks are much taller than they appear – we saw rock climbers on it

Once we finished the trail, we just walked right into town!

Argentina, Patagonia, El Chaltén, Senda Fitz Roy, trekking, hiking, Olympus, photo

Senda Fitz Roy leads us back to El Chaltén!

Our hike had been around 15 kms and it took us around 7 hours with a few nice stops along the way.  I highly recommend this hike – not strenuous but moderate and with the amazing views I have shown you here (and others I did not!).

Hiking Tips from an Unexpected Climb of Blood Mountain

I enjoy hiking and love exploring new routes.  On one recent hike, near my home in Atlanta, I had the opportunity to learn some lessons in hiking so I’d thought I’d share some hiking tips from that experience.  While these tips may be common sense, the refresher is always good…  But before I share the hiking tips (located at the end of the post), let me tell you what happened…

The setup to the story

Living in Atlanta, Georgia I have access to great hiking an hour and a half away from the city at the southern end of the Appalachian Mountains, host of the famous Appalachian Trail (AT) that runs from north Georgia all the way to Maine.  There is nice hiking closer to Atlanta (like around the Chattahooche River National Park) but for longer and more strenuous hikes (and overall better vistas), I like going up to the north Georgia mountains despite the trip adding a 3-hour round trip to and from the mountains.

I was looking for a long hike to do on a daytrip as part of general conditioning for my hike in Patagonia and I was seeking a loop, instead of an in-and-out hike.  A good friend who also enjoys hiking offered to come along (I don’t hike solo) and we set out to do Jarrard Gap Trail connecting it to the Slaughter Creek Trail by traversing a 1.85 mile stretch of the AT for a total hike of around 5.75 miles.  It was a great hike but I learned some lessons in hiking from an unexpected twist in our hike…

While I have hiked in interesting places (like the Transylvanian Alps in Romania and Mt. Kilimanjaro), I am not an expert hiker who knows all the tricks of the trade, who is used to half-missing signage, who is secure in his inner compass, etc.  So I rely on maps and stuff I find on the Internet to create a route.  (My friend Val in Real Life would probably laugh her rear off at my lack of innate outdoor skills!)  On this occasion, my friend and I got a little complacent thinking we had clear in our head the route we were taking.  I will first share with you the hike we DID as it was definitely diverse in terrain and views, and enjoyable, if long.  I will then tell you what we THOUGHT we were going to do that day and highlight the difference between the two.  And then, I will share some lessons I learned!

The innocent start to the hike

After driving about 1.5 hrs, we arrived at Winfield Scott Lake, a rather small lake at the start of our hike.  To get there, we passed the entrance where visitors are supposed to take an envelope and place $5 in it and drop it in a locked box.  One is supposed to tear off part of the envelope and hang it on the rear view mirror of the vehicle (the number on that stub and the envelop in the locked box would match, telling the part ranger that this car has paid).  There were no envelopes to be found so we improvised and dropped the fee with a label that indicated my license plate in case someone checked.  We doubted anyone would be checking on this Sunday but we preferred being good citizens.  I took a picture of what I dropped in in case I needed it later to fight a citation!dollars

The actual hiked route

We entered the trail and, after crossing a narrow and single-side handrail bridge, we were dumped on a paved road where we saw a house with Halloween decorations still on the mailbox (this would prove useful later!).  There was a simple sign indicating the way and we walked maybe 0.25 miles on the road until the real entrance to the real Jarrard Gap Trail.

Appalachian Trail, north Georgia mountains, hiking, trail, Jarrard Gap, photos

On the Jarrard Gap Trail

The terrain was a nice upward slope but not too intense.  Nice views of the downhill on this winter day.  Once we exited this trail at the Jarrard Gap, we walked a little to the next set of signs which helped point the way in this 4-way intersection.  Except it was not all too clear as it did not have any of the names in our map.

Someone told us which way was the AT and we walked little on it until we saw the white mark that is used to mark the AT so on we went.  So we entered the AT in the direction of Blood Mountain.  There were slight (rolling, I would call them) downhills and flat bits of terrain.  We passed a camp area on the left after having taken a quick break, and soon on the right we saw the trailhead to the Freeman Trail which sort of parallels the AT (it re-meets the AT on the opposite end).  At that point, we were 2.6 miles from our beginning point and so we went off on Freeman Trail.

Freeman Trail is about 1.8 miles of very different terrain than what we had been on on the Jarrard Gap Trail and the AT.  At parts narrow, often very rocky (small and big), it was actually a fun trail to hit as long as one is not expecting a cozy walk.  We were not.  We even passed an icy spot on our way to the other end of the trail.

We understood we would exit Freeman Trail and take the AT in the direction back towards the entrance to Freeman Trail.  But, before setting on the AT, we stopped to eat our lunch at this popular intersection.  At this intersection, besides the AT and the Freeman Trail, there is a trail that leads to a parking lot 0.7 miles away.  That parking becomes probably the point with the shortest route up to Blood Mountain.

Appalachian Trail, north Georgia mountains, hiking, trail, Blood Mountain, Samsung Galaxy, photos, climb

At the spot where Freeman Trail hit the AT

By taking the AT in the direction of the entrance we took into the Freeman Trail, we were proceeding to ascend Blood Mountain which, at near 4,400 ft, is the fourth tallest mountain in the state of Georgia and one of the most popular mountaintops in the state with breathtaking views all the way to North Carolina and Tennessee.

The climb to the summit was hard.  Rocky and steep with many switchbacks, with vegetation everywhere.  It definitely worked out my gluteus maximus and my hamstrings!  I had the same trouble I had had on Day 4 on Kilimanjaro after passing the Barranco Wall segment of that hike.  I carried a 16-lb backpack as part of my training but ended up emptying my extra bottle of water (one that I carry precisely as a way to drop backpack weight should I feel like I need to; it is not the water I expect to consumer during the hike). It indeed was a challenge – an unexpected one – but I am glad I did it as it was good training for my upcoming hike and a great workout.

Appalachian Trail, north Georgia mountains, hiking, trail, Blood Mountain, photos, climb

On the way to the summit!

At some point, we reached a clearing with large smooth rocks replacing the ground, like how Stone Mountain is when you are climbing it.  We stopped briefly and chatted with some folks who had gone up ahead of us; they had not heard of Slaughter Creek (which was a little unnerving but they had come from the “nearby” parking lot so they were likely not expecting to hit the creek on the other side of the mountain).  From this clearing, one could see Stone Mountain and Atlanta in the distance.  That was very impressive given how far north we were.

Appalachian Trail, north Georgia mountains, hiking, trail, Blood Mountain, photos, climb

The view from the clearing

The AT is well-marked with rectangular white boxes painted on trees and rocks so no issues knowing where we were so we continued on it as we knew the AT would connect to the Slaughter Creek Trail.  Not long afterwards, we reached the summit which has a neat rock outcropping from which to soak the entire view.  It is located right next to a nice shelter structure for those who stay overnight (further down, there is a “privy” or basic toilet facility).  After checking the view and confirming which of the two possible ways was the way down (other than the one we came up from), we began our descent which I welcomed as going up had been hard.  I read later that the side we went up was harder but I am glad we did it that way because going down that way would have killed my knees with all the rocks…

The descent was uneventful.  We passed a campsite area on the left and it was a little mis-leading as the white box marking the trail made us think we had to detour at the campsite because the other part of the trail did not have the white rectangular boxes.  But the crude wooden map on the campsite and a brief exploration of the other trail (where we saw a sign that said “Water” and pointed down that path) led us to determine that the unmarked way was the way to go.  Confidently we moved forward and downward and soon we ran into a trio that confirmed for us that was the way down indeed.  So it was nice to have that validation.  They told us that we would make a left at the steps at the bottom that were still iced over.   The descent was not too rocky at all so that made it better for our knees.

We reached the iced-over steps and felt really good that we were on the final stretch.  We walked maybe 0.4 miles before we hit the entrance that we had taken to enter the Freeman Trail and then returned to repeat backwards the way in – a final 2.6 miles to get to our parking lot.  Along the way, we had forgotten about the road we had been dumped into before hitting the real Jarrard Gap Trail.  Thankfully, the house that still had Halloween decorations on the mailbox saved the day as we remembered having passed it.

The INTENDED route

So after having read what we did.  Here is what we had intended to do…

We were supposed to get on Jarrard Gap Trail (check) and hike it until it ended at the Jarrard Gap (check) and then connect with the AT (check) and walk towards Freeman Trail (check) but continue 0.4 miles past the entrance to Freeman Trail without taking Freeman Trail (NOT CHECKED!).  After the 0.4 mile stretch, we would encounter the trailhead to Slaughter Creek Trail which would have taken us back to the road near Winfield Scott Lake.  End of a moderate day hike.

That, ladies and gentlemen, is what we were supposed to do.  5.75 miles that could have taken us 2.5-3 hrs, perhaps.  I will explain what happened next but stay tuned for hiking tips at the end of the post!

What went wrong on this north Georgia mountain hike? 

No, no banjos or bears

The map from the website where I got the route instructions did not label the trails the proposed route would take us on.  Thank goodness there was a clear map at the parking lot by the lake that had trails with names on them.  We could not quite reconcile this map to the one in our printout so we took a photo of the map so we could have handy along the way (boy, was that a good idea!).

map, Appalachian Trail, north Georgia mountains, hiking, trail, Blood Mountain, photos,Jarrard Gap

The parking lot map

However, the map sort of helped get us confused – we saw that there was clearly a way from Freeman Trail on to Slaughter Creek Trail (via the AT) so we thought we were good.  But, what we failed to grasp was the increased distance such a route meant:  instead of our intended 5.75 mile plan, we ended up doing about 10.5 miles (per our reconstruction of the facts once back in the comfort of our respective homes).  This is how…

Remember when I said earlier that we encountered the start of the Freeman Trail so off we went on it?  Well, as you read on the “intended route” bit above, we were not supposed to take Freeman Trail.  The route instructions we had printed were just highlighting that at mile 2.6 we would encounter the trailhead for Freeman Trail. The explanation of the route was peppered with beautiful photos that certainly kept us from focusing on reading the text carefully as, upon careful reading later, we realized it never indicated that we needed to get on the Freeman Trail!

0.4 miles after passing the Freeman Trail, we were supposed to find the start of Slaughter Creek Trail at which point we would be returning along the same-named creek.  After a while on Freeman Trail we wondered if we had missed a turn 0.4 miles after we had started on it to find Slaughter Creek Trail (the connection to that trail was not evident in the map from the parking lot).

Appalachian Trail, north Georgia mountains, hiking, trail, Freeman Trail, Olympus, photos

Along the Freeman Trail

We should have turned around…  However, the map we had taken a picture of did show that we would hit the AT again and would swing back to hit Slaughter Creek Trail at some point (which we didn’t realize was much later than expected…).

And so we kept going on the rougher trail that is Freeman Trail.  Partly perhaps because we were distracted by our conversation and maybe partly because the trail was unusual (narrow, rocky, with more interesting vegetation that leafed-out winter trees).  Maybe it was just such a nice day for a hike so why rush it?  Eventually,we ran into a man and his dog and we asked him how far to hit the AT and he told us “one mile or so.”  We were taken aback but pressed on as we knew this way we would get to where we wanted to go.  We finally hit the AT and decided it was time to sit down and eat our lunch.  We had worked hard and had, at least, the same effort to go still to finish!

As we continued the hike by getting back on the AT, I still didn’t realize we were headed all the way to the top.  I thought this trail would swing on the south side of the mountain and some other trail would take hikers all the way to the top since I didn’t think the AT would run through mountaintops.  But we agreed we didn’t want to backtrack across the Freeman Trail so we went forth.  I think this was a good decision as, at least, we experienced reaching the top of Blood Mountain.

Appalachian Trail, north Georgia mountains, hiking, trail, Blood Mountain, photos, climb

Yours truly on the climb to the summit – note the white mark towards the bottom

The descent from Blood Mountain was uneventful except that we totally missed the entrance to the Slaughter Creek Trail!  When we reached the spot where we were supposed to turn off, we ran into a group of folks and we briefly chatted as we passed each other (after having seen a sign indicating the trail was coming up) and seemed to have missed the trailhead.  We had seen a little of the creek but missed the fact that we lost it at some point.  Or we assumed that for part of the trail, it would not be right by us. I am not really sure.  Anyway, we realized something was amiss when… we encountered the sign that marked the entrance to Freeman Trail that we had seen a few hours before!

At this point, I don’t think we were in the mood to backtrack and find Slaughter Creek Trail.  We understood we had missed the entrance and, given how much we had done already, we decided to back out the way we had come in via the Jarrard Gap.

Appalachian Trail, north Georgia mountains, hiking, trail, Jarrard Gap, Olympus, photos, climb

Back in the familiar territory of the Jarrard Gap

So, there you have it.  A series of mis-steps that, while annoying, did give us what looking back was a challenging and rewarding day of hiking.  However, there are lessons to be learned and that is also a good by-product of this experience!

hiking tips, lessons in hiking, Appalachian Trail, north Georgia mountains, hiking, trail, Blood Mountain, photos, climb

Neat view from the summit of Blood Mountain

Key lessons learned for future hikes

  • Read the route carefully, pay attention, and if it does not explicitly say to take a trail, do not; do not be distracted by pretty pictures!
  • Use a clear map that labels all the trails and shows a scale so you can properly estimate things.
  • Snap a photo of the route map (or download it if it exists in that format); great way to study what is going on if you think you took a wrong turn or presented with an unfortunate trail intersection where the sign is missing or damaged -> yes, all too common.  The signs are useful but don’t count on them being there or usable.
  • Corroborate the route on another website if possible; sometimes hikers post comments on their experience on the particular trail and highlight some potential gotchas; most helpful!
  • Signage will not always be clear so the points above are important.
  • Cell service, though not always available, can be available at some clearings.  GPS is great as long as the signal can find you…
  • Be prepared with enough food and water (we were, mercifully).  You never know what happens.  Hunger is preferable to thirst if you have to prioritize – though I doubt that you have to pick one or the other.  Also, while you may plan properly, your hiking partner for the day hike may or may not be like you.  So a little extra of both food and water can’t hurt to be extra safe.
  • Bring a headlamp even if you think you are hiking in the daytime (had the hike been even longer than we thought, it would have started getting darker).  Again, not a lot of weight and just helps you be ready in case things do take longer than expected (either because you got lost, or someone twisted an ankle and you proceed at a much slower pace, etc.)
  • Always hike with someone. The enjoyment of solitude in the midst of nature can be the point of hiking for some – but not for me.  I enjoy hiking with someone whether for good conversation or just general keeping company.  But also, if something goes wrong, I want another head thinking about things along with me!
  • Never stop hiking because you had one hike were you were not “with it.”  That is how one learns and it can still be very rewarding and worthwhile – plus it gives you a good story to laugh at and not take yourself too seriously!  And one does learn…

Regardless of all this, if was great to be able to do such a long hike to help my training for Patagonia and to prove to us that we were fit enough for such a hike combining length and climbing.  I look back at the simplicity of the mistake we made and how it really changed the nature of the hike.  BUT, I am most glad I got to do all I was planning to do that day PLUS get to the top of Blood Mountain!!

——————————————————————————–

Read about other hikes in Georgia that I have taken once or several times!

Sope Creek

Sweetwater Creek

Island Ford

Tallulah Gorge

Panther Creek

On the Camino de Santiago: Day 7 from Lavacolla to Santiago!

The big day arrived on Day 7.  On this day, we departed on the Camino for the last time as we left lovely Pazo Xan Xordo to enter Santiago de Compostela as many have done over the last 1,000 years on this ancient pilgrimage for the final 2.5 hours of our trek.  We were excited but were also on a schedule as we needed to arrive on-time to attend Pilgrim’s Mass at the Cathedral of Santiago de Compostela at noon.  Since this Mass gets packed, we wanted to be there at minimum 30 minutes in advance.  We wanted to sit on the nave on the side of the altar in case they used the “botafumeiro.”  They did not, to our great disappointment, but if they had, it would have flown right over us!

Cathedral, Santiago de Compostela, Camino, The Way, pilgrimage, Spain, España, Espagne, travel, photo, Olympus

Waiting for Pilgrim’s Mass to start

Monte de Gozo

But I get ahead of myself.  So we left Lavacolla sharp at 8 AM and made one stop at the impressive Monte de Gozo on the outskirts of town.  It was from this vantage point that pilgrims would get their first glimpse of the final destination.  “Gozo” means happiness which is exactly what the pilgrims would feel at this point after so many months/years of hiking their way across Europe and Spain.  I was more impressed by the monument built here and taking pictures of the sun showing through the top of the monument.

Monte de Gozo, Santiago de Compostela, Camino, The Way, pilgrimage, Spain, España, Espagne, travel, trekking, hiking, photo, Olympus

The monument at Monte de Gozo

Monte de Gozo, Santiago de Compostela, Camino, The Way, pilgrimage, Spain, España, Espagne, travel, trekking, hiking, photo, Olympus

Each side of the monument commemorates something different

Monte de Gozo, Santiago de Compostela, Camino, The Way, pilgrimage, Spain, España, Espagne, travel, trekking, hiking, photo, Samsung Galaxy

Loved catching the sun through the glass cross

The great arrival in Santiago de Compostela

At some point in the walk (I think it was on a big downhill), we stopped being “outside” of Santiago and entered the outlying sectors of the city.

Santiago de Compostela, Camino, The Way, pilgrimage, Spain, España, Espagne, travel, photo, Olympus

One of the last villages we passed before entering Santiago proper (after Monte de Gozo)

We crossed a long bridge over a highway and we felt like this was the final stretch.  OK, it was a long final stretch and we did stop at a café to make a final pit stop and to get a snack (not sitting down).  We knew once we hit Santiago, we were likely not going to get a break until noon Mass ended so this was a smart choice!

sign, Santiago de Compostela, Plaza del Obradeiro, Camino, The Way, pilgrimage, Spain, España, Espagne, travel, trekking, hiking, photo, Olympus

Welcome to Santiago de Compostela!

As we got closer, it seemed the streets got narrower which kept making us more eager to finally get there.  I was eager to see the reaction of my fellow trekkers when they first saw the Cathedral (I had been there in 1994 already).

Getting the Compostela and Pilgrim’s Mass

Our plan was to hit town and immediately head to the Pilgrim’s Office (on rua Vilar) to get our “Compostela,” the certificate granted to those who complete the Camino.  A nice volunteer from Ireland named (of course) Mary helped English speakers with instructions to be ready to step inside and get the Compostela; a few questions were asked and the credencial (passport) was briefly examined.

Cathedral, Santiago de Compostela, Plaza del Obradoiro, Camino, The Way, pilgrimage, Spain, España, Espagne, travel, trekking, hiking, photo, Olympus

Pilgrims filling out their papers while waiting for their Compostela

It was an exhilarating moment to get the Compostela (after standing in line about 25 minutes) even if I briefly embarrassed myself by telling the lady that she had gotten my first name wrong.  She politely told me that they write the first name in Latin not in its regular form…  As soon as I got to the hotel later, I took photos of the Compostela just in case something happened to it on the rest of the trip!

Cathedral, Santiago de Compostela, Camino, The Way, pilgrimage, Spain, España, Espagne, travel, photo, Canon EOS Rebel

The big moment of getting the Compostela!

We had been told we could not take our backpacks in for Mass so we then proceeded to drop off our backpacks next to the Pilgrim’s Office for 2 euros.  We then were free to make our way to the Cathedral but, first, we took quick group and individual photos in the Plaza del Obradoiro in front of the Cathedral.

Cathedral, Santiago de Compostela, Plaza del Obradoiro, Camino, The Way, pilgrimage, Spain, España, Espagne, travel, trekking, hiking, Trekking for Kids, photo, Olympus

Our Trekking for Kids group posing in front of the Cathedral

We then moved in to claim our spots for Mass and we took turns while we waited for the start of Mass to go behind the main altar to see the tomb of Santiago (St. James), after all, all this started because of him!

Cathedral, Santiago de Compostela, Plaza del Obradoiro, Camino, The Way, pilgrimage, Spain, España, Espagne, travel, photo, Olympus

Another detail of the interior

Cathedral, Santiago de Compostela, Plaza del Obradoiro, Camino, The Way, pilgrimage, Spain, España, Espagne, travel, St. James' tomb, photo, Canon EOS Rebel

St. James’ tomb

Cathedral, Santiago de Compostela, Plaza del Obradoiro, Camino, The Way, pilgrimage, Spain, España, Espagne, travel, photo, Olympus

Details from inside the Cathedral

Cathedral, Santiago de Compostela, Plaza del Obradoiro, Camino, The Way, pilgrimage, Spain, España, Espagne, travel, altar, photo, Canon EOS Rebel

A side altar

During Mass, in the part where they greet the pilgrims, they mention groups by name.  I had told them at the Pilgrim’s Office that we were a group, Trekking for Kids, from the U.S. and Canada and it was neat to hear us greeted during Mass.

We had heard that because 2014 was the 800th anniversary of St. Francis doing the Camino, the Church of San Francisco (St. Francis), not far from the Cathedral was issuing another certificate to pilgrims (the “Cotolaya“) so we went later that day to claim it (at this point, we would have taken any certificate issued to pilgrims, I think!).

Church of San Francisco, St. Francis, Santiago de Compostela, Camino, The Way, pilgrimage, Spain, España, Espagne, travel, trekking, hiking, photo, Olympus

Walking towards the Church of San Francisco (St. Francis)

Church of San Francisco, St. Francis, Santiago de Compostela, Camino, The Way, pilgrimage, Spain, España, Espagne, travel, trekking, hiking, photo, Olympus

Main altar at the Church of San Francisco

So our week-long trek along this millennial pilgrimage came to a glorious end.  It was a unique experience and I loved returning to Santiago de Compostela of which I will write some more in another post.  I have some suggestions for those considering the Camino.  Keep an eye out for that post!

—————————————————————————————————————

Read more about my Camino:

Day 1

Day 2

Day 3

Day 4

Day 5

Day 6

On the Camino de Santiago: Day 6 from Salceda to Lavacolla

Day 6 saw our last full day of our walk along the Camino de Santiago as Day 7 would be a short day.  Day 6’s walk took about 5 hours (perhaps about 18 km) not including our lunch stop at Amenal.  I felt both excited at getting close to the finish line and also a little bit sad that the end was so close.  We left the hotel (and our luggage) in Salceda after a good breakfast and walked a few minutes to get back on the Camino.  Along the way, I had been collected the needed stamps on my “credenciales” (pilgrim’s passport); these are required to be able to get the “Compostela” certificate upon arrival at the offices in Santiago de Compostela.

Camino de Santiago, passport,Lavacolla, Spain, España, Espagne, trekking, hiking, pilgrimage, travel, photo, outdoors, Olympus

The pilgrim’s “passport” (credenciales) that you must stamp every day

Camino de Santiago, passport, pilgrim,Lavacolla, Spain, España, Espagne, trekking, hiking, pilgrimage, travel, photo, outdoors, Olympus

Proudly showing my stamped “credenciales” (or pilgrim’s passport)

Sights along the Camino

As usual, our way was a mix of fields of flowers, small forests, farms, and churches.  And the ever present signs pointing the way.  Here are a few of the images from this day in our trek.Camino de Santiago, nature, Lavacolla, Spain, España, Espagne, trekking, hiking, pilgrimage, travel, photo, outdoors, Olympus

Camino de Santiago, yellow flowers, Lavacolla, Spain, España, Espagne, trekking, hiking, pilgrimage, travel, photo, outdoors, Olympus

Beautiful field of yellow

Camino de Santiago, Lavacolla, Spain, España, Espagne, trekking, hiking, pilgrimage, travel, photo, outdoors, Olympus

Camino de Santiago, flowers, hydrangea,hortensia, Lavacolla, Spain, España, Espagne, trekking, hiking, pilgrimage, travel, photo, outdoors, Canon EOS Rebel

Hydrangeas were popular along the way

Camino de Santiago, Lavacolla, Spain, España, Espagne, trekking, hiking, pilgrimage, travel, photo, outdoors, Olympus

Just keep following the signs…

Camino de Santiago, church, Lavacolla, Spain, España, Espagne, trekking, hiking, pilgrimage, travel, photo, outdoors, Olympus

Church

Camino de Santiago, church, Lavacolla, Spain, España, Espagne, trekking, hiking, pilgrimage, travel, photo, outdoors, Olympus

Camino de Santiago, church, Lavacolla, Spain, España, Espagne, trekking, hiking, pilgrimage, travel, photo, outdoors, Olympus

Cemetery

An amazing place to stay:  Pazo Xan Xordo

Once we got to Lavacolla, a stone’s throw from Santiago’s airport actually, we walked a little bit to get to our lodging for the night:  Pazo Xan Xordo.  We were wowed by this 17th century home and farm with its own chapel and beautiful gardens.  This place was a real dream!

Camino de Santiago, hotel,Lavacolla, Spain, España, Espagne, trekking, hiking, pilgrimage, travel, photo, outdoors, Olympus

Pazo Xan Xordo and its front patio

Camino de Santiago, church, Lavacolla, Spain, España, Espagne, trekking, hiking, pilgrimage, travel, photo, outdoors, Olympus

Chapel near the front entrance of Pazo Xan Xordo

Camino de Santiago, church, Lavacolla, Spain, España, Espagne, trekking, hiking, pilgrimage, travel, photo, outdoors, Olympus

The inside of the chapel

It also has a small restaurant but it was not open for dinner so our host dropped us off and picked us back up for dinner in town, where we celebrated being so close to finishing with a great dinner and a dessert I had not had, but seen often, yet:  ice cream cake!

Camino de Santiago, restaurant,Lavacolla, Spain, España, Espagne, trekking, hiking, pilgrimage, travel, photo, outdoors, Olympus

The final dinner on the trail (in Lavacolla)!

Camino de Santiago, ice cream cake, dessert,Lavacolla, Spain, España, Espagne, trekking, hiking, pilgrimage, travel, photo, outdoors, Olympus

The ice cream cake

A perfect ending to another great day along the Camino!

Camino de Santiago, Lavacolla, Spain, España, Espagne, trekking, hiking, pilgrimage, travel, photo, outdoors, Olympus

Yours truly

——————————————————————————————————–

Read more about my Camino:

Day 1

Day 2

Day 3

Day 4

Day 5

Day 7

%d bloggers like this: