Hamburg’s Silent but Loud Witness to World War II

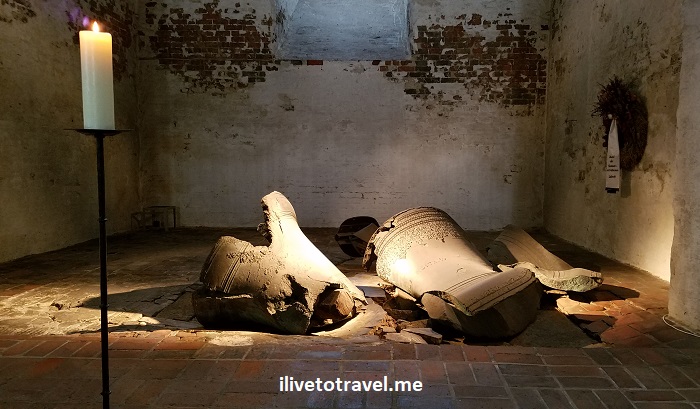
Hamburg, as many German cities, was ravaged by World War II.  You can see sometimes structures that pre-date the war and, then, lots of newer construction post-war.  And there are structures that perhaps were not totally lost but repaired/re-constructed.  But there are rarely any that remain as they were right when the war came to an end.  Plain and simple record of how the city looked.  St. Nicholas Church in the heart of Hamburg is one of those places that silently stand as a testimonial to the destruction of war, almost completely as it stood at the end of the war (minor repairs to the belltower).  (Another example is Kaiser Wilhelm’s Memorial Church in Berlin.)

Hamburg, St. Nicholas Church, Germany, WWII ruins, Hamburgo, travel, Alemania

Tower from the front (L) and from what would have been the inside (R)

St. Nicholas Church and its short history

St. Nicholas Church was not an old church at the time of WWII.  It had been re-built from a fire that destroyed the church as it existed on that site in the 1840s.  The last church was completed in the 1870s and stood fully there until WWII – so it was about 70 years old until it was destroyed by bombs.

Hamburg, St. Nicholas Church, Germany, WWII ruins, Hamburgo, travel, Alemania

A remaining wall by the tower (L) and the opposite end of the church (R)

Hamburg, St. Nicholas Church, Germany, WWII ruins, Hamburgo, travel, Alemania

Detail of the foot of a column

In reading about the church, I learned that, for a couple of years after it was built, it was the tallest building in the world (taken over by the Cathedral of Rouen when it got finished in 1876).

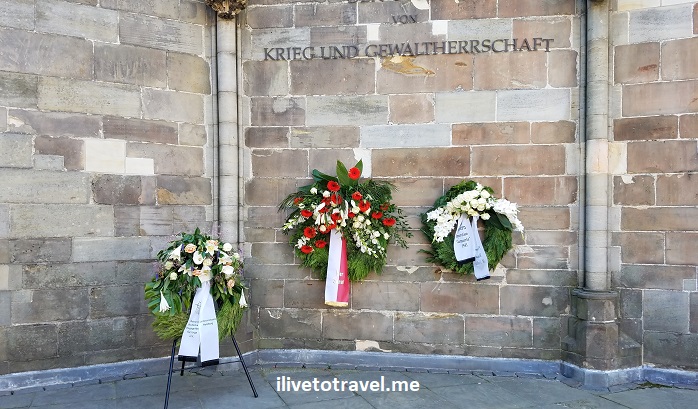
After WWII, the St. Nicholas Church could have been re-constructed but it was decided to keep it as a memorial.  Remaining standing outer walls were leveled years after the war.  Some were not in favor of this as great architecture was lost.  Attention was not paid to the site after that and it further decayed.  That was until 1987 when it was prepared to serve as a place of remembrance.

Hamburg, St. Nicholas Church, Germany, WWII ruins, Hamburgo, travel, Alemania, WWII memorial

Memorial

Great views of Hamburg and its history

Nowaways, one can ascend the tower (for a small fee) via an elevator installed in 2005 and take in views of this great city from 76m high (the tower is almost twice as tall).  At the same time, the viewing area shows pictures of the vicinity as it looked at the end of the war.

Hamburg, St. Nicholas Church, Germany, Hamburgo, travel, Alemania, WWII ruins

Poor picture of one of the photos in the viewing platform showing the destruction around the church

As many cities do, Hamburg has many great corners to explore, such as the Blankenese district in its outskirts.  St. Nicholas Church is one of those places that carries a lot of meaning and conveys it effectively without needing to over-dramatize, over-complicate, or over-explicitly-explain.  Clearly, I highly recommend visiting the site AND going up.  The images from the past and from today are well worth it.  So, to wrap this post up, ere are some of the views from up high!

Hamburg, St. Nicholas Church, Germany, WWII ruins, Hamburgo, travel, Alemania, city center

View of other churches in Hamburg’s city center: St. Peter and St. Jacob

Hamburg, St. Nicholas Church, Germany, WWII ruins, Hamburgo, travel, Alemania, rathaus

Hamburg’s Rathaus and the Binnenalster “lake” in the background

Hamburg, St. Nicholas Church, Germany, WWII ruins, Hamburgo, travel, Speicherstadt, Elbphilarmonie, Concert Hall, vista

View towards the impressive Concert Hall and the Speicherstadt District


Other posts about Hamburg:

st. nicholas church, hamburg, mahnmal, nikolai, memorial, wwii memorial

Check out Hamburg’s Unique Blankenese Stair District

Hamburg, in northern Germany, is one of its largest cities.  This normally would equate to crowded, polluted, and just endless.  Well, it may be a little of those things but I only felt the latter.  Hamburg is really a collection of many areas (as most cities are).  Among the most charming parts of the city is the outer district called Blankenese, one of my 12 cool things to do in Hamburg.  It is a former fishing village – now one of the most affluent neighborhoods of Hamburg.  But its status as a wealthy place is not what makes me recommend it.  Instead, it is its “stairs” quarter – its “treppenviertel“.Blankenese, Hamburg, treppenviertel, Hamburgo, Alemania, Germany, shipowner's quarter

A friend’s recommendation in Hamburg

A friend who lives in Hamburg recommended heading out to the area west of Altona‘s city center to check out the quarter (“viertel“) where ship owners used to live back in the day.  This quarter in Blankenese is in a very steep area leading down to the Elbe River.  Houses were built on the hillside and, given the times, roads were not needed/built but stairs (“treppen“) were.  And there are plenty!

We drove out from Hamburg passing incredible little mansions right by the Elbe River until we got to Blankenese.  We had no precise instructions but, quickly, we realized we had gotten to the point in town in question.

Exploring Blankenese’s “Treppenviertel

At first, we thought we were looking for one major staircase down to the river until we noticed all the big and small paths and stairs connecting all the hillside houses overlooking the Elbe.Blankenese, Hamburg, treppenviertel, Hamburgo, Alemania, Germany, shipowner's quarter

The houses were charming partly due to their architecture, partly due to the views, and partly due to their charming gardens.  It was neat to explore though, as we were heading out to Lübeck, we could not walk around too much.  Suffice it to say, it was well worth the drive out to experience this unique district and also to enjoy the drive along the river passing all the magnificent houses along the way!

Blankenese, Hamburg, treppenviertel, Hamburgo, Alemania, Germany, shipowner's quarter

Nice path’s along the stair district – no paths for cars!

Blankenese, Hamburg, treppenviertel, Hamburgo, Alemania, Germany, shipowner's quarter

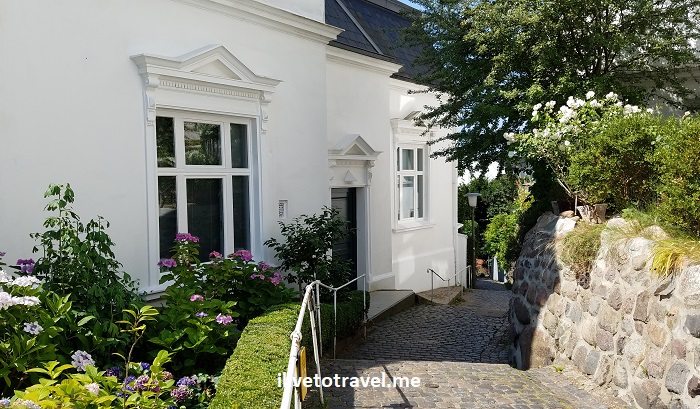
Glad this district’s buildings survived the ravages of war

Blankenese, Hamburg, treppenviertel, Hamburgo, Alemania, Germany, shipowner's quarter Blankenese, Hamburg, treppenviertel, Hamburgo, Alemania, Germany, shipowner's quarter

Blankenese, Hamburg, treppenviertel, Hamburgo, Alemania, Germany, shipowner's quarter

The old hotel by the beach


Other posts about Hamburg:

————————————————————————————————–

If you make it to Hamburg, perhaps to chase Beatles’ history or something, and have extra time, get out of the heart of the city and check out this part of greater Hamburg.  And walk these stairs – it will be good exercise, neat scenery and great views!

Blankenese, Hamburg, treppenviertel, Hamburgo, Alemania, Germany, shipowner's quarter

6 Tips for Visiting Berlin’s Pergamon Museum

Berlin is loaded with history, be it from before Germany itself existed as a political entity, to the times of the “kaisers”, to two World Wars, to the Cold War, and to current times.  The collection of history can be found all over: in churches, buildings, monuments.  But also within the walls of the many museums the city hosts.  The Pergamon Museum in Berlin is one of the preeminent museums of the city – and of Germany.  Before I share my list of Pergamon Museum tips, some background on the museum first…


What is the Pergamon Museum about?

Pergamonmuseum, as it is called in German, covers some of antiquity’s most fascinating history from the Fertile Crescent and adjacent areas.  Think Mesopotamia, Babylon, the Assyrians, etc.  It also goes into older but not ancient history in the Middle East.  For example, the various dynasties that arose after the founding of Islam.  And then into Islamic art as it manifests itself through time and geographies, such as the Muslim era in Spain.

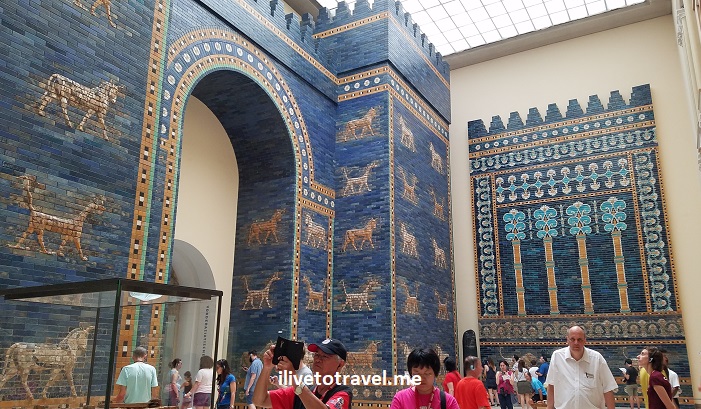
It is a broad range of topics and many may or may not sound familiar.  However, items like the Ishtar Gate and the Market Gate of Miletus are imposing and impressive and likely known to some. (Ishtar may sound familiar because it was the name of one of the worst movies ever with Dustin Hoffman and Warren Beatty…).

Ishtar Gate, Berlin Pergamon Museum, Pergamonmuseum, Babylon
Impossible to get it all in in one shot. Beautifully reconstructed!
Ishtar Gate, Berlin Pergamon Museum, Pergamonmuseum, Babylon
Detail of the gate

The Ishtar Gate was one of the many gates in ancient Babylon and dates from about the 6th century B.C.  Amazing, huh??

What is THE most famous piece in the museum?

However, the most important piece exhibited is the Pergamon Altar.  The Pergamon Altar was not given that name because of the museum but, actually, the reverse.  The reconstructed altar exhibited in the museum was from the ancient Greek town of Pergamon in what is now Turkey.  German archaeologists uncovered it and brought its ruins to Germany in the late 19th century to reconstruct it.

Sadly, the wing where the Pergamon Altar is housed is undergoing major renovations and I could not see this grand piece (bummer!).  The altar will re-open for visitors in 2019 or 2020 after about a 5-year closure.  It better be a grand wing after a 5-year project!

Gate Miletus, Pergamonmuseum, Pergamon Museum, Berlin museums, ancient art
Market Gate of Miletus (as much as could fit!)
Assyrian Palace, Pergamonmuseum, Pergamon Museum, Berlin museums, ancient art
Reconstruction of Assyrian Palace. Here, a Lamassu (human headed bull)

How long has the museum been around?

Its current building dates from 1930 but the original museum was first established in that location, on Berlin’s Museum Island, since 1909.

Berlin Museum Island, Pergamon Museum, Pergamonmuseum, where is the Pergamon Museum, Germany
Pergamonmuseum is on the top of the map

Is all the stuff exhibited real??

It is worth noting that not every item is original.  Some of the items have been re-assembled like complicated jigsaw puzzles from antiquity.  It was not always possible to find every piece to these archaeological puzzles.  So, either the spots were left “blank” or were filled in with material reproducing what was likely in the spot.

Unbeknownst to me, some of the items are just replicas made from molds cast on the original pieces which may sit in another museum elsewhere around the world.  Despite all this, the pieces shown, large and small, help one understand the forms, shapes, colors and motifs that were representative of the different periods.

roof Alhambra, Granada, Islamic art, Pergamonmuseum, Pergamon Museum, Berlin museums, ancient art
Roof from the Alhambra in Granada – great Islamic art
roof Alhambra, Granada, Islamic art, Pergamonmuseum, Pergamon Museum, Berlin museums, ancient art
Mshatta Facade, part of an Umayyad palace in Jordan

All the exhibits are properly signed in German and English with very minor exceptions which are usually tags for small objects here and there.  Most of it will be explained in one of those aforementioned languages!

How long does it take to see the Pergamon Museum?

Let me start by noting that at any given time part of the museum may be closed for restoration or renovations, as I shared earlier.  The museum is currently also being expanded to better flow through its wings.  This means the ancient Greek exhibits are also offline.

So, back to the question:  how long does it take to see the Pergamon Museum?  Of course, some of that depends on whether you are just a walker looking at things as you move or whether you stop to contemplate.  Also, how much of the larger explanatory panels you stop to read (which I highly recommend – otherwise, seeing old objects will not be of much meaning…).  It took me about 2.5-3 hours to see what was available to me.

Aleppo room, Pergamonmuseum, Pergamon Museum tip, Berlin museums, ancient art
Aleppo house room from 1600s, thankfully saved from the destruction going on in that Syrian city

Pergamon Museum Tip #1:  take your time and breaks

It was easy to move through the museum as it was not like a maze.  The two open floors had a flow to them which facilitated staying on course.  It was also a welcomed feature that there were places to sit all over!

Pergamon Museum Tip #2:  make a stop at the restroom BEFORE you enter the exhibits

One unfortunate feature of the museum is that the ONLY restrooms (at least in the wings that were open when I went…) are located on the lobby of the museum when you enter the building, by the lockers.  The restrooms are located OUTSIDE the area where they scan your ticket to access the exhibits.  I suppose you can exit and re-enter the museum but you would have to backtrack down to the ground floor (no exhibits are located on the ground floor).  Most inconvenient and not visitor-friendly at all…

Pergamon Museum Tip #3:  combine visits when you go

Berlin’s Museum Island, where the Pergamonmuseum is located right off Unter den Linden, a main thoroughfare in Berlin.  It is right by the Berliner Dom (Berlin’s Cathedral) and next to at least three other museums on the island (the Bode Art Museum, the Altes Museum, and the Neues Museum).

The DDR Museum, showcasing how life was in East Germany (the Communist one), is also nearby.  While my tolerance for time in museums is likely capped at 4-5 hours for a given day, I suggest coupling the Pergamon with the lighter DDR Museum.  The DDR Museum may take about 1.5-2 hours tops.  Or couple the Pergamon visit with a visit to the Berliner Dom.

Pergamon Museum Tip #4:  avoid crowds

OK, this tip is not rocket science…  Currently, the museum is open 7 days a week from 10 AM until 6 PM, except Thursdays when it stays open until 8 PM.  However, it is a very popular attraction so to lessen the size of the crowd around you, go when it opens (there will be a crowd at any time but maybe a little less).

Pergamon Museum Tip #5:  avoid the line to get in

Who loves standing on long lines?  Yep, silence…  I thought so!  As with many places these days, one can buy tickets online, thereby saving a long line to buy the tickets.  Also, when one gets the tickets online, one reserves a 30-min arrival time slot to get in.  When I arrived, I pretty much strolled right up to the entry guards.  As you can see in the photo below, there was a long and slow line of folks waiting to get their ticket – on a very hot day (there was shade at least where they were standing).

Pergamon Museum, Pergamonmuseum, online tickets, pergamon museum tip
See how long the line is? The sign tells you where to go if you already have your ticket
Pergamon Museum, Pergamonmuseum, online tickets, tips for pergamon museum
To the left, the line. To the right, the clear path to get in!

Pergamon Museum Tip #6:  get the audioguide

The ticket I bought online cost me 12 euros.  This ticket included getting the audioguide, that most necessary of tools to make a museum visit more educational.  Key rooms and artifacts have numbers that one punches in on the audioguide.  The explanations on average are 2-3 minutes long.  Short enough to not bore, and long enough to sit on a bench and rest the feet from all the walking (I had walked TONS around town the days I was there and my feet were achy!).


Clearly, I highly recommend a couple of hours in this museum to anyone curious or fascinated by art, history, archaeology, and such things!  More info on the museum can be found here.


Have you visited the Pergamon?  What was your favorite item?  Other museums in Berlin you like?  Share by leaving a comment!

Save this pin to your travel board!

Pergamon Museum, Berlin museum, Pergamon visit tips, Pegamonmuseum

Great Gear for Climbing Kilimanjaro | Clothing

Planning my hike of Mount Kilimanjaro and the subsequent safari (check out my visit to Serengeti) in Tanzania was not an easy task.  From every angle, it felt daunting.  How to train, what clothing I would need, what items I needed to bring, what constraints we had with bag weight, and on and on.  It is not easy to sift through all the considerations on the gear for climbing Kilimanjaro, especially the clothing.  Some good work is required!

Research is key in planning your gear for climbing Kilimanjaro

Good research was key and I figured that would be the case from the get-go.  That research took many forms.  Talking to people who have hiked Kili.  Reading blogs or websites about hiking it.  Talking to the great folks at REI. And working through the list and advice given to me by the trek organizer (Trekking for Kids) – which was outstanding.  In the end, I still had many decisions to make on what felt could be important things to add to my packing list for hiking Kilimanjaro and the subsequent safari.  Fortunately, I was well armed with information and advice.

This post is geared to those contemplating climbing Mount Kilimanjaro. Or perhaps those just interested in reading about what people wear when they climb Kilimanjaro!  In any case, reaching Kilimanjaro’s peak, Uhuru Peak, is an adventure that requires both cold and hot weather gear. This is so because the mountain has just about every climate zone possible in its 19,340 ft.

I will attempt, as an amateur, to share over a couple of posts what made it to my packing list and how it helped.  This post will focus on clothing (I share in a separate post the key non-clothing items to bring – and why!).  If you are reading this and planning a similar trek, please feel free to leave any questions as comments and I will reply and try to help.  In addition, should you have other suggested items or even better suggestions than mine, please share!  There are more ways to skin a cat than one!

Some details about my gear recommendations

Before I move on to my recommendations for the clothing packing list, a few key items to note:

  • I went on safari after the hike concluded (I highly recommend this!  You are ALREADY there!) so I also include in my packing list things needed for the safari which is mostly regular stuff but just for warm weather.
  • Kili has multiple climate zones ranging from hot to extreme cold – this requires understanding how much of what to bring and your own preferences.
  • I am not laying out all the options possible, especially in clothing, as this post would be five times long and no one would read it, but will share what all the advice led me to choose – happy to answer any questions you may have.
  • I did write about my 7 top items to take on this hike.  It was a high-level view of the question and written before I went on the trip (whereas this one was written with the first-hand knowledge of having completed the trip).  This post will get into more details.

Kilimanjaro, planning, gear, packing, climb, hiking, trekking, Tanzania, mountaineering

Pin it and dream of Kili!

Clothing – Lower Body

Let’s take it from the bottom of the body upwards.

  • Hiking boots – Get good hiking boots AND do your practice hikes using them so you break them in well.  Otherwise you may suffer more during the hike, including dreadful blisters.  Some folks opted for shoes that were more like hiking shoes.  However, I prefer the safety of the ankle support since I am bound to get sloppy when tired.  Sloppiness raises the risk of twisting my ankle and ruining the rest of the hike.  The following are a couple of boots that read well from the product descriptions.  Mine were REI waterproof hiking boots from a long-time ago so no image at Amazon for them.  Study these and their features, and keep in mind that waterproof and comfort reign supreme in terms of choosing boots. Regardless of where you purchase them, make sure you know whether you can try them out and return them if you, once you have tried them out, decide they are not for you.  That’s a great way to be sure to have the right footwear.  Your footwear will be your key ally those days of being on your feet.  (The two shown here represent two different price points to contrast the options.)

Sample 1Merrell Men’s Moab 2 Mid Waterproof Hiking Boot

Sample 2Columbia Men’s North Plains Ii Waterproof Mid Hiking Boot

  • Gaiters – These items help keep mud and scree from doing a number on you by getting into your footwear and becoming a major nuisance.  You will need gaiters during the summit night climb for sure and, more than likely, on the first day if it has rained recently (it had not when we got started, so I did not need them that day).  You do not really need knee-high ones in my opinion; something to cover the possible gap between the bottom of your pants and the top of your boots is sufficient for the one or two times you will use them.  I would say not the most critical of the items but nice to have.
  • Socks – The socks needed for the hike and the ones needed for the safari were of very different kinds.  For the latter, you may not need to be told what to get (anything that helps keep the foot dry is always better than plain cotton but you won’t die if you wear cotton ones; just be more sweaty).  But for the hike, I highly recommend you use a liner to wick moisture away from your feet and then woolen socks over them.  Wetness is a contributing factor (not the main one perhaps) to blisters.  For summit night or other colder days, you will be well advised to have a pair of VERY thick woolen socks.  I was still a little cold in my feet even with the sturdiest of these on summit night – the part of it that I had any awareness…  I understand that our summit night was not the coldest night possible by a bit so, if it can be colder and I was cold with very thick woolen socks, I hate to know how bad it can feel on my feet!
  • Pants
    • A rainproof outer shell was a must to avoid getting soaked if it rained.  However, this outer layer does not need to keep you warm (I used under-layers to handle the cold).  The outer shell is about rain and, also, wind.  I got a hard shell (you can get a soft shell instead if you want).  A key feature I found most helpful are the side long zippers (ankle to hip) that enable you to very quickly put them on (as in, when rain starts all of a sudden…) – a breeze!  Bottom line on these:  windproof and waterproof.
    • When I was not using the outer shell (which was most of the time), I just used my hiking pants as the exterior layer.  I would highly recommend zip-off (convertible) hiking pants for quick adaptability:  if it gets too hot during the day, you don’t have the “do-I-want-to-go-through-the-hassle-of-taking-off-my-boots-to-change-into-shorts?”-type of dilemma…  But it also saved packing both long pants and shorts 🙂  Read through all the details of these and others you may find (all sorts of price points!).  The convertible hiking pants shown don’t need to be anything fancy:  comfortable and with the amount of pockets you feel you want in the right places (and with buttons, Velcro or zippers on them per your preferences).  Basic worked fine for me!

Sample Hiking PantsColumbia Boy’s Silver Ridge III Convertible Pants
or  KÜHL’s  Renegade  Pants
Sample Outer ShellMarmot Men’s PreCip Full Zip Pant Shell

  • Base layer for the legs – Base layers (long leggings) made from merino wool (the best) are important to stay warm.  This layer, given the material, will also keep odors from building up.  This characteristic makes them re-usable for more than one day. Added benefit:  cut down on what needs to be carried on the flights to/from Africa and by the porters.  You can use polypropylene for this layer but I heard merino wool just performs better.  On summit day, you may need two layers of base layer.  I wore two under the hiking pants and then the hard shell on the outside.  Before the trip, I was consistently told that silk is about the best material to help retain warmth next to the skin.  I was surprised when I heard that.  I just happened to have this pair of silk leggings but, once on Tanzania, our lead guide told me to use the two merino layers I had instead of the silk pair and one merino pair.  It worked well enough for me on summit night!
  • Shorts for safari – I wore shorts during the safari (the zip-off hiking pants and an extra pair) but I also did wear my full hiking pants to better protect me from the sun (and bugs, I suppose).  Of course, shorts will also be things you wear in the evening or when exploring towns.

Clothing – Upper Body

  • Base layer– The upper body layering approach is much like the lower body’s.  I used base layers for the colder days – again merino wool.  (Usually one, but two on summit night!)  For lower altitudes, a regular long sleeve CoolMax type of shirt.  As I went up and things got colder, a wool “close-to-the-skin” layer under the CoolMax worked well.  Wool is ideal for skin-contact as it wicks moisture from your skin preventing many things (one of them: smells!).  I show one example below but there are tons from many brands that fit the needs – and varying budgets 😉  Bottom line: no cotton!

Sampletasc Performance Men’s Elevation Ultrafine Soft Merino Lightweight Long Sleeve Shirt

  • Mid layer – I got a merino wool mid-layer to have for the evenings at camps lower than base camp. On summit night, this layer would separate the skin-hugging base layers and the outer layers I will mention next. Tasc‘s Elevation line (of which I show a base layer item above) also has a 1/4 zip hoodie jacket that also combines merino wool with their signature bamboo fiber which may be a great item.  I didn’t have one with a hoodie so I had to wear the regular ski hat if I was cold enough at camp at night. By the way, I am a fan of Tasc‘s regular bamboo fabric t-shirts so I am curious how this one would work.  The Icebreaker item I show below, has the power of one of the best-known and valued brands in terms of quality of merino wool. Normally that means a higher price point.  But this one seems quite reasonable.  Search around when you click through below as they have other versions of the same type of item with some range in price point.  The SmartWool brand, in my short years of serious hiking, has proven to be a good and reliable one.  So theirs is worth reading more about when selecting a mid layer top.  Be wary of items that will themselves as having wool.  A few years ago I clicked on one and it was mostly polyester and only 11% wool.  Always read the product details!!  Note:  An alternative could be a fleece jacket.  There are pros and cons to wool vs. fleece.  One of the main difference is how each performs in keeping you warm when wet (wool is better) and how quickly they dry (fleece is better).  Since I knew I would have the right layers to keep rain off me, then wool was a no-brainer for me.

Sample Mid Layer 1Icebreaker Merino Descender Long Sleeve 1/2 Zip
Sample Mid Layer 2Smartwool Men’s NTS Mid 250 Full Zip T

    • Outer layers –  On the trek, I had an outer hard shell for rain and wind.  I also carried a synthetic down jacket which was great because it was very compact when packed.  I used the latter in the evenings while at camp on cold nights, And, of course, on summit night.  My outer shell was an Arcteryx jacket very much like the one below. Arcteryx is not a cheap brand (I hunted the jacket until I found it on a great sale!) but reading through the item I show below will give you an idea of the features to look for.  Best I can tell, this one is pretty similar from top to bottom to the one I had (except mine was orange).  To keep in mind for summit night:  I used two merino wool base layers, the merino wool light jacket, the hard shell (for wind, not rain), and the synthetic down jacket – which I was not wearing at the beginning of the ascent but which I wore during breaks and once it got too cold even while moving.  It important to plan these well because summit night will be COLD.

Sample Outer ShellArcteryx Alpha SL Jacket

  • Shirts for safari – I had quick-dry short sleeve shirts that also had side vents – very comfortable in warm weather and preventing odors from building up…
  • Head- and neck- gear –  I used different items to cover my head from the cold and from the sun – both very important.  A typical sun hat to protect against the sun (with a rim) was a very good idea.  A skull cap was one of the items I used in cold weather.  In very windy or in rainy conditions, the hood from the hard shell helped a good deal.  I also had a buff which I used when the skull cap seemed like a little much.  In fact, the buff served many purposes, like loosely hanging around my neck to avoid burning up when in the sun.  I also used it to cover my mouth and nose when it got dusty on the trail or in the safari.  Finally, I brought a balaclava for summit night.  It would offer lots of protection with only a small space open to look out.  I could also just use it around my neck (would keep it warmer than the buff would).  So quite a few options!
  • Outer gloves –  You are going to want some extreme gloves! The gloves should be waterproof because you don’t want gloves getting wet where it is cold.  And some good heavy duty insulation (e.g., PrimaLoft). You will still need liners underneath (you would think an extreme glove would be enough…).  My fingertips were still a little cold on summit night even with the liners.  But that eventually passed as I entered “the zone” (read how summit night unfolded)  You also need to decide on the type: mitt or separate-fingers. For that outer layer of gloves, I chose mitt. Plus:  less “surface” exposed to the outside, so keeps more warmth around your fingers. Minus: Lower usability of your fingers since they cannot move independently.  However, the rationale for mitts was that most of the time, I would be holding hiking poles in my hands during the ascent.  For that, the mitt grip worked. Once I wanted to reach for tissues or take a photo, yes, I would have to take the mitts off but that was not a big deal. Even fingered style gloves may have been too thick for some of these motions.
  • Liners – I only used the extreme gloves summit night but the liners I used a lot on the days and evenings prior to summit night.  Maybe bring two pairs of liners of different thicknesses, or one pair of liners and one pair of lighter gloves.  The Grabber hand warmer thingies that generate some heat can be helpful though they do not always seem to generate the same level of heat at high altitude.  Nevertheless, any heat helps so you may want to bring some.

Clothing – sleep time

OK, do I really think you need help with this?  No and yes.  No, because sleep wear is such a personal comfort thing.  But yes because part of it is slightly counter-intuitive.

When you are sleeping in the super-cold weather sleeping bag at night at the higher altitudes and on colder nights, the less you wear, THE BETTER.  No, no, nothing kinky about that statement.  Simply the interior of the super-cold weather sleeping bag will make you feel your own body heat warming you as it leaves your body.  So the more clothing you wear, the less your body heat will work with the sleeping bag to keep you warm.

Other than that, keep the jackets, pants, etc. close to the sleeping bag.  Because when you wake up in the middle of the night to relieve yourself (and, trust me, you WILL if you are taking Diamox), you will need to put those on because you will not be able to go outside in your “sleepwear”!

ilivetotravel Shira Camp with Mt. Kilimanjaro Olympus camera

A happy if tired hiker by his tent and the roof of Africa!  Wearing the merino wool mid layer and the synthetic down jacket.

Can I help you any more with planning your packing list?

So, this is the run-down of the clothing items I’d include in any packing list for a hike of Kilimanjaro.  The items shared here are the things I obtained and used on the hike (and on the subsequent safari).  I have to say my planning paid off.  These items served me very well.  Others may have different additional suggestions on what to add to the list of things to bring to hike Kili.  I hope they will share those here!

Finally, I hope if you were not considering hiking Kili or were uncertain, check out my other posts on the topic (see below) and know that it is fairly attainable with good training and preparation!

Disclosure:  I am not being paid or in any way compensated by the brands whose wares I discuss in this post.  While I would love to sample their products and review them, that is not the case in this post.  I just want to show good samples of the types of items I’d consider.

Save this pin to your board!

What to wear Kilimanjaro, clothing Kilimanjaro climb, packing list Kilimanjaro, hiking


Other related posts that you may want to check out!

Puno Region of Peru | Hope, Bones and Beauty

I spent a few weeks in Peru a few years ago with a week spent traveling around in the Puno region.  This is the region of Peru that borders the shores of Lake Titicaca.  In this post, I want to share what I got see during the visits I made in this most beautiful of lands in Peru.  This visit included time in the Azangaro region and other towns in the area that captivated me.

The main reason for my trip to Peru was work.  I was there to visit projects and their beneficiaries to see firsthand how the projects my organization executed helped combat deep poverty by improving economic livelihoods, health care, education, sanitation, etc.  I was about to see people that as I tourist I would likely not get to see, rural areas most tourists do not visit, and understand how real life is for the millions of people in areas less accessible than the more known Machu Picchu, Lima, Cusco, etc.

It’s not skin and bones – it’s just bones in Lampa

But, as often happens (happily for me), on my way to visit various projects, the local colleagues like to show anything of interest along the way as it both serves to showcase their land and history but also as good breaks for pit stops. Much appreciated, my friends!

One of the MOST interesting things I saw was a church in a town called Lampa. The church is the Immaculate Conception and the town’s distinguished former residents hang around even after they pass away…

Church of the Immaculate Conception, Lampa, Peru

Church of the Immaculate Conception in Lampa, Peru

Church of the Immaculate Conception

Visit to a school in San José, Azángaro

Education is key for the success of children but can be a hardship in the short-term to the families.  In the Puno region, it is likely that the families speak Aymara or Quechua as their home language so the question is how kids learn best.  One of the theories favors bilingual education so assimilation and other aspects of learning are faster or the learnings stick better (I am not an academician on this so take my statements as a layman’s approximation!).

My organization was involved in helping local rural schools develop and sustain educational programs that tap bilingual education so I was taken to to visit a couple of schools – where the children were thrilled to see a visitor sit in their classroom: I became the attraction as the picture below betrays!  What surprised me the most was the children’s chapped faces. You just want to apply lotion all over their dried out skin except that would not be really helpful if it is not sustained.  I have to say they were as happy as they could be though some of the them walked a couple of miles to get to school each way…

Happy kid with very wind-burnt cheeks 🙁

Kids lining up in the schoolyard – some walk miles to get to school…

Fattening bulls to make a better living

Another type of project I visited in the Puno region (in Huancané, to be more precise) dealt with improving economic livelihoods. In this case this was pursued by improving fattening of bulls that the locals would sell so:

  1. They weigh more when they are sold and
  2. They get to that weight faster. In addition, farmers were being empowered to sell the bulls directly to the market instead of relying on intermediaries (who typically mislead them and take a big chunk of the proceeds).

From the one to two years it was taking them to fatten a bull to the size needed to sell it, it now takes them 2.5 to 4 months which means they quadrupled their income.  If you consider the money they don’t have to pay intermediaries (minus the costs they incur to sell the bull), their take is even higher.  These folks usually start with one bull and slowly grow to have 3 or 4 at a time after doing this for a few cycles.  An improvement indeed!

A bull being measured as part of the project’s activities

They emphasized over and over in the various areas I visited how this has helped them get from extreme poverty to just poverty.  They can now send their kids to school, for example.  Fattening time was sped up by simply introducing protein in the diet of the bulls. The cool/smart thing was that the farmers already had most of what they needed.  This was in the form of waste created after collecting the various crops they grow.  Stems, leaves, etc. of different crops that remain after the core product is harvested used to be burned.  But some of these actually are highly nutritious for the bull.  Therefore, they become part of the recipe for the new feed.  The only thing they have to buy is molasses and some powder (I forget what it was).

Myself with the project coordinator and a participant in the project near the home of the participant

Urea?  U r kidding me

Interestingly, I learned that one of the ingredients used in the feed is urea.  During one of the visits the locals prepared a demo for me of the mix being created.  There were about 9 women and each would pour an ingredient.  The molasses, the urea and the powder were mixed in a small tub by a woman with her bare arm and hand.  Then that mix was poured over the big pile.  Suddenly, all the women stepped in to mix it all, again, with their bare hands!  Imagine me standing there.  Having just shaken everyone’s hands upon arriving.  And knowing full well I would be shaking their hands when I left!

Preparing the bull-fattening mix – a demo for me

Well, God has a sense of humor. As I was a special guest and they are very hospitable folks, they prepared some roasted potatoes with white cream.  Additionally, they served cheese some homemade cheese. I was expected to eat.  Otherwise, I would be rejecting their humble hospitality.  Actually more than a rejection, it would be interpreted as they had not offered something good enough for me.  Now, that is something I would NOT do to them.

I had seen a woman rinse her hands earlier.  Therefore, I talked myself into believing they had all sterilized themselves before preparing the food.  I dug in to eat what I thought was the safest of the fare: the roasted potatoes. I had to try the cheese given how it was given to me.  But I successfully skirted the white cream (or liquid). Who knows what that was!  Cow puke (don’t think I exaggerate…)?  Curdled milk?  I didn’t want to find out.  I figured I had done 2 out of 3 and that was a stretch enough!  Plus I didn’t need a case of Inca-revenge on the long drive back…

Locals preparing roasted potatoes in Azángaro, Perú

Preparing the potatoes for the feast

Sewage plant visit

Another type of project I visited in the Puno region was the building water treatment plants for “dirty waters”.  In one visit, they walked me around the tanks explaining the treatment process.  They also explained that beyond building the plant, a key component was to ensure the plant would be maintained and kept “sustainable” without external assistance when the project was over (a lot about local governance, fees, and training folks to do the maintenance on the plant).

Azángaro - Water Treatment Plants, Perú

Some of the sewage tanks on whose edges I walked…

See that pool in the picture above, the one where EVERYTHING comes in?  They made me walk the ledge of that pool to get to the other side.  I kept thinking “how many HOURS away is my hotel if I fall in??”  “what if the earth quakes??”

After one of the visits, a local TV crew was waiting to interview me.  I am guessing it was a small station because we were quite far from the town of Puno in the middle of Azángaro. I was asked what I thought of the water treatment plant. Mind you, I know zilch about water treatment plants – except for what I had just learned.  I guess they thought the foreign visitor must have been an expert if I had come so far to see it…

So, I had to ‘with camera on me’ be spontaneous and say something half smart. To start it off, I said that it was a great benefit to the town, etc..  Then, I added some words about ensuring it gets the right maintenance because it is valuable to all the citizens.  I hope I sounded smart but I missed the broadcast and didn’t get to Tivo it!  I do think I emphasized the right things.  Pat, pat.

More than just development projects

There is a lot to see in the region, such as the islands in Lake Titicaca.  Perhaps a more off-the-beaten-path site is Sillustani.  It is a pre-Incan cemetery consisting of tall stone towers most in ruins.  To be precise, they are from the Aymara that were later overrun by the Incas (the Europeans were not the only ones who wiped out different native populations).  Unfortunately, over time, robbers bombed many of the towers to access their contents.  But they are still impressive structures.  The image at the end of this post if of one of the towers, which would be perhaps as tall as five or seven people standing on top of each other.

The beautiful lands around the Puno region

I have to talk about the scenery here. The land is incredible. There are vast plains surrounded by mountains and the cloud was a perfect blue. That area may normally be called a valley.  But the expanse is so great that “valley” doesn’t conjure the right image. Since it was early winter and it was the dry season, the grass was browning but I still saw some green.

I could see a biking circuit for ecotourists being developed in that area to go visiting small towns and nature areas. But I guess too many tourists would spoil the sense of “real” the area gives. I left the Puno region by plane flying back to Lima from Juliaca wishing I could spend more time in this great land.

The Puno region is more than just Lake Titicaca

I have been very fortunate that I got to go off the beaten path in exploring more than Lake Titicaca and its islands by going further into the Puno region.  Though not really part of a plan, I got to see undeveloped territory and the beauty of the Puno region as it has always been. They say this area looks a lot like parts of Mongolia, Kazakhstan and Afghanistan. The province of Azángaro is by far the one I liked the most in a very competitive field!  Ever since my childhood I have been fascinated a bit by Lake Titicaca (OK, more by the funny sounding name in Spanish…)  Now, having seen the beautiful landscape around it and its deep blue waters, I am definitely fascinated by it and understand how this part of the country is much more than the famous lake!


Pin this image to your board to remember this beautiful Peru region !

Puno region, Peru Azangaro, Huancare, Titicaca, Sillustani

Sillustani, Peru

How Best to Explore Intramuros in Manila

Intramuros is the old district of Manila, the capital of the Philippines.  It carries a lot of history and meaning within its walls as I shared with you in a prior post. Though it is quite distinctive and historic, it is not your typical tourist haven.   That is actually what makes it a key point of interest in Manila:  it is a national treasure for the country itself, not just for tourists.  As a national treasure its reconstruction and growth are managed by the Intramuros Administration (IA).  Maintaining the integrity of the district is very important to the IA and that is a good thing for current and future generations of locals – and the world at-large.

Some of the highlights of Intramuros

The first thing that will catch your attention is the city walls and all the forts, gates, bulwarks, ravelins and redoubts (clearly, I picked up some words related to military fortifications!).  A good starting point in this network is Fort Santiago.  The fort was built by the Spanish starting in the late XVI century and formed part of the city walls that once surrounded Manila, much as the Spanish did in a few of its colonial capitals (like Old San Juan in Puerto Rico).  Protecting the city was important as it was a key connecting point in trade routes for Spain, trade routes that even spanned the Pacific Ocean going all the way to Mexico, one of the richest pieces of the Spanish Empire.  All this rich history makes Intramuros an area to explore around Manila and its environs.

what to see in Manila, Fort Santiago, how to explore Intramuros, Manila travel, Manila, city walls, Philippines, Olympus

The entrance to Fort Santiago from the land side, repaired after WWII

Through the centuries it has changed due to earthquakes, attacks, or modifications.  For example, there use to be a building right around the main gate shown in the pictures – the building was destroyed in a great earthquake that rocked Manila in 1880.  During WWII the fort suffered great damage.  Today, it is set up well for visitors.  You first enter a plaza or park and then cross the moat (which is an arm of the Pasig River) to enter the main part of the fort.

what to see in Manila, things to do Manila, explore old Manila, Fort Santiago, Intramuros, Manila, city walls, Philippines

The moat in front of the entrance to Fort Santiago

what to see in Manila, things to do Manila, explore old Manila, Fort Santiago, Intramuros, Manila, city walls, Philippines, Olympus

You can walk along the walls and look across the river.

what to see in Manila, things to do Manila, explore old Manila, Fort Santiago, Intramuros, Manila, Philippines, photo, Olympus, architecture

Walk along the walls of the fort!

And you can see the place where the Philippines’ national hero, José Rizal, was imprisoned right before his execution in 1896.  A poignant detail you will notice is that his footsteps from his prison to the place of his execution are marked on the ground.

what to see in Manila, things to do Manila, explore old Manila, Jose Rizal, Fort Santiago, Intramuros, Manila, Philippines, photo, history, national hero, Filipino

Lifelike statue of Rizal in his former cell

what to see in Manila, things to do Manila, explore old Manila, Jose Rizal, Fort Santiago, Intramuros, Manila, Philippines, photo, history, national hero, Filipino

Rizal’s walk to his execution

After you are done in Fort Santiago, a short walk takes you to the Manila Cathedral, which has been destroyed and reconstructed more than a handful of times since it was first built in the late 16th century.

what to see in Manila, things to do Manila, explore old Manila, Manila Cathedral, Intramuros, Manila, Philippines, photo, architecture

The Cathedral of the Immaculate Conception built in 1958

The Cathedral shares the Plaza de Roma (used to be called the Plaza de Armas, a key spot in any Spanish colonial town) with the former Governor’s Palace (also destroyed in the past) which now houses government offices, including the Intramuros Administration, which I got to visit.

what to see in Manila, things to do Manila, explore old Manila, Palacio del Gobernador, Governor's Palace, , Intramuros, Manila, Philippines,

The Governor’s Palace

San Agustín Church, the oldest stone church in the Philippines (it opened in 1607), is one of the few buildings still standing in Intramuros that pre-date WWII.  Though it suffered a little damage, it is mostly still the same structure.  Along with three other churches in the Philippines, it is a UNESCO World Heritage site.  Legazpi, the founder of the city of Manila is buried here.  And if you get to visit, check out the ceiling – it plays a trick on the eye:  though it looks elaborately decorated, all that you see is painted on a smooth surface!

San Agustin Church, Intramuros, Manila, Philippines, photo, Olympus, architecture

Interior of the church – everything on the arches and ceiling is painted on!

San Agustin Church, Intramuros, Manila, Philippines, photo, Olympus, architecture

Detail in the interior of the church

Though I call out Fort Santiago, the city walls with all its different components are good places to explore and get up on to check out the views.  Worth noting that right outside the city walls, the former moat was reclaimed during the American period and a full 18-hole golf course established!

Intramuros, Manila, city walls, Manila Town Hall, Philippines, golf course, what to see in Manila, things to do Manila, explore old Manila,

City wall fortifications with the golf course in the background

How to see Intramuros

Depending on the reason for your visit to Manila and how much time you have,  how you do Intramuros may vary.  But whether you only have half-a-day or two days to spare, you should find a guide to show you around for 2-4 hours.  There is a lot behind what you see in Intramuros and you will miss more than half of the story if you only walk around without a guide.  I had a neat tour guide who, though a little too freely-sharing and opinionated, nevertheless presented Manila’s story in a very compelling way.

You can walk the district (it is not too big) or use a calesa to get around a little more comfortably, especially on a hot day.  The good part about walking is that you can meander around with more freedom and take better pictures!

Calesa, Manila, Philippines, Intramuros, transportation, local, travel

Calesas on the run

Finally I would recommend not only visiting Intramuros but staying there one or two nights to soak in the district.  While it is not the most lively area in the evening, there is a perfect spot to explore the old town, watch the sun set, and enjoy the evening breeze:  The Bayleaf Hotel.

Staying in Intramuros

Understanding how to explore Intramuros is one thing but it is also important to know where to stay!  I found it preferable to stay right in Intramuros to enjoy the view at night and not have to deal with traffic.  I stayed at the Bayleaf Hotel which has great views (plus it was the tallest building in Intramuros) and was the only hotel within the city walls.  The hotel sits right by the city walls and Victoria St., a very colorful street worth walking so the location was great.

It is one of the best spots to watch the sun set in Manila (even locals suggested we go there without knowing I was staying there!).   Unfortunately, I did not get to watch the sunset from the hotel as it rained really hard that day (it is the tropics!).  I did go up the next morning to the Sky Deck terrace to soak the awesome 360 degree view.  You can see the golf course built in the site of the moat outside of the city walls.  You can see the tall Manila Town Hall right outside the walls, then the National Museum.  And then you can turn around to see all of Intramuros right below you.  Even if you don’t stay at this particular hotel, find a way to go to the terrace!

Intramuros, Manila, city walls, Manila Town Hall, Philippines, golf course, clouds, sky, what to see in Manila, things to do Manila, explore old Manila,

Looking from the Bayleaf’s Sky Deck towards the Manila Town Hall (notice the golf course)

Manila, Intramuros, Philippines, view, vista, Bayleaf Hotel, cloud, sky, Olympus

View over Intramuros (the Cathedral to the left) towards Manila Bay

I only wish I had been there on a clear day where I could witness an amazing sunset over Manila, perhaps with a tropical beverage and camera in hand, taking it all in…  I guess there is always a return to Manila.  If MacArthur did it, why not me??


Add Intramuros to your Pin board!

Intramuros, Manila, Philippines, Filipinas, history, Spanish, colonial, Fort Santiago, what to see in Manila, things to do Manila, explore old Manila,

Read more details about the history of Fort Santiago here.

I was a guest of the Bayleaf Hotel for the night I was to watch the sun set over Manila.  This trip happened five years ago but I preserve some text on the hotel because I truly do believe its location is ideal for a base to explore Intramuros.

Camino Packing and Training Tips

The Camino de Santiago has become a very popular destination/experience for many around the world, especially after the movie “The Way” hit the movies screens and as more people do it.  People of all ages and nationalities gravitate to this, as did I and a group I traveled with last summer to hike the Camino.  So far, I have written about each of our 7 days in a series of posts (start here with Day 1). But I’d thought I’d devote some time to sharing Camino packing and training tips.

While this is not an exhaustive treatise on each of the topics, it should give you a good high-level understanding on training.  I hope it also helps you develop a good packing list with what to wear and items you will need.  Please feel free to ask questions or suggest your own tips via the comments section below.

Camino de Santiago, Spain, trekking, hiking, camino packing training tips

Camino, Santiago, Spain, old church, camino packing training tips, travel, trekking

How fast can you do the Camino de Santiago

How strenuous the day is on the Camino de Santiago depends on how much ground you plan to cover on a given day.  If you are young (read: in your 20s or early 30s), you likely think you can attack the Camino and do over 20 miles a day, perhaps 30.  That’s crazy talk.  Yes, you physically may be able to but a couple of things:

1.  After a couple of days of pushing this way, your body will let you know how crazy that was.  I have heard the horror stories.  Don’t be over-ambitious.

2.  More importantly, you are missing the point of the Camino.  Yes, getting to the destination is the “aim.”  But the point is to be on a journey, a pilgrimage (whether spiritual or emotional).  Moving at the speed of sound renders this experience as just checking an item off the bucket list.  Which, if it is all it is for you, then fast speed might as well be your friend because you will get bored not seeing it as an experience for such a long way.  No judgment here, just saying that soaking it in is probably best.

The answer to this question could also depend on how much of the Camino are you planning to cover.  I only had a week and had to do the minimum distance to get the Compostela (the famous certificate granted to provide pilgrims with proof that they did indeed make it to Santiago de Compostela).  Therefore, I had to make sure I covered the distance.  Yet, I had enough time to sit for leisurely lunches and also not have to wake up at the crack of dawn.  I’d peg my speed at the mid-point with my max distance on a given day around 12-14 miles.

How to train to do the Camino

Let’s start the packing and training tips for doing the Camino with the latter.  The Camino is not Everest Base Camp or Mt. Kilimanjaro but that does not mean it is easy.  The challenges posed by the Camino are different than those epic climbs.  While altitude is a factor in those hikes, that is not the case with the Camino.

The mountains or hills faced in the Camino will not compare to hiking the Inca Trail to Machu Picchu or getting to Uhuru Peak in Mt. Kilimanjaro.  But if you walk more than the minimum distance required to get the Compostela, you will need to prepare for some good climbs.  And the corresponding downhills (always fun on the delicate knees of a hiker…).

The final factor to keep in mind is that while there may not be tons of steep hills nor altitude, this hike puts a lot of stress on your feet.  When I climbed Kilimanjaro, the distances walked on a given day were well in the single-digits in terms of miles (maybe it got to double digits in kilometer-land).  Yes, it was difficult due to low oxygen and steepness but it was not brutal on my feet.  Don’t get me wrong, when I would arrive at camp, I was desperate to take off my boots!  But the Camino is much more unforgiving when it comes to your feet.  They take a beating, so make sure they keep on ticking.

What to consider to build your Camino packing list

Before I get into the key items for your Camino packing list, clearly whether you are carrying all your stuff on your back or not makes a big difference.  Yes, there is an option to NOT carry it all yourself from place to place!  Now, that may not be your style and all that, and that’s OK.  But, for some, it is the way to go and it was for me 🙂

Regardless of how you do it, I will still issue the same warning:  don’t over-pack.  You will be amazed at how little you can get by with.  A lot less than you think.  And worst comes to worst, you can go to a local store along the way and buy what you need…

But I also say that because going on this journey, in my view, is about changing some parameters about our lives.  Develop new insights, clear our heads, have new experiences, and -hopefully- be renewed in whatever way we may need to.  So, with all that said, here are some things that I deemed important to take along my Camino…

What to pack for the Camino

Feet

  • Good walking shoes or boots.  Without good shoes that you have broken in BEFORE the Camino, you will be in trouble.  Don’t be cheap about this item.  Cheap out on the camera or other items but not on this, my friends!  These could be boots or walking shoes.  The former gives you better ankle protection.  The latter may feel more comfortable.  You may want both to alternate.  After many days of wearing the same show, you may long for a different pair…  Up to you (as are all the tips I share here!).  Certainly, I would say, get waterproof in case it rains.

  • Along with the shoes, go non-cotton socks.  What good is a pair of proper and broken in walking shoes if you are going to just slap on cotton socks?  Cotton socks are an invitation for blisters and the painful fun that means for the few days after you develop them.  Wool socks and, ideally, liners complete the most important focus of your gear list:  your feet.
  • Now, if the socks and shoes don’t do it and a blister seems imminent (sometimes blisters just develop…), you must quickly take action to prevent the blister from materializing. At that point, you want to protect the spot where you are beginning to feel the burning (which is exactly what you feel BEFORE the blister arrives). The simplest and cheapest solution is to place a small piece of duct tape on that spot on your foot. Yes, stop, take footwear off and apply the small patch of duct tape – don’t wait.  So duct tape is a must-carry on any hike with the added side benefit that you can repair other things with it as needed. But don’t carry the roll, for goodness’ sake! Wrap duct tape on a pencil or on your hiking pole and you will save space and weight.
  • In case things go too far and you develop a blister, a blister repair kit is a good idea to bring along.  I was the beneficiary of a fellow’s trekker blister “repair” kit coming down Kilimanjaro and became a believer.  I don’t recall the brand I used on the Camino but the item below is the one I bought for my next hike in Patagonia.

Clothing

Now we can get past all things feet.  From a clothing standpoint, the usual advice applies here.

  • Layers.  The weather can vary and some high spots can get very cold.  And depending on the time of year, it could get quite warm during the day.  So plan to have layers which help manage the changes you may experience throughout the day.
  • Waterproof.  At some point, you may encounter rain so you want proper rain gear which might as well also serve as wind-breaking gear.  In terms of things to wear, make sure it is really waterproof (Gore-Tex). Waterproof also refers to protecting the contents of your backpack, whether by placing a bag over your backpack or putting the contents of your backpack in plastic bags.  Your choice!
  • Wicking.  Since you may not be carrying one-for-every-day in the underwear category and to help your skin remain “un-irritated”, wicking underwear is a good idea.  It removes humidity before sweat covers your skin which prevents bad odors.  And, hence, should you decide to wear them more than once between washings, then at least you know you will not smell!  Because my hike was only 7 days, I had underwear for every day but I still used wicking underwear for the comfort of not developing chaffing, etc.

  • Temperatures.  Plan for a range of temperatures.  This ties to the layers bit but also realize that, at night when you are not hiking, you may want to sit outdoors and it may get chilly at night, even in the summer depending on the weather system on a given day in your area.  So some light jacket in the summer may be appropriate for the evenings; perhaps more substantial at other times of the year
  • Comfort.  Be sure the materials you wear are comfortable to you.  During 6-8 hours of hiking, you want to be comfortable not itching or something else.  When you get to the next town, you WILL want those walking shoes off and will love slipping into some flip flops, sandals or running shoes or whatever other comfortable footwear you like.  Bring only one of those, no need to overdo it, but allow yourself this luxury!  (Flip flops could be handy to shower in communal showers if that’s your accommodation style!)

Miscellaneous

  • Hunger avoidance devices (read: snacks).  You will not hungry on this trek!  Plenty of places to stop and get a snack or a meal at very reasonable prices.  Carrying two boxes of protein or granola bars is wasted weight and space and, more importantly, keeping you from sampling local foods and snacks.  So, just carry what you buy locally or just stop along the way!
  • A camera!  You can certainly opt for a different kind of travel if you are not drawn to capturing memories in this manner.  Journaling, for example, may be a better way for some.  For yours truly, though, the imagery of a place not only captures my attention but is also a way I use to be able to share what I experience.  Along with this go the requisite battery charger or extra batteries and an appropriate number of SD cards 🙂  I do like the wifi SD card which allows me to transfer photos out of my SD card onto another device (good for backup or to clear memory on the SD card).
  • Toiletries and accessories.  Yep, you know what this list is about (toothbrush, deodorant, etc.) so no need to detail it nor give you too much advice.  But I will call out some things…  First, bring travel-sized items.  Second, see how much stuff you can live without.  Do you really need a hair dryer?  (No judgment implied!)  Finally, some items I will recommend…  Some hand lotion/moisturizer is a good idea.  Chapstick is a must.  Also, some antibacterial liquid (e.g., Purell) is a must along,  Finally, add wipies to the list but no need to bring more than a handful per day, actually.
  • First aid.  While there are kits out there, I just go with common sense and practical.  There are drug stores and the like in the towns you will pass so no need to overdo it.  Some band-aids, some anti-diarrhea meds in case you can’t make it to them town (no one had troubles of this sort in our group), some anti-inflammatory in case something hurts (knees, for example), and the like should make a good kit.  As a packing tip, I used ziploc bags that are half of the regular sandwich bag to pack meds.  This eliminated the need to carry bottles which can occupy more space.  Whether you want to get Cipro (digestive system antibiotic), Ambien (to sleep) or anything else, it is up to you and your doctor.  I took none of those meds though I take Cipro when I go to some destinations.  Of course, if you are taking prescription drugs, bring those and write down somewhere the main ingredient (vs. the medication name).  If something happens and you need to get more locally, the main ingredient is what you need.
  • Night light.  If you will be sleeping in shared accommodations, this comes in handy to minimize disrupting others’ sleep and/or preventing you from tripping in the middle of the night as you make a night run to the restroom 🙂  I prefer headlamps like this one so I can be “hands-free”; please don’t make me explain why 🙂

  • Backpack.  Please, whatever you do, do not bring a Swiss Army backpack (well-designed as they are for the frequent traveler) or, even worse, your college backpack.  You will be likely carrying more weight than you are used to.  And, I guarantee, that your back and shoulders will appreciate you bringing a backpack with a waist strap and a chest strap to help distribute the impact of the load  on your upper body.  Plus be sure the main straps and the backpack have some padding where they will touch your body.  Remember, it is many days of carrying it so be good to yourself.  And size does matters, when it comes to backpacks.  Will the size you get be able to fit all that you will carry on your back every day?  Remember, if you want the convenience, there are services that every day pick up your luggage and deliver it to the next place you will stay (if you know in advance).  With this option, you only carry what you need during your walk.  Bottom line:  figure out how much you need the backpack to carry (don’t forget to account for the water!) and then choose a size.

  • Backpack cover.  Along with this, have something ready to cover your backpack if it rains.  Trust me, no matter what they say, water will get in if it rains enough (e.g., think of the zippers).  You can buy a backpack cover (some backpacks come with it) or, save money and bring a nice size, good quality trash bag or maybe even just a cheap poncho.  Additionally, a way to prevent stuff getting wet is by packing items in large ziplocs before placing them within your backpack.  Remember that you are on the go and it may not always be easy or possible to dry any items that get wet.

Need any other Camino packing and training tips?

Alright, there is likely more to be said and advice to be given for someone planning their Camino packing and training.  More than likely, I will make some edits in the future.  In the meantime, feel free to share your thoughts, ask questions, etc. in the comments section.  Remember, your questions or suggestions will likely benefit other readers!  And if you want an Excel version of my Camino packing list (with a lot of the smaller items), leave me a comment and I will send to you.

Buen Camino!

Want to see what every day was like?  Click on the day and read on!  Day 1, Day 2, Day 3, Day 4, Day 5, Day 6 and Day 7


Pin this image to your planning board!
packing doing Camino, packing list, what to wear camino, what to bring camino, what to pack for the camino, santiago, the way

Ascenso a la Cima del Monte Kilimanjaro – Tercer Día

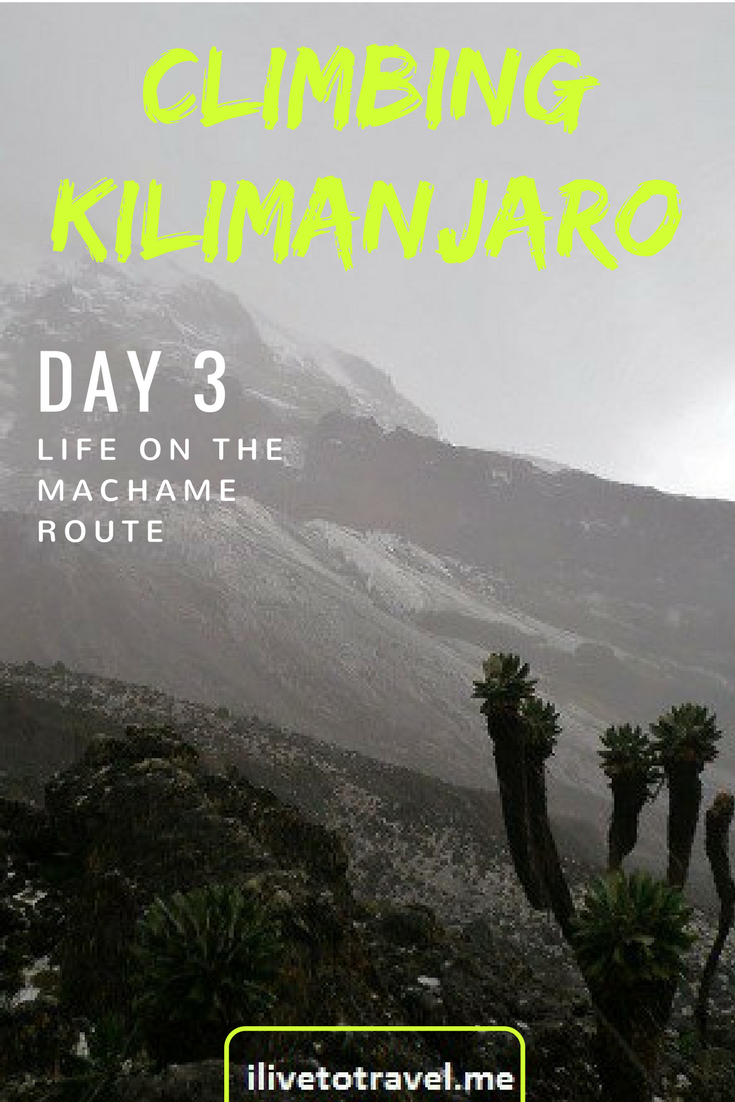
El amanecer en el campamento Shira, donde pasamos la segunda noche durante nuestro ascenso del Monte Kilimanjaro, llegó muy temprano como siempre…  El tercer día en la ruta Machame comenzaba y nos llevaría pasado la Torre de Lava camino al campamento Barranco.  Salimos del campamento alrededor de las 8:45 AM.  El plan para el día era ascender al área conocida como la Torre de Lava (dado la presencia de, sorpresa, una torre hecha de lava antigua) donde tomaríamos el almuerzo antes de partir para el campamento de la noche.  Este día no iba a ser la caminata más larga hasta el momento (el primer día caminamos más) pero igual tenía sus retos.

Sabiendo que iba de 12,600 pies (3,840 metros) a una altitud a la que nunca había ascendido (15,200 pies, 4,630 metros) me tenía más que intrigado, sino un poco nervioso al comenzar el camino esa mañana.  Aparte de en un avión, la altitud más alta a la que había ascendido por mis patitas era 12,550 pies (o sea, 50 pies más bajos de nuestro punto de partida esa mañana…) cuando subí al Pase Pawnee en las Montañas Rocosas en el estado de Colorado más de veinte años atrás…  Pero, adelante!

¿Subir para volver a bajar y perder o ganado?

Ahora, aunque ascenderíamos a la Torre de Lava, volveríamos a descender una buena cantidad para dormir esa noche.  Sí, quizás esté pensando lo mismo que yo cuando vi esto en el itinerario que nos habían proveído antes de partir para Africa:  si ya subí a esa altura, ¿por qué perder lo ganado bajando otra vez?  Es parte de la estrategia de subir alto y dormir bajo.  Este día era casi el modelo de cómo aplicar esta estrategia que permite que el cuerpo se recupere del esfuerzo hecho con menos oxígeno, reposando (leer:  durmiendo) donde hay más oxígeno:  a menor altitud.

ascenso Monte Kilimanjaro, senderismo, subir monte kilimanjaro, montaña, aventura, africa

Nuestra meta: ¡la cima!

Camino a la Torre de Lava

Bueno, pues comenzamos el sendero.  El paisaje comenzó con vegetación de esca altura (con la altitud baja el tamaño de la vegetación por lo limitado del oxígeno, tan importante para la flora como para los seres humanos) pero a medida que ganábamos en altitud se convertía en más escasa hasta que prácticamente ya no existía, reemplazada visualmente por rocas y tierra.

ascenso Monte Kilimanjaro, senderismo, subir monte kilimanjaro, montaña, aventura, africa

Comenzando con algo de vegetación…

ascenso Monte Kilimanjaro, senderismo, subir monte kilimanjaro, montaña, aventura, africa

… y cambiando a nada de vegetación

Claro que estábamos subiendo y el sendero tenía una pendiente pero era una pendiente más gradual de lo que yo esperaba por lo menos.  Aún así, venían los momentos en que tenía que decelerar la velocidad a la que iba.  “Pole, pole“, o “despacio, despacio” en la lengua de nuestros guías locales:  el swahili.  Este dicho sería repetido de ahora en adelante bastante.  Era la manera de acordarnos que éxito en esta montaña requiere paciencia y ser medido, no apresurado.  Así que pole, pole se convirtió en nuestro nuevo lema.  En el grupo todas las mañanas nos pareábamos con una persona nueva para andar juntos en el sendero.  Aunque íbamos en un grupo, el grupo se expande un poco, como un acordeón, entre las paradas pautadas cada hora.  El parearnos con alguien aseguraba que nadie iba solo; si alguien no podía esperar a la próxima parada o tenía que, por ejemplo, atarse las botas, nadie se quedaba solo.  Bueno, esto también proveía oportunidades para conocer a alguien nuevo, a alguien que alentara, y a alguien con quien conversar lo que distraía de pensar en el cansancio.  Bueno, casi.  Aún así, era una buena estrategia.  Mi compañera ese día era una ávida senderista del estado norteamericano de Utah y estaba en perfecta condición física.  Tuvo paciencia cuando tuve mis momentos de lentitud y me alentaba cuando lo necesario.  Lo mejor fue que nos conocimos mejor y, dos años después, cuando coincidimos otra vez en otro trek de Trekking for Kids (esa vez vino con su esposo) fue como reunirme con una vieja amistad.

Volviendo al paisaje, una cosa que había leído es que la ruta Machame, entre otras ventajas, ofrece más variedad de paisaje que otras rutas y esto fue cierto este día hasta llegar a la Torre de Lava y después.

La Torre de Lava

A medida que progresaba la mañana, los cielos comenzaron a oscureserse, y nubes o neblina iban y venían.  Eso sucedió justo al llegar a la Torre de Lava como puede ver en la próxima foto.  La Torre de Lava es impresionante pero yo estaba más impresionado por haber logrado llegar sin percance o terrible dificultad.  A pesar que la vista no fue bonita (bueno, fue no existente), estaba contento.

Torre de Lava, ascenso Monte Kilimanjaro, senderismo, subir monte kilimanjaro, montaña, aventura, africa

La Torre de Lava bajo neblina

Y más contento cuando descubrí que esta vez no almorzaríamos sentado en rocas al aire libre.  Nuestros porteros habían montado la caseta de campaña que usábamos para cenar todas las noches en la Torre de Lava.  Fue como un premio por el trabajo arduo de la mañana.  ¡Estábamos todos muy agradecidos!

ascenso Monte Kilimanjaro, senderismo, subir monte kilimanjaro, montaña, aventura, africa,

¡Hora de almorzar en gran comodidad!

Descenso de la Torre de Lava al campamento Barranco

Y todo lo que sube, tiene que bajar… Así es la vida y esta montaña.  Pero, este día era por la razón que expliqué:  nuestro cuerpo iba a necesitar recuperarse del esfuerzo a menor altitud con más oxígeno.  Así, comenzamos el descenso de la Torre en una bajada empinada y pedregosa al principio.  A pesar de eso, todos estábamos animados, riéndonos.

ascenso Monte Kilimanjaro, senderismo, subir monte kilimanjaro, montaña, aventura, africa, Torre Lava

Comienzo del descenso de la Torre Lava

Pero la madre naturaleza tenía otra experiencia para nosotros en mente…  Comenzó a llover.

Poco al principio.  Y eso enseguida resultó en detenernos para ponernos las capas exteriores a prueba de agua y cubrir las mochila para prevenir que se mojaran los contenidos.  Gracias a seleccionar bien, todo lo que me tenía que poner era fácil de poner, especialmente llos pantalones ya que tenían una cremallera de la cintura hasta el tobillo así no tenía que quitarme las botas – algo pesado y que requería más tiempo.

descenso de la Torre de Lava, ascenso Monte Kilimanjaro, senderismo, subir monte kilimanjaro, montaña, aventura, africa

El grupo preparándose para la lluvia

ascenso Monte Kilimanjaro, senderismo, subir monte kilimanjaro, montaña, aventura, africa, Torre de Lava

Todos cubiertos contra el agua

Una vez listos, reanudamos la caminata en descenso.  Y entonces empezó a caer granizo.  Al principio como que nos pareció bonito que cayera algo de granizo – era algo surreal.  Hasta que comenzó a caer más duro.  Hay terminó la gracia del granizo.  Fue miserable.

En nuestra memoria colectiva y como lo contábamos días después, el tamaño promedio del granizo era como de un pequeño automóvil.  Pero ese día cuando empezó a granizar más duro, parecían del tamaño de una mansión.  Parecía terrible.  Una vez pude ver las fotos en la compu me di cuenta que parece que sufríamos de algún shock mental porque era más pequeños que canicas…  ¡Qué exagerados somos!

ascenso Monte Kilimanjaro, senderismo, subir monte kilimanjaro, montaña, aventura, africa

El granizo tamaño “monstruoso”

La antesala a la gran pared de Barranco

Llegamos al campamento Barranco como a las 4:45 PM y varios del grupo tuvieron que correr a usar la caseta de servicio ya que la última parte de la bajada no hicimos paradas dado el mal tiempo (creo que el líder de los guías estaba preocupado que se pondría peor el tiempo).

Esa noche, durante la cena, el líder (Luis) nos dijo que sólo llovió aproxidamente un ahora y 47 minutos y, que en una escala del 1 al 10, este mal tiempo que pasamos era como un 0.5 en su experiencia (que incluye haber subido más de 20 veces y otras montañitas como Everest muchas veces…).  Nos sentidos un poco ridículos habiendo pensado que habíamos pasado tremenda prueba… un gran sufrimiento…  Y entonces rompimos en carcajadas dado lo cómico de la situación y alguien pidió que le pasaran el plato con el postre (mango).

El campamento Barranco fue el segundo en mi lista de campamentos favoritos en Kilimanjaro.  Creo que el sentirme más cerca de la cima combinado con el marco que nos rodeaba lo hizo uno de mis favoritos.

Uno de mis compañeros del grupo sacó su móvil y encontró señal.   Ofreció que el que quisiera podía tomar prestado el móvil y hacer una cortita llamada a alguien.  Ni corto ni perezoso, aproveché y llamé a mi mamá para decirle que todo estaba bien.  Nada mejor que aliviarle la preocupación a una madre (¡especialmente cuando le dije que me estaba alimentando!) – valió miles de dólares hacer esa llamada aunque no costó tanto, ¡estoy seguro!

La gran pared de Barranco, estoy seguro, esta bien presente en la mente de muchos en el grupo.  Pero creo que represento bien la opinión del conjunto al decir que estar sentado esa tarde/noche en ese campamento, admirando el cuadro frente a nosotros y  lo tranquilo del marco fue lo que más presente tuvimos en el campamento Barranco.  Terminamos el día iéndonos a acostar temprano para descansar bien para poder enfrentar la gran pared de Barranco en el cuarto día bien descansados…

ascenso Monte Kilimanjaro, senderismo, subir monte kilimanjaro, montaña, aventura, africa, campamento Barranco

Campamento Barranco – nuestro hogar esta noche

14 Artículos Claves para el Ascenso de Kilimanjaro

Ascender el Monte Kilimanjaro es una experiencia única – y bastante realizable para una gran parte de nosotros, los “no super estrellas atléticas.” Requiere preparación física y mental, cierto. No es para superhéroes nada más. Pero, subir a la cima de Africa también requiere planificación: qué preparativos hacer, qué traer, cuánto puede pesar el equipaje, etc. ¡La siguiente foto espero comunique visualmente la envergadura de lo que conlleva estar listo para esta aventura!

articulos ascenso kilimanjaro

Si está leyendo este escrito o está explorando un ascenso del Monte Kilimanjaro, o planificando uno, o sólo leyendo para entender más sobre este tipo de aventura. Cualquiera de esos motivos que lo trae aquí (déjenme un comentario al final del escrito y comparta), ¡bienvenidos y espero que encuentre el escrito provechoso! El objetivo principal de este escrito en particular (tengo varios escritos en español y/o en inglés en este blog) es el presentar una lista de los 14 artículos que estimo fueron muy supremamente importantes para mí cuando ascendí Uhuru, la cima del Monte Kilimanjaro tomando la ruta Machame. Cualquier duda, no deje de preguntar que mi objectivo con estos escritos es ayudar a otros a lograr esta meta.

1. Saco (o bolsa) de dormir (”sleeping bag”)

¡Importante: no cualquier saco de dormir!  Tiene que ayudar a mantener a uno caliente mientras se duerme. Los mejores y más calurosos sacos de dormir funcionan mejor cuando uno se pone menos ropa para dormir. Parece ilógico pero estos sacos funcionan así porque re-irradian el calor que genera el mismo cuerpo. Mi recomendación para Kilimanjaro es un saco que sea clasificado para cero grados Fahrenheit (-17 Celsio). O, si tiene uno de una clasificación menor, entonces va a hacer falta un forro (“liner”). Una buena razón para NO usar el forro es que en el medio de la noche, cuando las ganas de ir al baño van a ser fuerte, el forro es un obstáculo más en poder llegar al servicio (lean mi escrito del segundo día en la montaña donde explico por qué esto no es tan sencillo como uno pueda pensar…).

En cualquier caso, el estilo de saco que funciona mejor es el que tiene forma de “momia” ya que limita la cantidad de aire dentro del saco que tiene que ser mantenido caliente. Un saco rectangular guarda más aire por lo tanto es menos efectivo.


2. Toallitas húmedas (“wipies”)

Estas toallitas son el gran “resuelve” para muchas cosas… Si uno necesita ir al baño durante la caminata, estas toallitas ayudan con el proceso de saneamiento… Igual, cuando se llega al campamento después de la caminata del día, estas toallitas son muy útiles en la privacidad de la caseta de campaña para hacer un poquito de aseo ya que no hay posibilidad de bañarse o ducharse esos días. Pero no lleven miles. Hagan un cálculo de cuántas usarían para las actividades mencionadas. Entonces añadan algunas extras por si se necesita para alguna emergencia (derraman líquido dentro de la caseta de campaña, etc.). Y luego, añadan algunas más por si acaso. Pero miles no porque pesan y hay restricciones sobre cuánto peso pueden llevar los porteros (los pesan al entrar a la montaña) y uno mismo tiene que minimizar el peso en la mochila que uno carga lo más posible.

3. Botella “nocturna”

No me refiero para agua. Aunque también necesitan esa de todas maneras y que pueda sobrevivir congelamiento la noche final cuando la temperatura es muy baja. Pero volviendo a la botella nocturna. Me refiero a la posibilidad de ahorrarse un viaje al servicio en el medio de la noche teniendo una botella de cuello ancho y BIEN marcada. Ojo, que no sea muy pequeña porque en una noche, dado que uno tiene que tomar mucha agua todo el día para mantenerse hidratado y también un diurético que ayuda a evitar los efectos de la altura, uno produce una gran cantidad de orina. La botella se vacía en el servicio, se cierra bien, y se guarda para la próxima noche. Para las mujeres, existen unos embudos que dirigen el líquido hacia la botella pero es una cosa más para maniobrar en el pequeño espacio de una caseta de campaña compartida… De nuevo, los refiero al escrito del segundo día para que vean por qué poder aliviarse dentro de la caseta puede ser la manera preferida en el medio de la noche – ¡lo fue para mí!

4. Lámpara “manos libre”

Este tipo de lámpara que uno se coloca alrededor de la cabeza va a ser supremamente importante no sólo si se va al servicio en el medio de la noche o se camina por el campamento de noche pero especialmente crítica la noche del ascenso. Y con esta lámpara y su uso por horas la noche del ascenso, hay que traer bastantes baterías, recordando que las baterías duran menos en altura (no sé por qué, ahora que lo pienso…). También quizás un bombillo o dos de repuesto (yo no lo necesité pero basta que uno no lo traiga…).


5. Análgesicos anti-inflamatorios

Aunque mi preferencia es evitar el uso de medicinas en general, esta preferencia queda suspendida cuando estoy intentando escalar una montaña de 19,340 pies de altura. Habiendo sufrido de problemas con mis rodillas años antes, no estaba seguro como éstas reaccionarían a varios días corridos de horas subiendo y bajando. En verdad, solamente me hizo falta el medicamento durante el descenso, entre el campamento base y el campamento donde pasaríamos nuestra última noche en la montaña. El sendero era extremadamente rocoso y el constante poner todo mi peso a cada medio paso en cada una de las rodillas por sí sola (bueno, y con el bastón) bajando estas piedras nada pequeñas puso en peligro el bienestar de mis rodillas. Por prevención esas últimas cuatro horas tomé un par de Advil (medicina con ibuprofen, un anti-inflamatorio) cada hora para prevenir mayores dolores. Háblenlo primero con su doctor por si acaso pero el mío me dijo que podía hacer esto. Aunque tuve un poco de dolor, no fue nada grande y todo me resultó bien.

6. Pastillas para dormir

No me gusta depender de medicinas como mencioné antes y ciertamente no sabía si estas medicinas para dormir serían peligrosas en altura. La tenía a manos (en mi caso, Ambien) más por los vuelos largos y los primeros días después de llegar a Africa pero no las había consumido. Nuestro guía principal nos sugirió que si las teníamos, que tomáramos media pastilla para poder quedar dormidos más rápidamente y que maximizáramos las horas de dormir. Con el cansancio que tendríamos al final de cada día era posible que fuera tanto que no pudiéramos quedarnos dormidos tan rápido como uno pensara. Le hice caso y todo resultó bien y ¡dormí fabulosamente!

7. Bastones (“trekking or hiking poles”)

Esta aventura va proceder muchísimo mejor con, no uno, pero DOS bastones. Los bastones sirven varias funciones. En las bajadas, apoyarse en estos alivia la presión en las rodillas porque distribuye el peso no sólo en una pierna pero en la pierna y el bastón. En las subidas, cuando hay que lidiar con rocas, los bastones ayudan a uno impulsarse para dar el paso; pareciera un poco ridículo si uno estuviera en una caminata de un día pero cuando se está intentando subir una montaña de la altura de Kilimanjaro, sobre varios días, esta ayudita del bastón puede ser la diferencia… Como ven, creo grandemente en estas herramientas. Recomiendo, además, bastones con amortiguadores. Los amortiguadores verdaderamente hacen una diferencia notable.

Es importante que la empuñadura sea cómoda porque vas a usar estos bastones muchas horas por 6 días. Las hay de varios materiales. Algunos materiales hacen las manos sudar más que otros. Yo opté por unos en los que la parte de arriba era de un material diferente que la parte debajo de esa parte superior. Imagine que conduce un automóvil de cambios (o estándar). La parte de arriba (donde se apoya la mano) sería de un material y la parte de abajo (que uno no toca cuando conduce un auto pero en un bastón sí usaría) de otro. La variedad en material ayuda porque uno agarra el bastón de maneras diferentes, uno quiere cambiar la posición de la mano y la muñeca durante el día. Recomiendo probar los bastones en persona en una tienda especializada. Como yo hago senderismo todo el tiempo (¡de menos dificultad que Kilimanjaro!), para mí hizo sentido invertir en unos buenos bastones.

Finalmente, los bastones mayormente son ajustables en su altura. Esto es importante ya que para la subida no tienen que ser tan largas como cuando uno baja. Poder ajustarlos es bueno porque uno puede mantener el uso de la empuñadura ajustando el largo del bastón.
Bueno, hay bastones de todo tipo y precio así lo mejor es estudiar el tema y escoger lo que mejor le cuadre a uno. Pero estos bastones van a ser importantes aliados para llegar a la cima.

8. Cinta de embalar (“duct tape”)

Cinta de embalar, la que entiendo que se puede ser conocida también como cinta gáfer, es quizás el artículo más curioso de esta lista. ¿Por qué? ¡Porque en verdad uno no sabe en qué maneras lo va a necesitar! ¿Se abre un hueco en la mochila? Usa esta cinta. ¿Siente que te puede empezar a salir una ampolla en el pie? Usa esta cinta. Etc.

En vez de llevar el rollo monstruoso que ocupa espacio en el equipaje y pesa, yo enrollo una buena cantidad alrededor de cada bastón y así siempre lo tengo accesible.

9. Una buena cámara

Bueno, este debe ser obvio, uno no sube esta montaña sin llevarse unas fotitos del evento. Pero claro, la cámara depende de qué tipo de fotógrafo estamos hablando. Un fotógrafo más serio querrá la cámara más sofisticada pero estas pesan… Y mientras más peso se lleva, bueno, mayor la dificultad. Yo opté por no traer mi cámara SLR con sus tremendos lentes. Opté por invertir en una cámara de bolsillo bastante buena ya que la de mi móvil no era tan buena. Además quería tener redundancia por si el móvil se me perdía o la batería se me acababa. Finalmente, podía llevar varias baterías pre-cargadas para esta camarita. Hoy día ya las cámaras de los móviles son tan buenas que entre eso, y un cargador de batería portable pudieran ser suficiente pero uno entonces tendría que llevar varios de estos cargadores ya que no hay dónde re-cargar estos cargadores… Ya quizás hoy los cargadores portátiles con baterías solares son suficientemente buenos para utilizarlos pero… yo no me arriesgaría con una sola solución en el tema de cámaras…

10. Toalla de secado rápido

A pesar de que uno no se va a poder duchar o bañar una vez en la montaña, uno sí se va a poder asearse hasta cierto punto en la montaña y una toalla sería necesaria. Lo más obvio es que uno se va a lavar los dientes ya que uno tiene agua limpia para hacerlo al esterilizar el agua. Además, cuando uno llega al campamento, los porteros que cargan el equipaje y equipo de campamento traen agua caliente a cada caseta de campaña para uno poder lavarse la cara y quizás las manos, brazos y pies; toallitas húmedas van a ser la manera principal de uno lavarse pero con esta agua caliente hay posibilidad de por lo menos refrescar la cara. Por ende, la necesidad de una toalla. Pero, en la mañana, no va a dar tiempo que se seque la toalla entre el lavado de dientes y tener que empacar la toalla. Por lo tanto, una toalla que se seque rápido es vital.

11. Colchoncito inflable

El saco de dormir no va a ser suficientemente relleno para cubrir lo pedregoso que es el suelo en los campamentos, después de todo, uno no va a un terreno baldío o semi-preparado para la comodidad de los visitantes.  Uno va a una montaña y el suelo no es un colchoncito.  Por lo tanto, un colchoncito inflable va a ayudar a poder dormir no comodamente por el lujo de dormir bien, pero suficientemente cómodo para PODER dormir.  El colchoncito solamente tiene que ser del tamaño del saco de dormir (la caseta típica que acomoda a dos personas no va a tener espacio para más).  Para inflar, se puede llevar una bombda operada con baterías pero ambas cosas añaden al equipaje y al peso… Yo opté por hacerlo a pulmón cada día cuando llegaba al campamento.  Lo pude hacer todos los días aún los días en altura con menos oxígeno; yo asumo que quizás eso me ayudó a ejercitar los pulmones a esas alturas.  En las mañanas una de mis tareas más odiadas era desinflar el colchoncito y enrollarlo…  Pero, de que es necesario, es necesario.

12. Libreta pequeña

A mí me gusta (no sólo porque escribo un blog como este) tomar notas cuando viajo para poder recordarme luego de detalles como dónde cené, cuánto tiempo tomó llegar de un lugar a otro, etc. Hay a quien le gusta anotar reflexiones a media que transcurre un viaje. Cualquiera que sea tu estilo, tener una libretita a mano para tomar notas o escribir un poco más es una buena idea. A mí se me hubiera completamente olvidado cuánto tiempo caminé cada día, etc. si no tomara estas notas. Luego me ayuda a recordar mi viaje y mi experiencia. La llevaba en una bolsita plástica en mi mochila al igual que mi cámara – uno nunca sabe cuándo puede comenzar a llover (aunque también llevábamos algo para cubrir las mochilas si empezaba a llover, en una ocasión no cerré bien una botella de agua que llevaba dentro de la mochila y se mojaron algunos de los contenidos…).

13. Método para purificación de agua

Este posiblemente es el artículo más importante para no acabar con tremendo problema en el sistema digestivo durante el viaje y arriesgar la subida. Los porteros cargan agua y recogen agua en el trayecto pero esta agua tiene que ser tratada para hacerla no peligrosa. Es imposible que los porteros hiervan toda esta agua, además de cocinar, con el combustible que pueden cargar y el tiempo que tomaría ya que mientras menos oxígeno, más tiempo toma hervir el agua. Por lo tanto, le resta a uno resolver la purificación de agua. Hay varios métodos disponibles que en verdad no son tan pesados de hacer. Hay tabletas de iodo que requieren preparar el agua con anticipación para que tengan tiempo a hacer efecto. Entiendo que estas tabletas además dejan un saborcito raro por lo tanto es buena idea añadir algún sabor al agua para cubrir este saborcito de las tabletas. Otro método que es más sencillo, rápido y sin saborcitos es usar una pluma que usa luz ultravioleta para neutralizar cualquier bacteria que pudiera tener el agua. La más conocida en mi mundo se llama Steripen. Esteriliza la bacteria (no la mata) para que no se pueda reproducir; aunque haya bacteria en el agua, no puede reproducirse dentro del cuerpo humano y uno no se enferma. Estas plumas Steripen usan baterías para generar luz ultravioleta. Uno la inserta en la botella de agua (ojo: de cuello ancho), la enciende y una lucecita avisa cuando ha terminado de esterilizar el agua. Una vez completado el proceso el agua está inmediatamente lista para ingerirse. Se debe leer bien las instrucciones para que saber cómo mejor usarla (por ejemplo, hay que mover la pluma para asegurar que llegue a todas partes de la botella). Lo más importante es llevar suficientes baterías ya que las baterías duran menos en altura y la botella se usa por lo menos de dos a cuatro veces al día y todo dependiendo de cuántas botellas se esterilizan (otra gente en el grupo quizás no traen lo correcto o se les acaba sus baterías y es difícil uno decirles que no pueden usar la de uno). ¡¡Es mejor precaver que tener que lamentar!!


14. Pero lo más importante…

Espero que hasta ahora la lista compartida haya contribuido positivamente a planificar el ascenso de Kilimanjaro. Cualquier duda, nuevamente, contesto cualquier pregunta o comparto algún otro detalle que se me pueda haber pasado. Estos han sido los ítems más importantes para mí aparte de la ropa para esta aventura. Pero el ítem más especial para mí en mi mochila fue una foto de mi familia…

Uhuru, ascenso Kilimanjaro

————————————————————————————————-

Para leer cómo fue el ascenso desde el comienzo hasta el fin, pinchar aquí para empezar por el día uno en la ruta Machame.

————————————————————————————————-

¡Guarda esta imagen en Pinterest!

empacar para Kilimanjaro, que llevar a Kilimanjaro, lista para Kilimanjaro

Ascenso a la Cima del Monte Kilimanjaro – Segundo Día

Despertar el segundo día en el Monte Kilimanjaro fue tan estimulante como comenzar el camino el día anterior.  Claro, el primer día estaba lleno de la expectativa de la experiencia que nos esperaba, entre un poco de nervios pensando “podré?” y un gran sentido de aventura.  Pero también nos habían advertido que esa primera jornada en la ruta Machame tenía un alto potencial para lluvia y lodo – y eso no nos sucedió por lo tanto, haber pasado el primer día sin tener que lidiar con agua y lodo constituía un éxito para el grupo. Ya teníamos un día logrado.  Mirando hacia atrás, el primer día fue interesante por ser el comienzo de la aventura, pero la caminata por bosques, etc. no fue tan inspiradora ya que las vistas y paisajes no eran quizás tan diferentes como los que conozco ya por mi parte del mundo.  Lo especial de Kilimanjaro en cuestión de paisajes comenzaría el día dos…

Un nuevo día ascendiendo Kilimanjaro

Llegar al día dos representaba progreso hacia nuestra meta y mirábamos adelante.  Sabíamos que el paisaje iba a cambiar ya que pasaríamos de una zona de clima a otra (por el cambio de altura a medida que ascendíamos) y la vegetación iba a ser diferente:  de vegetación frondosa y verde a terrenos más yermos y desabrigados, donde la vegetación se iba reduciendo en tamaño y densidad a medida que ganábamos altura.  Específicamente, el día dos nos entraría en los páramos (“moorlands” en inglés).  A pesar de no ser tan densa la vegetación, las plantas y paisajes de ese día me parecieron sumamente interesante y bonitos.  Disfruté mucho el recorrido ese día ya que ese paisaje era una novedad para mí.

Dije que las vistas del primer día no eran nada especial pero al despertarme en el campamento Machame (a una altura de 10,200 pies / 3,100 metros) esto fue lo que me encontré – tremenda inspiración para comenzar el recorrido hacia el campamento Shira!

cima kilimanjaro, ascenso kilimanjaro, senderismo, campamento Machame

La cima de Kilimanjaro

Los páramos del Monte Kilimanjaro

Ahora que hecho este recorrido y que lo he vivido, sé lo que son los páramos pero antes de verlos, no tenía la menor idea de qué esperar.  De antemano había leído que eran terrenos algo llanos que se encuentra a altura y donde la vegetación comenzaba a mermar dado que la reducción en los niveles de oxígeno limitaban el crecimiento de las plantas.  Aún así hay flora que se adapta a las condiciones (la gran y sabia madre naturaleza!) y aquí algunas fotos con ejemplos de las plantas a nuestro alrededor.

flora en Kilimanjaro, paramo, vegetacion en Kilimanjaro, flora en Kilimanjaro, paramo, vegetacion en Kilimanjaro,

ascenso Kilimanjaro, senderismo, trekking Monte Kilimanjaro, ruta Machame

ascenso Kilimanjaro, senderismo, trekking Monte Kilimanjaro, ruta Machame

Paisajes y vistas

Nos despertamos esa mañana a eso de las 7:45 bajo un cielo azul precioso.  Al comenzar nuestro recorrido a la distancia veíamos el Monte Meru, vecino del gran Kilimanjaro.  Nos proveyó no solo una vista impresionante pero también buenas oportunidades para fotos.

Monte Meru, ascenso Kilimanjaro, senderismo, trekking Monte Kilimanjaro, ruta Machame

El Monte Meru en la distancia

El sendero ese día fue algo rocoso pero no tan intense como lo sería otros días.  Pasamos grandes rocas las que fueron bien aprovechadas para unas fotitos por todos en el grupo (y, a la vez, un Descanso en el camino).

ascenso Kilimanjaro, senderismo, trekking Monte Kilimanjaro, ruta Machame ascenso Kilimanjaro, senderismo, trekking Monte Kilimanjaro, ruta Machame

ascenso Kilimanjaro, senderismo, trekking Monte Kilimanjaro, ruta Machame

Una tarde y noche en el campamento Shira

La ruta ese día, aparte de lo mencionado, no proveería nada más novedoso que la vista del Monte Meru, las rocas, y la vegetación tan curiosa.  Pero la jornada iba a ser coronada por el campamento en el que pasaríamos la noche.  Antes de contarles más del campamento comparto que la noche antes fue la primera vez en mi vida que había dormido en una caseta de campaña.  Comento esto para que entiendan que me encantó el campamento no porque soy tipo normalmente aventurero en este sentido.

La caminata de ese día sería de 5.5 millas (9 kms) ganando 2,400 pies (740 ms) ya que el campamento Shira queda a 12,600 pies (3,840 ms).  Entre una y otra parada de descanso en la ruta, llegamos como a las 2 de la tarde al campamento.  Este campamento fue uno de los lugares más preciosos para mí de todo el ascenso.  Quizás fue una mezcla de su ubicación, las horas del día que estuvimos ahí, y el cansancio – no sé pero, en verdad, no importa qué contribuyó a sentirme así.

campamento Shira, ascenso Kilimanjaro, senderismo, trekking Monte Kilimanjaro, ruta Machamecampamento Shira, ascenso Kilimanjaro, senderismo, trekking Monte Kilimanjaro, ruta Machamecampamento Shira, ascenso Kilimanjaro, senderismo, trekking Monte Kilimanjaro, ruta Machame

El campamento estaba situado miranda la cresta Shira y de esa posición, si uno giraba 180 grados, se veía la cima de Kilimanjaro.  Que panorama tan espectacular!!  Como llegamos tan temprano, disfrutamos el campamento completamente, sentados hablando, volando papalotes (una de nuestro grupo los trajo!), y descansando.  Algunos aprovechamos el lujo de tiempo libre para estirarnos un poco 😊

campamento Shira, ascenso Kilimanjaro, senderismo, trekking Monte Kilimanjaro, ruta Machame

Unas vistas espectaculares

campamento Shira, ascenso Kilimanjaro, senderismo, trekking Monte Kilimanjaro, ruta Machame

De más está decir que el tiempo en este campamento nos permitió recargar energías para emprender el día 3!

Uno de los mejores puntos para ver la cresta Shira (y tomar fotos de ésta) coincidía con ser uno de los pocos puntos donde se podía recibir todavía señal de servicio móvil.  Muchos de los guías pasaban ahí el tiempo enviando mensajes de texto.  Ese mismo punto de acceso a señal móvil queda a 10 pies (3 ms) del “servicio” (inodoro portátil que nos acompañaba en el ascenso…).  Este servicio era el que quedaba más cerca de mi caseta de campaña.  Sería un lugar que visitaría varias veces esa noche ya que la medicina que tomábamos para ayudar con el ajuste a la altura (Diamox en los E.E.U.U.; ingrediente activo: acetazolamide) era, pues, un diurético…  Este sería también un servicio móvil pero no de telefonía 😉

Las excursiones nocturnas al servicio

Ir al baño en el medio de la noche no parecería ser la gran cosa… Pero, hagamos inventario…  hay que salirse del saco de dormir (“sleeping bag”) con sus cremalleras, hay que vestirse y abrigarse, hay que abrir las cremalleras de la caseta de campaña (son dos), hay que colocarse la luz nocturna, hay que coger lo que haga falta para el “evento”, y finalmente ponerse algún calzado ya que los campamentos tienen muchas piedras (y que estarían frías!).  Todo esto, hagan cuenta, a la misma vez que uno tiene unas fuertísimas ganas de aliviarse las ganas ya que el diurético no perdona y uno, en el afán de prevenir enfermedad de altura se la pasa tomando agua (la hidratación ayuda muchísimo a no sentir estos efectos de la altura).  Bueno, por lo menos mi caseta de campaña era una de las que quedaba más cerca al servicio – esos pasitos ahorrados quizás ayudaron…

Ahora, uno de los consejos que nos dieron de antemano fue el de traer una botella plástica extra de cuello ancho (y además se nos dijo que la marcáramos bien clarito para no confundirla con una de agua…).  Esta botella sustituiría muchos de los pasos enumerados en antes ya que al salir del saco de dormir uno podía en esa botella, dentro de la caseta, pues orinar…  Claro, más fácil para los hombres que para las mujeres pero las mujeres se dice que pueden usar un artefacto especial que guía el líquido hacia la botella – pero, ojo, esto requiere más coordinación de lo que uno puede tener en el medio de la noche!

campamento Shira, ascenso Kilimanjaro, senderismo, trekking Monte Kilimanjaro, ruta Machame

Nuestra caseta servicio

De todos modos, comencé a usar la susodicha botella de esa noche en adelante pero no siempre te ahorra los viajecitos… la capacidad de mi botella era menos del total de todo lo que expulsaría en una noche así que, en algún momento de la noche tocaba ir al servicio de todos modos para aliviarse y para vaciar la botella…  Quizás he compartido más de lo debido para mantener esto un escrito lindo pero lo comparto para los que quieren saber bien las realidades de la experiencia de la vida no solo en cualquier campamento, pero en uno a altura y bajo las condiciones que les comento (diurético, altura, etc.).  Concluyo el “tema” diciendo que nunca tuve problemas volviendo a quedarme dormido después de estas “excursiones” nocturnas y soy duro para quedarme dormida (i.e., no me es fácil) pero el cansancio es supremo y el cuerpo necesita reponerse…

El almuerzo ese día

Quiero finalizar la narrativa con algo más agradable por lo tanto les cuento de mi almuerzo ese día dos que fue mi almuerzo favorito de toda la semana:  un emparedado de queso grillado con tomates y pepinos.  No se verán de revista en la fotito pero les aseguro que sabían a gloria!  Nuestros guías y ayudantes fueron excelentes fuera guiándonos hacia la cima, preparando o rompiendo los campamentos, o preparando delicias como este almuerzo!  No sobró ni uno!

campamento Shira, ascenso Kilimanjaro, senderismo, trekking Monte Kilimanjaro, ruta Machame, almuerzo

Cierro diciendo que yo regresaría Kilimanjaro para pasarme dos o tres días en este lugar tan idílico.  Con las siguientes fotos, les comparte las mejores imágenes que llevo grabadas digitalmente y en mi memoria cerebral de este bello campamento.

ascenso Kilimanjaro, senderismo, trekking Monte Kilimanjaro, ruta Machame

Un trekker cansado pero feliz!

De vuelta al Día 1

¡Y 14 artículos claves para ascender la gran montaña africana!

—————————————————————————————————————————————————


Tips for a Papal Audience in St. Peter’s Square

(Guest post by Chris Sanders)

Wow, we got front row tickets to a Papal audience in St. Peter’s Square and saw Pope Benedict the XVI up close in Vatican City!  One of the more unique, interesting, and fulfilling experiences one can have in Rome is to attend a Papal general audience. There is something almost magical about the crowds of thousands, packed into St. Peter’s Square to see and hear the Pontiff – the leader of a billion Catholics worldwide. Even for non Catholic and non religious people, the experience can be interesting and unique at minimum… and its free of charge!  One of the most unique things to do while visiting Rome.

Veterans of Papal events in Rome

My wife and I have been to no fewer than five Papal events, three of which were general audiences (the other two were the Beatification of Mother Teresa and an Easter Mass).

During general audiences in St. Peter’s, the Square is partitioned into several sections – each section is filled with rows of plastic chairs. Sections are filled on a first come first serve basis.  Most of the time, despite arriving early, we get a seat somewhere in the middle of the Square, far away from the “action.”

Thankfully the Vatican has invested in really good video monitors and a world class sound system.  Seriously, you can actually hear the Pope take a breath before he speaks – it is THAT good!

The best seats during a Papal audience!

However, during our most recent Papal audience, we (my wife and I along with our friends Raul, Beth Ann, and Bill) were treated to especially good seats, way up in the Pontiff’s “VIP section” (as I call it):  the boxed section just to the right of the Pope’s canopy if you are facing the Basilica…  It probably has a more official name. 

Now that I think about it, maybe its called the “IP” section, because across from our section (and to the left of the Papal canopy) were seated various European royals (Belgian, to be more specific) and other dignitaries, many of whom were invited to approach and receive a blessing from the Pope after the audience. 

I guess technically, our tickets to the Papal audience were in the “VIP” section as it were…  Still, the IP section wasn’t so bad… 🙂

Seat from VIP section at Papal audience at The Vatican
View from our seats – no zoom!
Queen Fabiola and Queen Paola of Belgium at Papal Audience
Queens Fabiola (left) and Paola (center) of Belgium

Anyway, so there we were, in the “IP” section at St. Peter’s during a Papal audience in The Vatican. The experience was exhilarating to say the least… 

From this vantage point (as one would expect) the sounds are clearer, the sights more vivid — and in addition to being only a few yards away from the Pontiff, one also gets to view the Square and see the massive crowds from his perspective…  I mean, imagine if – on an otherwise routine Wednesday at 11 AM – a few hundred thousand people came to see and hear what you had to say, wow!

Getting closer to the Pope during the audience

The most exciting moment came at the end of the ceremony, when Pope Benedict got into his Pope Mobile…  And on his way to tour the Square, the white open air Mercedes made a quick pass by our section. The Pope himself passed literally just out of arms length of us… 

A few nuns who were positioned slightly in front of us actually made a connection with the Pontiff!  And they were not shy about getting a close to the front as possible!

Pope Benedict XVI doing the rounds after the Papal Audience in St. Peter's Square

Each of the Papal events we have attended have been special, for different reasons. The day we were “IPs” was special in its own right as the vantage point was unparalleled. Also, this was the first time we saw Pope Benedict XVI…  Our previous three events were with Pope John Paul II. Viva il Papa!

St. Peter's Basilica at The Vatican

Tips for planning your visit in a Papal audience

If you are interested in attending a Papal audience in The Vatican, the below items should help you with your planning:

  • Papal general audiences are held each Wednesday at 11 in the morning. In the wintertime or on days with bad weather, the audience is held indoors (in the Basilica or in the Hall of Papal Audiences).  In the summer months, the audience is held outdoors in St. Peter’s Square – very spacious!
  • Tickets to a Papal audience are free but you need to reserve them in advance.  You then pick up the tickets at The Vatican on the day before the audience. There are multiple outlets but I suggest going right to the official source, the Prefecture of the Papal Household http://www.vatican.va/various/prefettura/en/biglietti_en.html
  • Remember, tickets to Papal audiences are TOTALLY FREE! If someone tries to sell you a ticket, don’t buy it!
  • If you want to sit in the “VIP” or “IP” sections (remember these are my terms, not The Vatican’s), work through your local parish church.  Even then, I don’t think anything is guaranteed.  In fact, we didn’t realize our tickets were “premium” until we picked them up the day before the audience.
  • Arrive at St. Peter’s Square as early as possible in order to get the best seats possible.  Getting close to center aisle or any of the aisles maximizes the chances that you will see the Pope up close if he goes around in his Pope-mobile!
  • Be advised, you have to pass through a security checkpoint to enter St. Peter’s Square.
  • Hit the restroom beforehand.  There aren’t many restrooms available within the Square…
  • Take a hat to protect your head from the sun.  The sun actually can be quite intense in St. Peter’s Square.

Good luck! If you want additional information about getting tickets to a Papal audience, or, if you would like to share your experiences attending a Papal audience, let us know via a reply to this blog!


Other things to do while in Rome:

– St. Paul Outside the Walls: One of Rome’s Less Seen Basilicas

A Food Tour in Rome

– Doing Rome with a Plan

– Ceilings of the Vatican and Rome

——————————————————————————

Pin this image to your travel board!

Papal Audience, Rome, Vatican, audiencia papal

How Hard Is It to Climb Kilimanjaro?

A few years ago I climbed Mount Kilimanjaro, the roof of Africa by virtue of being the tallest mountain thereI have written about how I prepared, what I wore for the climb, and how each day was from day 1 to reaching Uhuru Peak (Kili’s summit) to coming down the mountain.  However, one of the things I have not written about directly is one of the questions I commonly get asked:  “how hard is it to climb Kilimanjaro?”

I get the question directly but I also it in a different way:  when people look at me like I did an almost impossible feat.  I get that it is not something most people do hence why it is a feat of a kind. But to me there are crazier and/or harder things (it is all relative, isn’t it??).  So I wanted to share a little of my perspective on how hard it is to climb Kili.

Kili, Kilimanjaro, Moshi, Tanzania, trekking, hiking, climbing, adventure, Africa, outdoors, photo, travel

The first time I saw Kili outside of the Honey Badger Lodge – such an amazing mountain!

Kili, Kilimanjaro, what to pack, Tanzania, trekking, hiking, climbing, adventure, Africa, outdoors, photo, travel

A photo shared in my earlier post showing what I took with me (for the climb and subsequent safari)

A bucket list item that never was:  Kilimanjaro

I never planned or thought of climbing Kilimanjaro.  It had never occurred to me even as a fleeting thought.  Nowhere in the radar.  I had barely heard or read of people who had done it.  Nor was I a big hiker to begin with (I had never slept in a tent until my first night on Kili!).  My first multi-day hike ever had been the year before I climbed Kili when I hiked four days in the Transylvanian Alps in Romania with Trekking for Kids (TFK).  This all changed one night at a fundraiser for TFK a few months later.

At this event, folks started egging me on to join them in a few months later on the climb Kilimanjaro with TFK.  I considered the whole idea preposterous. I felt tremendously ill-suited for something so physically demanding.  “Climbing Kilimanjaro is too hard,” I thought.  While I exercise regularly and consider myself to be generally fit, I was not running half marathons (had done it once a dozen years before) nor doing bootcamps a few days a week nor anything of the like.

Climbing Kilimanjaro was for the super athletes of the world.  I was far from being that though I knew I was in slightly better shape than the average person.  But, a lot of cajoling, elbowing, and a couple (or 4) glasses of wine later, I succumbed to friendly group pressure and banter.  I said yes.  In a way, I was feeling excited that I would attempt something so ‘crazy’ and out of my comfort zone (always a good thing to do every now and then).

The next morning I woke up and incredulously remembered the prior night’s events.  I was asking myself why I had agreed to undertake this ludicrous effort instead of politely saying I’d think about it.  Well, I am not one to disappoint so I decided I was going to give it a shot after all.  I decided that not because I thought that I had what it took.  In fact, I thought it would take a LOT of training time I did not have.  Training at altitude I also did not have easy access to.  And requiring plenty more hiking experience at altitude or not that I did not possess…

Kili, Kilimanjaro, Moshi, Tanzania, trekking, hiking, climbing, adventure, Africa, outdoors, photo, travel

Ready to start the climb – clean, well-prepared, and eager!

Getting ready for climbing Kilimanjaro

A million questions started swirling in my head once I accepted I was indeed going to stick to this.  SO many question!  How do I best prepare?  What do I need to bring with me?  What do I need to wear to deal with the cold?  Can I do anything to improve my chances at the doing well under exertion?  Can I do anything to help me be ready for the high altitude?  What did I need to know in terms of my personal safety?  How much was it going to cost me when it was all said and done?  And on and on.

I was fortunate to have been doing the expedition to Kili with an outfit like TFK.  They provided a good bit of info to help us prepare ourselves, and gladly answered all my questions as I researched things and acquired the things I needed.  I even remember being at REI looking at stuff.  I called TFK’s Director of Operations, an all-around hiking guru.  And started asking many questions to understand the options, look at items, see if the items’ features were really needed, and all that sort of good stuff.  It was not easy but having access to expert knowledge helped make these key decisions, Especially when spending is required and one has to be careful what one spends the hard-earned money on!!

I won’t repeat here all the things I decided to do in terms of preparation or to pack in terms of the best clothing options and non-clothing items to bring; I will provide links to those posts below.  But now I will address here the “how hard” question…

So how hard is it to climb Kilimanjaro then?

Hiking to the summit of a 19,340 foot mountain is not something to be undertaken lightly.  OK, perhaps if you are a superstar athlete or have the right genes you can… but most of us do not fit that category.  Actually, I take that back:  even being a superstar athlete does not guarantee you will make it to the top of the mountain or even to the rim of the volcano (Stella Point for our route up).

Physical conditioning is only part of what is needed to make it to Uhuru Peak, the summit.  It will most CERTAINLY help you tons. I experienced difficulties after the intimidating Barranco Wall and, of course, summit night for not being in the best possible shape.  However, the other key factor affecting your chances of success is, well, simply how your body deals with the high altitude and lower oxygen levels.

The good news: you can do a couple of things that help a tad.  Nevertheless, you have to have an OK fitness level.   You WILL be exerting your body through a few hours a day of walking and gradual climbs, mixed with some steeper climbs at certain points!

Kili, Kilimanjaro, Lava Tower, Tanzania, trekking, hiking, climbing, adventure, Africa, outdoors, photo, travel

Leaving the Lava Tower looks harder than it was (Day 3)

Training at altitude would help but, from what I understand, the body’s adjustment to altitude dissipates within a few days/a week so that may not be logistically possible for most (if money and time were no object, of course, one would train at high altitude in another continent for a week or two and head straight to climb Kili without wasting days in between – not a likely approach for most).  I did not do any high altitude / long climbs as part of my training due to many constraints but certainly they can only help so if you are able to do some of that in the weeks before, then your fitness level will be better.

Kili, Kilimanjaro,Barafu Camp, Machame Route, Tanzania, trekking, hiking, climbing, adventure, Africa, outdoors, photo, travel

Heading to Barafu Camp from where we would launch to the summit (Day 5)

Part of my training as I share elsewhere was walking on a treadmill on a high incline with a backpack loaded with twice the weight I would carry on the mountain.  It was an odd sight at the gym for sure but it helped physically if not just mentally…  That and the fact that I am in general good shape through routine exercise were in my favor but I still struggled summit night (who doesn’t?) and after the Barranco Wall.

Kili, Kilimanjaro, Barranco Wall, Tanzania, trekking, hiking, climbing, adventure, Africa, outdoors, photo, travel

Climbing along (not up) the Barranco Wall had its challenging spots (me in orange!) (Day 4)

Kili, Kilimanjaro, Barranco Wall, Tanzania, trekking, hiking, climbing, adventure, Africa, outdoors, photo, travel

A little while after the Barranco Wall (OK, an hour or so), we got hit by a little rain

Kilimanjaro was far from easy (each day I would end completely drained and able to move but barely). But I feel it is a reasonable, attainable goal for people with a fair degree of training/fitness.  And with the drive to push themselves beyond what they think they can do.  Yet, with all that, it will still all depend on how the high altitude hits each particular individual.  And that reaction cannot be predicted.

I have to say that MOST CERTAINLY going with a great organization (in my case, a non-profit like Trekking for Kids) and having a one-of-a-kind extremely seasoned lead guide as we had (Luis Benitez – read about him here) were key success factors in helping ME complete the journey from planning to trekking to summitting.  And making it down in one piece!

What was the hardest part about climbing Kilimanjaro?

It is a hard question to answer.  We are all so different.  My answer may not be yours.  Things I can think of include:

  • the cold, especially at summit night,
  • the longing for a nice glass o’ wine or a beer (OK, I threw that in for comic relief),
  • the badly needing to get up to pee in the middle of the night (if taking Diamox – or not),
  • the constant packing and unpacking, inflating and deflating,
  • the not showering,
  • the bathroom situation at camp and on the trail,
  • the rocks to climb requiring longer legs than I have,
  • the having a sick tent-mate and wondering for days if you will catch it and not be able to summit,
  • etc.

(NOTE:  Observe that food is not on this list of possible “hard” things.  I ate great stuff thanks to our great porters and crew!)

But, frankly, all these things are overcomeable.  For instance, while I used wipies every day to sort of clean up after a day of hiking, I had no such thing for the hair.  Yet not even ONCE on the mountain did I think that it had been days since I had washed my hair last.  Those who know me will know how incredible THAT sounds.

Kilimanjaro:  Hard climb but special

That’s what makes going up Kili something special.

YES, it is hard in many ways. Indeed, physically, no matter how well trained you are (with those rare exceptions).  But the hardest part is the mental part.  When you wonder if you really can make it all the way.  And when you wonder whether you want to – on one of those rare moments when you are too tired to think straight.

The hardest part is keeping going, putting one foot in front of the other when you think you can step no more.  But you can.  And you will.  Pole, pole.  Slowly, slowly – our internal Swahili chant.  And you will be so amazed when it is all done that you actually did it.  That you had it in you.  I never knew I did.  But I did.  And I found out through this amazing experience…  I am eternally grateful for those folks at that fundraiser who egged me on. Because the sense of achievement and the self-discovery was truly a gift received – or earned, actually 🙂

And this is the face of happiness at 19,340 ft above sea level at the summit, with my family close to me.

Kili, Kilimanjaro, Uhuru Peal,, Tanzania, trekking, hiking, climbing, adventure, Africa, outdoors, photo, travel

At Uhuru Peak, the summit of Mt. Kilimanjaro!!  (with the short-lived too-reflective sign; it’s gone now)

————————————————————————————————–

Some key links to other posts I have written here based on my experience of climbing Mount Kilimanjaro:

Gear for Climbing Mount Kilimanjaro Clothing

Preparing to Hike Kili: More than Training and Gear

Top 14 Items to Bring on a Climb of Kilimanjaro

And if you want to read a day-by-day walkthrough of what it is to summit Mt. Kilimanjaro, start with Day 1.

And if you just like hiking in general, check out some of my posts about hiking in different places around the world!

Hiking in the state of Georgia: Blood Mountain

Hiking in the Transylvanian Alps in Romania

Trekking the W Circuit in Patagonia

Doing the Camino de Santiago in Spain

A Hike around Fitz Roy in Argentina

how hard climb kilimanjaro, kilimanjaro training, can i climb kilimanjaro

Would love to hear from you about places you hope to hike or favorites past hikes – always good to get ideas from others for future hikes!!

%d bloggers like this: