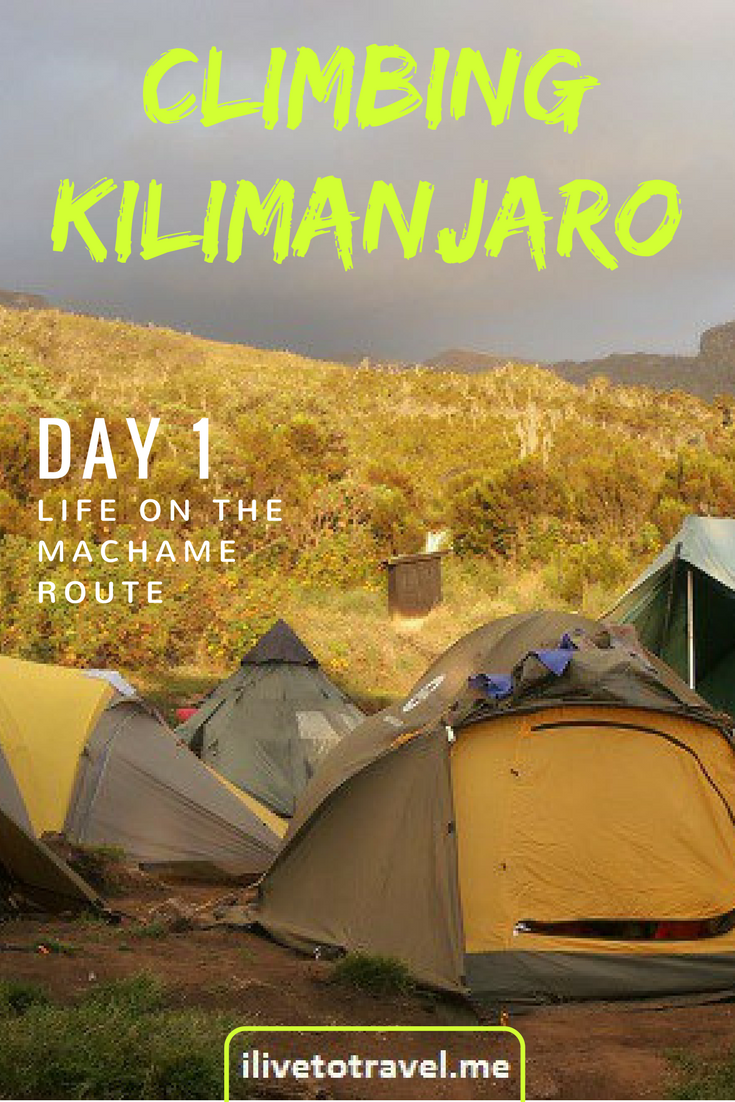
On the Machame Route | Kilimanjaro Day 1

Writing about my hike to the top of Mount Kilimanjaro along the Machame Route is no easy task.  What to share?  Clearly the “facts” of the route, camps, durations, altitude, acclimatization, weather, gear, the day-to-day routine, etc. are all important elements of the story.  But the more I thought about how to write about this experience, the more I realized I wanted to share how it felt first and foremost.  And also covering some of the elements listed earlier as they fit into the overall story, instead of making those the focus of each story, making this more a log of the climb.  As I mentioned in another post, preparing for Kili is more than training and gear.  I hope that you will see, over the series of writeups, that an emotional element also applies to actually doing the climb.  Let’s get going with day 1!

The Machame Route and the climb

One second… before getting into the hike itself, a quick word about the route that we took for this climb.  Our group went up the Machame Route, known for its vistas and for not being as crowded as other routes.  Also, the Machame Route is a route with a higher likelihood of success than the so-called “Coca-Cola Route” (the Marangu Route).  That is because it offers better altitude adjustment or acclimatization to the ever higher elevations the trek would face (climb high, sleep low; 6 days of ascent; etc.).

The climb itself is to Uhuru Peak.  Mt. Kilimanjaro actually refers to the entire mountain, the tallest free-standing mountain in the world.  Uhuru Peak is the highest point on the mountain and, therefore, in Africa!  Whereas Uhuru Peak is the goal, the entry point to the goal on the Machame Route is called Stella Point.  Once you get to Stella Point, there is about one more hour before reaching the actual summit.  Making to Stella Point, though, is no guarantee that one will reach Uhuru Peak though… More on summit night in another post.  Let’s go back to day 1 itself.

Starting day 1:  waiting at the Machame Gate

Day 1 starts full of anticipation.  The trekkers finish prepping the daypack they will carry on their backs.  And packing the other piece of luggage that will be taken from camp to camp by the porters accompanying our group.

Backpacks ready to go up Mt. Kilimanjaro

Daypacks waiting for their trekkers!

We got up at the crack of dawn to head from our hotel (the awesome Honey Badger Lodge) to the hotel from which the mountain trek would leave, the Springlands Hotel, home base of Zara Tours who Trekking for Kids had hired to do our trek.  So add 20-30 minutes to the lead time… (I would have rather stayed at Springlands the night before but I imagine it was booked since there were a few buses loading that morning to go to the mountain.)

The ride to the Machame Gate, entry point to the Machame Route, could not start quickly enough.  As with many things, one gets ready and then one waits.  After we finished leaving some of our non-trek stuff in storage at the Springlands, our bus arrived and the process of loading up our trek bags began.  Finally -and not soon enough- we were on our way to the Machame Gate.  It seemed to take forever but it couldn’t have been more than 1 hour or hour-and-a-half.  We were just so ready to get the climb going!

At the Machame Gate

Once we arrived at the Machame Gate, we proceeded to, you guessed it perhaps, sit and wait for about an hour.  The reason, though, was quite simple:  the permits had to be purchased by the lead guides.  This process takes time as we were not the only ones there (fancy that!).  This would be a reality throughout the trek:  others are there with you.  Not that we expected to be alone, mind you.  Just that one never stops to consider that fact until one gets to this departure gate.  While it could have been chaotic, it really was not; everything was fairly orderly.  We proceeded to eat our boxed lunches while we waited and took a few pictures to commemorate the start of our climb.

At the Machame Gate at the base of Mt. Kilimanjaro

ilivetotravel doing the obligatory photo at the Machame Gate, looking ready and clean!

Another thing you can do while you wait is read the few signs posted with instructions and warnings for those starting to climb Kili.  Good reading.

Sign on Machame Gate at Kilimanjaro

We cheered when we saw our guide come over with paperwork – it meant we were ready to go.  The funny thing is that we saw other guides come out around the same moment with their papers.  You would think the first-come, first-serve approach would have led to guides coming out gradually and sequentially.  Nope.  It seems all permits were issued almost at the same time for all the groups waiting!  That meant, everyone got going at the same time creating a little bottleneck at the entrance gate.  We got to pass quickly through without waiting long so we were FINALLY on our way!!

The hike on day 1

Day 1 was mainly going through a forest habitat starting at 6,000 ft (1,830 m) and ending at the Machame Camp at 10,200 ft (3,100 m).

Day 1 of the Machame Route of Kilimanjaro

Typical of the day 1 Machame Route. Notice the porters on the trail.

It may have been the built-up anticipation but, for the most part, I didn’t feel the altitude wear on me as the day went on.   We were fortunate it did not rain that day.  So, the gaiters were not really needed (those green things I am wearing on my legs in the earlier photo to help prevent mud or pebbles from getting into our boots).  This part of the trail is about the nicest one with some work done to create a good trail for part of the way.

Arrival at the Machame Camp

Our arrival at camp was about 4:30 PM, five hours after we started that day.  We were thrilled at having completed our first day of 6 to get to the summit.  While we knew we still had a lot of challenges ahead, it felt SO good to have one day under our belt!  At this point we did our first book signing to show we were there.  This is a key requirement if we wanted to be issued an official completion certificate at the end of the hike.

Register at camp in Kilimanjaro

The Machame Camp sits in an area with plenty of vegetation.  This means we had more smaller animal life than we would have higher up; read, mice.  Key here is to keep the tent zipped up when not coming and going!   The Machame Camp has a toilet building that is pretty new.  I heard it had both Western toilets and Turkish toilets, if those are the proper names for the fixture types.  We also had a pair of portable toilets-tents and I preferred those… (less smelly).

In any case, getting to camp means setting up the sleeping tents and the mess hall tent.  Normally the porters who carry these items and set them up get there ahead of the trekkers and the guides but on day 1 we got there at the same time.  So this day we got to watch them at work.

Camp being set up in Kilimanjaro

Setting up camp

Wrapping up our first day on the mountain

Once the tents were set up and before dinner was ready, I, like some of the other trekkers, got organized by washing up, taking out the items needed for the night (headlamp, etc.), and preparing the daypack for the next day.  Oh, and the getting drinking water and treating it (Steripen worked wonderfully!) – a staple of the every day life on the mountain!

Trekker at camp in Kilimanjaro

Yours truly getting ready for my first night camping ever!

We enjoyed a beautiful sunset that night before heading to the mess hall tent for dinner.  I took advantage of an early bedtime so I could be well-rested for day 2 – NICE!  Dinner included a hot soup, potatoes, fried fish, vegetables, and small bananas along with tea and hot chocolate.  On to my first night camping ever and day 2!

Tents at Machame Camp during sunset in Kilimanjaro

Our tents with a beautiful backdrop courtesy of the African sunset

On to Day 2 on the Machame Route…

Kilimanjaro hike, climb Kilimanjaro, day 1 on the machame route

—————————————————————————————————————————————————

Other posts about the Kilimanjaro trek:

–  Preparing for the hike is more than training and gear

–  The Machame Route:  our way up

–  Day 3 of the hike

–  Day 4 of the hike

–  Day 5 of the hike

–  Day 6 of the hike (summit night)

–  7 things you will not see me without as I climb Kili

–  Interview with fellow Kili climber and Ultimate Global Explorer

%d bloggers like this: