Two Days Exploring Canyonlands, a Mighty Five National Park Powerhouse!

Canyonlands seems endless: truly a Mighty Five National Park! Along with Arches, Zion, Bryce Canyon, and Capital Reef, it is one of the Mighty 5 U.S. National Parks in Utah.

Canyonland National Park is located near Moab, Utah and not far from Arches National Park, it is far from from a major airport but certainly worth the effort. We spent two days exploring Canyonlands which was perfect in the context of our broader trip covering the Mighty Five.

Attacking Canyonlands: Island in the Sky District

The park is made of several districts with Island in the Sky being easily the most accessible and with a lot to offer to hikers and non-hikers alike. It was easy to spend two days and leave territory not-covered, even just in Island in the Sky. This district’s main roads are in the form of a “Y”. One enters on the top right of the Y, the only entrance/exit to this district (with a main paved road).

We had dedicated two days to Canyonlands, the second of the Mighty Five U.S. National Parks we were visiting on this hiking trip. We decided to split the visit as follows:

  • Day 1: The lower leg of the Y, starting by going all the way to the bottom and making our way back up (and out). On this day, we visited the following:
    • Orange Cliffs Overlook facing the Green River
    • Buck Canyon Overlook facing the Colorado River
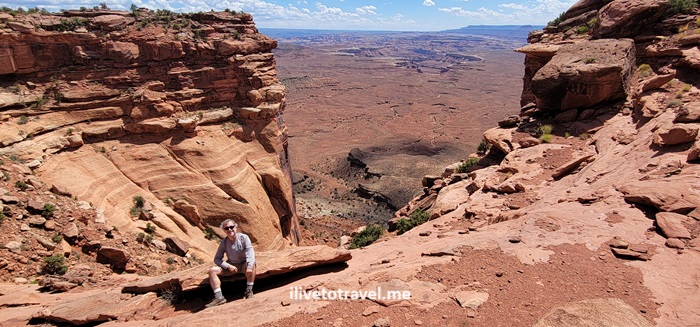
    • Grand View Point Overlook walking along the rim
    • Murphy Trail.
  • Day 2: The upper part of the Y, starting at the far end of the left upper arm of the Y. These were all short hikes, easily accessible.
    • Upheaval Dome
    • Whale Rock
    • Aztec Butte
    • Mesa Arch
    • Shafer Canyon Overlook.
Great VIew Point Overlook, Canyonlands National Park, Green River, Colorado River, Utah hiking, Orange Cliffs
Easily accessible Orange Cliffs Overlook view!

Grand View Point Overlook and a good intro to Canyonlands

After stopping at the Orange Cliffs and Buck Canyon Overlooks, we proceeded to Grand View Point Overlook. As we entered the trail, we happened upon a 10 AM outdoor park ranger talk. Very fortunate as I learned a lot about the major forces that shaped the terrain and created the multiple layers of different colors and compositions we see today.

Great VIew Point Overlook, Canyonlands National Park, Green River, Colorado River, Utah hiking

Great VIew Point Overlook, Canyonlands National Park, Green River, Colorado River, Utah hiking

The trail to the overlook was a short and highly rewarding 1.8 mi walk along the canyon rim with little elevation gain though you are in an altitude of ~6,000 ft. There is a short rock climb to get to the best viewpoint – and great spot for photos!

Great VIew Point Overlook, Canyonlands National Park, Green River, Colorado River, Utah hiking

Great VIew Point Overlook, Canyonlands National Park, Green River, Colorado River, Utah hiking

Wrapping up day 1: Murphy Trail

Murphy Trail was going to be our strenuous hike on this day. Not because of the length, as it was not too long (a 4.5-mile hike), but because we started in the afternoon and it was one very hot day. On and it would be steep with an elevation gain of 1,109 ft. The initial part of the trail was a walk on a field that did not have much to say in its favor. But then we reached the edge and began the best part of this fun hike. The terrain included rock scrambles and the like, and the view was always breathtaking once we left the field.

Murphy Trail, Canyonlands National Park, parks in Utah, hiking in Utah, outdoors, canyon hikes, outdoors, adventure

Murphy Trail, Canyonlands National Park, parks in Utah, hiking in Utah, outdoors, canyon hikes, outdoors, adventure
Down and up all those rocks

Murphy Trail, Canyonlands National Park, parks in Utah, hiking in Utah, outdoors, canyon hikes, outdoors, adventure

Once we got to the connector to the loop trail at the bottom, we stopped for lunch (at the “green” rock level) before beginning he hike back up to the rim. Though it was a very hot day, with good hydration and electrolytes, we did it safely and greatly enjoyed the hike: navigating the rocks, the descent/ascent, and the great vistas and rock formations.

Murphy Trail, Canyonlands National Park, parks in Utah, hiking in Utah, outdoors, canyon hikes, outdoors, adventure
The little green area at the bottom was our lunch spot

Certainly, a few degrees cooler would have been nice. But the ice cold water awaiting for us in the cooler we had in the car felt like heaven as I poured it over my head and feet!

Upheaval Dome

Day 2 was not going to be the strenuous hike day, but a day full of moderate or easy relatively short hikes for us. Upheaval Dome was our first destination of the day.

There were two overlooks, the first of which was about halfway in. The trail, an in-and-out, was only only 1.3 miles but with 226 ft elevation gain. Not strenuous at all but providing a great vantage point to look at Upheaval Dome. It was unlike any sight we saw or were going to see during our time in the park. It was a circular hole, as in a volcano’s caldera or a crater, but inside there were massive, tilted rock formations of a greenish color.

upheaval dome, canyonlands, hiking, rock formations, utah, southwestern parks

Whale Rock

Right by Upheaval Dome was Whale Rock. No explanation needed for its name… It is about a 0.8-mil trail roundtrip though we tooled around a little so maybe it was a mile for us. Elevation gain is 128 ft to the top. Not strenuous but has a steep spot that some may take slow. It offers a good view of Island in the Sky with little effort. Just because a trail is short it does not mean shoes with good traction are not necessary: always good to have them because of the sloped nature of some of the rocks one will walk on on trails like Whale Rock.

whale rock,, canyonlands national park, parks in utah, hiking, rock formations, southwestern US, nature
View of the road from Whale Rock

Aztec Butte

The walk to Aztec Butte was not that exciting but the climb to the top of the butte offered a nice challenge with a very steep rock face.

aztec butte, canyonlands, hiking in utah, rock formations, southwestern parks

aztec butte, canyonlands, hiking in utah, rock formations, southwestern parks
Steep and cool rock layers along the route

Right below the top are small “caves” that I imagine were used by people long ago. I read that they were used to store grains and other food.

aztec butte, canyonlands, hiking in utah, rock formations, southwestern parks
Cavemen

The roundtrip is about 1.4 miles with 213 ft elevation gain (all when the butte is reached). Great views from the top.

aztec butte, canyonlands, hiking in utah, rock formations, southwestern parks

And, no, no Aztecs lived in the area…

Mesa Arch

The combination of a short hike at 0.83 miles and the amazing structure of Mesa Arch make this a definite must-see. Only 102 ft elevation gain to boot so relatively easy. It does require, though, walking on rough terrain and stones. But, through the arch ones has a great view of the canyons below and the La Sal Mountains afar.

aztec butte, canyonlands, hiking in utah, rock formations, southwestern parks, mesa arch

aztec butte, canyonlands, hiking in utah, rock formations, southwestern parks, mesa arch
Having some fun: on the same photo in two places!

Canyonlands is a phenomenal place for all, hikers and non-hikers alike. The beauty of the canyons is outstanding. The Colorado and Green Rivers add to the scenery as they snake their way down the canyons. But what certainly caught my eye was the variety of colors across the many layers of rock exposed for us to see!

A Day in Arches, One of the Mighty Five National Parks

In June 2024 I spent a day in Arches National Park as part of an 8-day hiking trip along the “Mighty FiveU.S. National Parks in Utah. Arches is one of the most iconic and recognizable of the National Parks, a great system of parks and preservation of the beautiful nature available to anyone who lives or visits the U.S. (Throughout my trek across the Mighty 5, I was struck by how many Europeans were out visiting all these gems of nature.)

The park has many viewpoints, short walks, and longer/more difficult hikes such as Devils Garden, Fiery Furnace and Delicate Arch. It offers a scenic drive past many of the viewpoints so one can enjoy the amazing terrain and cool rock formations (the one that I call “Nefertiti” being my favorite!).

Devils Garden Trail

My trip to Utah’s National Parks focused on hiking, first and foremost. So, in reviewing the options, Devils Garden Trail was a clear must-do. This trail is a 7.8 mi loop; it passes many of the arches worth seeing at Arches National Park. However, as I researched the park and this trail in particular, I learned that the eastern side of the loop is a lot rougher and has fewer of the sights while adding considerable distance.

In fact, of the eight arches on this loop trail, seven can be accessed from the Double O Arch Trail (see below), a subset of the loop trail so the decision was very easy to make. To maximize our day and see other sights in the park after the main hike, we opted to skip the eastern part of the loop and just do the Landscape and Double O Arches route. Doing this shortened the hike to 4.25 miles while not short-changing seeing the most beautiful parts of the loop.

Hiking just to Landscape Arch

Landscape is the longest arch in North America; it spans about 306 ft but at its narrowest point, it may be about 6 ft wide. I wish one could get closer but the area around it is off-limits (probably for good reason). This arch feels so fragile when you look at it! Hiking to Landscape Arch takes about 1.9 mi roundtrip (with about 250 ft elevation gain). It is not hard, but still requires a little effort (bring water no matter how short the trail is).

landscape arch, arches national park, day in arches, hiking in utah, visit utah, alltrails

landscape arch, day in arches, arches national park, hiking in utah, alltrails
The photo does NOT do it justice

Landscape Arch has many visitors since it is fairly accessible; so this part of the Double O Arch Trail is more crowded. Thankfully, after Landscape Arch, the trail becomes much less crowded.

Double O Arch Trail (past Landscape Arch)

As I mentioned, this trail is about 4.25 mi roundtrip (with an elevation gain of about 680 ft) including passing Landscape Arch. This trail presents some fun challenges that could be intimidating for anyone with a fear of heights as there are a couple of narrow spots. Also, there are some steep-ish rock climbs uphill past Landscape Arch. I enjoyed walking on a fin as part of this hike. At no point did I feel unsafe on the rocks or terrain.

double o arch trail, arches national park, day in arches, alltrails, visit utah, hiking in utah
Walking up & down rocks was fun and not that hard

The vistas from the trail are phenomenal and the big reward is the imposing Double O Arch. Definitely a cool spot.

We decided to not make any of the small detours to see the other arches on the way in and to leave those for the return back to the trailhead. A good idea to break the monotony of seeing something you already walked past on the “out” part of the in-and-out!

Double O arch, arches national park, day in arches, hiking in utah, visit utah, alltrails
From afar; looks better from up front

It is allowed to climb on to the base of the lower arch for great photo opps but not atop either arch. (Often there is a sign indicating climbing them is not allowed.)

Double O arch, arches national park, day in arches, hiking in utah, visit utah, alltrails
Hiking buddy showing our disappointment!
Double O arch, arches national park, day in arches, hiking in utah, visit utah, alltrails
Hard to show how magnificent the arch is!

On to the Dark Angel

From the Double O Arch one can continue to the Dark Angel, adding perhaps 0.8 mi roundtrip. We were not sure exactly what it was, and started on the trail. We got close to the halfway point and decided the trail did not look interesting. Plus, we could see the Dark Angel “column” from afar (and realized we had seen it in the distance from the Double O Arch already).

dark angel, arches national park, day in arches, hiking in utah, visit utah, alltrails
That is the Dark Angel “column”

It was very hot and we wanted to spend time elsewhere in the part so we turned around. My recommendation: time is better spent in other parts of this trail or the park itself. It was cool to see the Double O Arch from the other side so not a bad thing!

Black Arch

We saw the Black Arch from afar and high up. While we did not reach it, this viewpoint offered many chances for clowning-around photos that I won’t bore you with!

black arch, arches national park, day in arches, hiking in utah, visit utah, alltrails
The arrow points to the Black Arch

Navajo Arch

Navajo Arch was pretty cool and a little different than the other arches. You can walk right under it. It is unusual that there is not a view through it. A little more of secluded cave-like spot.

navajo arch, arches national park, day in arches, hiking in utah, visit utah, alltrails

Partition Arch

I liked the views from Partition Arch, the breeze, and the chance for good photos of the view and of climbing (or trying to) around on the base of the arch. I may update later to add a photo!

Pine Tree Arch

Pine Tree Arch felt like a window out to the landscape behind it. A massive rock with a hole, it was the least interesting (structurally speaking) of the arches on the trail. Landscape and Double O were the most interesting in that regard with Navajo and Partition coming right behind them.

pine tree arch, arches national park, day in arches, hiking in utah, visit utah, alltrails

Skyline Arch

The Skyline Arch was not on the Double O Trail but was at a stop along the drive. It was far enough away on a trail that, by itself, did not seem to offer much. So we just took a look at the arch, nodded, and returned to the car (remember, we had done already Double O Trail + 1.5 mi towards/back from Dark Angel AND we were planning on a sunset hike).

Skyline Arch, day in arches, arches national park, visit utah, hiking in utah, day in arches

Skyline Arch, day in arches, arches national park, visit utah, hiking in utah, day in arches
My friend took a peek inside the arch to ensure we weren’t missing something

Sand Dune Trail

Another cool arch along the scenic drive (so not on Double O Trail) is Sand Dune Arch. It is a very easy walk from the parking lot and just different than anything else in Arches National Park.

day in arches, arches national park, visit utah, hiking in utah, sand dune trail

day in arches, arches national park, visit utah, hiking in utah, sand dune trail

Cool Rock Formations at Arches

The drive afforded so many great views. Here are just a few, including Balanced Rock (one the most famous spots in the park) and my “Nefertiti”.

cool rock formations, day in arches, arches national park, visit utah, hiking in utah, day in arches

cool rock formations, day in arches, arches national park, visit utah, hiking in utah, day in arches, balanced rock

cool rock formations, day in arches, arches national park, visit utah, hiking in utah, day in arches

Ending a Day in Arches: Delicate Arch

Leaving the best for the end (of this post and of this day!) of this day in Arches NP … The plan had been, due to the high heat, to do the main hiking early and then visit the various viewpoints and short walks afterwards. But part of the plan was to see the huge and impressive Delicate Arch at the best time of day to see it: sunset.

Of course, this is well-known and the 3.2 mi roundtrip trail will not be empty nor will the viewpoint at the top. However, it was not annoyingly crowded (it is not an easy hike with an elevation gain of 629 ft so maybe fewer people attempt it). The only time to mind the “crowd” is when everyone is getting their photo under the arch but even that did not require a long wait time.

Delicate Arch at sunset, arches national park, day in arches, visit utah, hiking in utah
Before the peak of sunset
Delicate Arch at sunset, arches national park, day in arches, visit utah, hiking in utah
Simply majestic – thank you, Lord, for the beauty of your Creation!

The colors, not only of the arch, but of the sky and terrain around at sunset were out of this world! Sitting up there, wind blowing, looking at the natural beauty all around was one of the best experiences of my trek across Utah!

Delicate Arch at sunset, arches national park, day in arches, visit utah, hiking in utah
Great feeling of exhilaration!

Getting to Arches National Park

We opted to fly in and out of Las Vegas, though it is 6.5 hrs from Moab, Utah because of the availability of flight options, cheaper flights, and that it would be 2.5 hrs or so from our end point (Springdale, UT).

The town of Moab is the closest to the National Park. Since we were also going to spend time in Canyonlands National Park, Moab made great sense. The town also has a lot to offer in terms of options of places to stay, eat and shop. We rented an AirB&B south of town and enjoyed having easy access to grocery stores so we could cook dinners.

On the Appalachian Trail up to Blood Mountain

Living in Atlanta, I am blessed to be within 1.5-2.5 hrs of really phenomenal mountain hiking. While we have many nature trails within the city itself and around I-285 (our ring road), the majesty of the south Appalachians is within easy reach. And so was Blood Mountain.

This fall, I left home with a hiking buddy at 1:30PM and got started on the route around 3:30PM. We had picked starting on the Appalachian Trail’s Neels Gap as the route to climb Blood Mountain (4,458 ft in elevation). Blood Mountain is on the Appalachian Trail proper.

Blood Mountain, Appalachian trail, hiking in north Georgia, fall foliage, nature, hiking near Atlanta
The skies and the trees welcome us to north Georgia

Luckily for the avid hiker, there are several trails to go up Blood Mountain from either side: Neels Gap, Freedom Trail, Slaughter Creek. I had hiked it up via Freedom Trail a few years ago. However, we could not park at Neels Gap but a quarter of a mile away, there was another trailhead: Byron Reese Trail.

Headed up Blood Mountain via Byron Reese Trail

Byron Reese was about 0.7 mi away from connecting with the Appalachian Trail (and the entry point coming from Freedom Trail). From there up to the summit it would be about 1.6 mi each way by my estimation.

Blood Mountain, Appalachian trail, hiking in north Georgia, fall foliage, nature, hiking near Atlanta
The trailhead started with this – it bode well!

The trail up was moderate in terms of terrain with many roots, stones and rocks, and segments that were relatively smooth. The rocks often were purposefully laid steps. There were also larger masses of stone (granite perhaps?). Thankfully, though the larger masses of stone and the rocks were wet that day, they were not slippery (unless they had moss on them which not many did in October).

The white mark on the tree is specific to the Appalachian Trail
Blood Mountain, Appalachian trail, hiking in north Georgia, fall foliage, nature, hiking near Atlanta
Spectacular!
Blood Mountain, Appalachian trail, hiking in north Georgia, fall foliage, nature, hiking near Atlanta
We met a local

While the terrain was moderate to me as an experienced hiker, there was certainly enough inclines to be challenging enough for the short distance. It may be a harder trail for someone newer at hiking.

As one approaches the summit, there is an initial clearing offering a phenomenal view south to much lower mountains and hills. Clearly, Blood Mountain is higher than all visible terrain looking south.

Blood Mountain, Appalachian trail, hiking in north Georgia, fall foliage, nature, hiking near Atlanta
At the first clearing – better view that from the summit!

Atop Blood Mountain!

But, that is not the summit. The terrain is granite stone interspersed with vegetation. As one follows the trail, it becomes very narrow and surrounded by tall bushes. One wonders if one already summited. However, all of a sudden, you see the rear of the shelter available to Appalachian Trail hikers right at the summit.

Blood Mountain, Appalachian trail, hiking in north Georgia, fall foliage, nature, hiking near Atlanta, AT shelter
The shelter and my hiking buddy on Blood Mountain

Climb up the large rocks right by the shelter for more good views, though far from a 360 degree view.

Blood Mountain, Appalachian trail, hiking in north Georgia, fall foliage, nature, hiking near Atlanta
View from the summit
Blood Mountain, Appalachian trail, hiking in north Georgia, fall foliage, nature, hiking near Atlanta
At the summit’s top rock

We want down the same route we had gone up (vs. continuing on the Appalachian Trail down to Slaughter Creek. It started lightly raining on the way down and we even had small pellets of ice. It was a great wrap-up to a shorter (4.6 mi total) but awesome hike surrounded by the perfect scenery that fall provides at this time of year!

Blood Mountain, Appalachian trail, hiking in north Georgia, fall foliage, nature, hiking near Atlanta
Picture perfect colors from the summit

Day 2 on the Jotunheimen NP Circuit Hike

Having survived the first day of a 6-hike circuit – and the longest hike of the 6 -, it was time to get going on Day 2 for the next challenge: getting to Spiterstulen by climbing Glittertind mountain (vs. skirting it and going around it).

Tallest mountains in Norway and northern Europe

Glittertind is not only the second tallest mountain in Norway but in all of northern Europe. Glittertind stands at 2,452 m / 8,045 ft. The tallest mountain is nearby: Galdhøpiggen. It stands a modest 17 m / 56 ft taller than Glittertind. The height of these mountains is a little higher if you include the glaciers atop. For example, Glittertind, back in 2008, stood at 2,465 m counting the glacier.

Heading up Glittertind

We started the morning early with breakfast at 7:30AM and a departure from Glitterheim at 8:40AM. Though Glittertind stands at 2,452 m, Glitterheim itself is location at around 1,400 M above sea level. So we sort of had a head start in terms of the climb. Small mercies!

Glitterheim turisthytte, cabin in Jotunheimen, hiking in Norway, trekking, senderismo en Noruega, Norge, norvege
Leaving Glitterheim behind

The climb to the summit was about 3.8 miles. The first mile would ascend 425 ft. The second mile would go another 500 ft. Finally, the third mile would go another 450 ft. The final bit to the top would take us up approximately another 300 ft. I cannot recall for certain but it feels the last 1.5 mile was a pure rock walk. Steep and painfully slow to navigate stepping over all those rocks

rock fields, challenging hiking terrain, trekking in Norway, senderismo en Noruega, Jotunheimen, Den Norske Forening, DNT, Glittertind, Glitterheim, Spiterstulen
Norway may be also called Rocks ‘R Us
Glittertind, rock field in Jotunheimen, senderismo en Noruega, trekking i Norge, Norway hike, Spiterstulen,  Glitterheim
Can you still spot me in the rock field? Fun times

Atop Glittertind and all that snow

Within the last hour of the climb, it started to snow. Visibility decreased but we could still see where we were and where we were headed.

Glittertind, rock field in Jotunheimen, senderismo en Noruega, trekking i Norge, Norway hike, Spiterstulen,  Glitterheim
Can you see me now?
rock fields, challenging hiking terrain, trekking in Norway, senderismo en Noruega, Jotunheimen, Den Norske Forening, DNT, Glittertind, Glitterheim, Spiterstulen. snow
I could still see my friend (red oval above) so all was good.

Good thing because right by the summit there was a cliff we could not see… (see image below from AllTrails). Good thing that snowpack at the top was rock solid!

AllTrails, Glittertind, hiking in Norway, trekking in Jotunheimen, snowpack, glacier in Norway, Norge, DNT
This screenshot right after the summit
rock fields, challenging hiking terrain, trekking in Norway, senderismo en Noruega, Jotunheimen, Den Norske Forening, DNT, Glittertind, Glitterheim, Spiterstulen
At THE summit

Descending not always fun and games

Once we were done resting at the summit, we began the descent. For a little bit, we were still on the glacier / snowpack. We did not have any special attachments on our hiking boots. I just made sure I stepped where someone else had stepped before me, hoping the snow had compacted all it was going to compact thanks to the prior person. Oh, and that I was not going to step on snow that was sitting on top of a crevice or gap of some sort!

You can visualize in this AllTrails’ trail preview how sharp a descent this was (it began around mile 4.1, soon after leaving the summit ridge.

AllTrails, Glittertind, hiking in Norway, trekking in Jotunheimen, snowpack, glacier in Norway, Norge, DNT
steep descent, challenging hiking terrain, trekking in Norway, senderismo en Noruega, Jotunheimen, Den Norske Forening, DNT, Glittertind, Glitterheim, Spiterstulen
What it looked like in real life

Eventually, after left the summit ridge, the terrain was free of snow and the snow stopped falling. Back to our normal steep-descent-with-lots-of-rocks-and-scree. It was the usual very focused walk to avoid a nasty and painful fall.

steep descent, challenging hiking terrain, trekking in Norway, senderismo en Noruega, Jotunheimen, Den Norske Forening, DNT, Glittertind, Glitterheim, Spiterstulen
Just too awe-inspiring to not post another photo!
ilivetotravel, Spiterstulen turisthytte, lodging in Jotunheimen, cabin in Jotunheimen, Lomb beer, Norge, senderismo en Noruega

The challenging, steep descent from Glittertind is over

After the steep descent, we entered the area that you see in the picture above. We followed a stream for a bit on still-rocky terrain for a bit.

norvege, Spiterstulen turisthytte, lodging in Jotunheimen, cabin in Jotunheimen, Lomb beer, Norge, senderismo en Noruega
The descent is over!!
challenging hiking terrain, trekking in Norway, senderismo en Noruega, Jotunheimen, Den Norske Forening, DNT, Glittertind, Glitterheim, Spiterstulen

We then went up a little bit and rounded some mountain to a trail that would eventually parallel the private road leading to Spiterstulen. I so badly wanted to just get to that road and walk on a flat, smooth surface! But, it was not to be until the very end, close up to Spiterstulen. To add insult to injury, after we got on the road and approached the lodge, we had a slight uphill. Really…. 🙂

Regardless, my buddy and I were very happy hikers by the time we got to Spiterstulen!

challenging hiking terrain, trekking in Norway, senderismo en Noruega, Jotunheimen, Den Norske Forening, DNT, Glittertind, Glitterheim, Spiterstulen, ilivetotravel

How to end a hard hike

Thankfully, Spiterstulen was ready for us! From a refreshing cold beer to a great meal to a great space in the room and the large lounging room – Spiterstulen was great.

ilivetotravel, Spiterstulen turisthytte, lodging in Jotunheimen, cabin in Jotunheimen, Lomb beer, Norge, senderismo en Noruega
Spiterstulen from the outside
ilivetotravel, Spiterstulen turisthytte, lodging in Jotunheimen, cabin in Jotunheimen, Lomb beer, Norge, senderismo en Noruega

Our room was actually in a cabin and we enjoyed a private bathroom (with heated floor!), a small living room area and a great view from the room’s window. Perfect spot to chill and re-charge.

ilivetotravel, Spiterstulen turisthytte, lodging in Jotunheimen, cabin in Jotunheimen, Lomb beer, Norge, senderismo en Noruega

The meal started with salmon on a piece of bread (that could have been the entrée!). Then Norwegian meatballs with veggies, chased by diced watermelon topped with vanilla ice cream. All good!

foodporn, Spiterstulen turisthytte, lodging in Jotunheimen, cabin in Jotunheimen, Lomb beer, Norge, senderismo en Noruega

Norway’s beauty is infinite!

I am writing all this post-facto, a couple of weeks after returning home. The majesty of the landscapes of Norway are, maybe not unique, but definitely spectacular. Just a view like below, after a nice meal and a beer (or two), are enough to make one be in awe of God’s creation…

ilivetotravel, Spiterstulen turisthytte, lodging in Jotunheimen, cabin in Jotunheimen, Lomb beer, Norge, senderismo en Noruega

Check out Day 1 (Gjendesheim to Glitterheim)

Or, read on to Day 3 (Spiterstulen to Leirvassbu)

Day 1 on the Jotunheimen NP Circuit Hike

Day 1 of the 6-day circuit hike in Jotunheimen National Park began in the Gjendesheim “turisthytte”, where we had arrived the prior day to get an early start on day 1. “Hytte” means cabin in Norwegian and these are the lodgings anyone doing the park will be staying at – unless you camp. I will use “lodge” going forward though not every place we stayed felt “lodgy”. Most, but not all, lodges are run by “DNT” (Den Norske Turistforening), an association that maintains runs trails and cabins in Norway (thank you!).

In any case here is how day 1 of my circuit hike in Jotunheimen went!

DNT, den norske turistforening, Gjendesheim, turisthytte, Jotunheimen, Norway, nature, Norge, Noruega, hiking, trekking
Red “T”s mark the way!

Our approach to Jotunheimen National Park

As I mentioned in my Jotunheimen NP hike overview post, Gjendesheim became the logical starting point for our hike. It was right off route 51 and offered easy access to hiking trails and long-term parking.

I might add that it is a good starting point for those only wanting to do a 1- or 2-day hike as it has a ferry to two other lodges on the Lake Gjende from which one can hike back to Gjendesheim (or, the reverse, hike to the one or both of the lodges and then just return by ferry). So a good option for those not wanting to do the circuit but still see amazing landscapes.

Our route on the trail

We approached Gjendesheim from the north having started our drive at Bergen. Of course, we could have come from the south but we were going to do that region after the Jotunheimen hike so we wanted to explore other territory. For example, this allowed us to visit Lom, cruise the Geirangerfjord and stay at Geiranger with its beautiful setting hillside facing the fjord.

Starting the Jotunheimen NP hike at Gjendesheim

We arrived in Gjendesheim the night before. Our car was left at the long-term parking with anything we didn’t need for the next 7 days. The lodge, right by the ferry dock, consists of a couple of main buildings and a couple smaller ones.

Gjendesheim, turisthytte, Jotunheimen, hiking, Norway, norge
The main building

We stayed in the second largest building, basically a dormitory, where we shared a room with a bunk bed and nothing else. Toilets and showers were shared by everyone. The main building is where the dining room, common living space, and reception were located. It also may have had rooms but I did not explore. That building had toilets and showers in the basement so I assume it did have rooms upstairs.

Gjendesheim, turisthytte, Jotunheimen, hiking, Norway, norge

The common living space was small but offered great views of Lake Gjende as the sun set.

Gjendesheim, turisthytte, Jotunheimen, hiking, Norway, norge

Dinner started with a delicious pumpkin soup and the main was a lamb stew that was also pretty good (in retrospection, there were no bad meals on the circuit and a couple of spectacular ones later in the circuit). Dessert was rhubarb-something, not sure how to describe it! It is worth noting that while there is no menu to order from – you eat what is served – lodges are very accommodating to vegan/vegetarian diets.

Gjendesheim, turisthytte, Jotunheimen, hiking, Norway, norge, lamb stew

Hiking from Gjendesheim to Glittenheim – 1st half

Alright, so on to the actual hike for the day! Starting a circuit hike pretty cold with a 22.5 km/14 mi route was a bit intimidating. Legs would not be yet fully awake, technique for harder terrain not fresh, etc. We started at 8:30AM taking the trailhead right across from the cabin. The trail started with a 600 ft elevation gain in the first mile so definitely not the easiest of starts. It was not a bad start though. It was good to be finally on the circuit! That first mile took us 46 mins.

Lake Gjende, Gjendesheim, turisthytte, Jotunheimen, Norway, nature, Norge, Noruega, hiking, trekking
From the 1st mile looking down at Lake Gjende and the ferry dock

The second mile was kinder only gaining about 400 ft. And the third less about 275 ft. So it was an aggressive start that quickly mellowed. By mile 5, our average was 33 mins/mi so we clearly gained speed as the elevation gain eased. That was good as not only I was coming in “cold” (being the first day of the hike) but also first day with the 18-lb backpack on me.

In this segment we passed the end of Lake Bessvatnet and then hit Lake Russvatnet which we would alongside for about 1.5 miles (from mile 4.8 to 6.4) before heading up to reach high mountain terrain after mile 7.5.

Hiking from Gjendesheim to Glittenheim – 2nd half

So the second half of the hike began! From mile 7.5 to mile 11 was my favorite stretch of this day. I just really like wide open, high mountain terrain, allowing the eye to see far. Of course, it helped that uphills were few and smaller. We saw a handful of hikers but that was about it; that was more than we saw in the first half!

Lake Gjende, DNT, Gjendesheim, turisthytte, Jotunheimen, Norway, nature, Norge, Noruega, hiking, trekking, senderismo Noruega
Nice part of the trail

The final 3 miles were a mix of flat and downhill. The approach to Glittenheim, for someone who had already walked 12 miles or so, felt brutal: the cabin is right across from you but you can’t cross the water/river there -> you have to walk alongside it for a bit before the bridge to cross it. It felt eternal (it wasn’t) due to being tired and ready to get the boots and backpack off!

How difficult was the terrain from Gjendesheim to Glitterheim?

It is worth mentioning that there were definitely challenging parts to this trail. Plenty of water and mud due to recent rains requiring water crossings, stepping over stones to avoid walking in the water.

Jotunheimen National Park, DNT, Den Norske Forening, hiking in Norway, Norge trekking, Noruega senderismo
This IS the trail! A common occurrence

This required minding not only finding the next stone to step on but also ensuring not slipping or that the stone would move once you stepped on it. Muddy spots were handled similarly but I hated those more. There were plenty of these and rock fields to maneuver over (not around!). It took focus and, at the end of the day, my neck and shoulders were very stiff and needing a massage.

Rock field!
Lake Gjende, DNT, Gjendesheim, turisthytte, Jotunheimen, Norway, nature, Norge, Noruega, hiking, trekking, senderismo Noruega
Rocks everywhere – fun challenge but tiring!

The trail also included 3 bridges got larger water crossings, including the one at the end.

Lake Gjende, DNT, Gjendesheim, turisthytte, Jotunheimen, Norway, nature, Norge, Noruega, hiking, trekking, senderismo Noruega
One of the bridges on the trail

And the temperature?

My hike was in late August/early September. Skies that day were a little overcast. Temperature-wise, though I started with a jacket, eventually I took it off and my wool baselayer shirt was sufficient. I did wear glove liners; it wasn’t cold enough for real gloves but the liners provided just the right amount of protection against the cold and the wind, while allowing to use fingers more normally. Other than that, nothing of note to report.

The Glitterheim lodge

I couldn’t have been more elated to arrive at Glittenheim. Though not the best of the lodges, it was heaven after a day 1 of 14 miles! There were two large buildings, much as at Gjendesheim.

This time we stayed in the main building on the second story. Our room again was a bunk bed room with no toilet or shower. The hallway did have a bathroom sink which helped with brushing teeth and filling water bottles. The showers and the toilets, though, were in the basement. In the middle of the night, going down two floors, with very sore knees after a 14-mile hike, using a spiral staircase while half asleep, was not my idea of fun. On top of that, lights would not turn on downstairs as, I guess, generators were turned off. I was thankful I had taken my phone for no good reason – the flashlight feature came in handy!

The common living area was nice with a massive fireplace and great views. The dining room, as usual, was communal tables which is nice to meet some other folks, hear where they are from, hear their hiking plans, etc. That night we sat with a young couple from Israel (whom we would see just about at every lodge during the circuit) and another young couple from the Ukraine (living in Poland).

Glittenheim, Jotunheimen, hiking in Norway, trekking, Norge, Noruega, nature, outdoors, DNT
Glittenheim common spaces

Dinner was buffet-style. The first dish was spinach soup and the entrée a beef stew with potatoes as the side. (If you have not gotten this from describing the food at both lodges… there is no menu. You eat of what is being served!) The dessert was very interesting. It was some form of rhubarb jelly over which one poured something akin to milk. I was hesitant at first but found it delicious!

After dinner we enjoyed beers at the common living space before going upstairs to ready things for the next day and get some good, well-earned rest!

Lake Gjende, DNT, Gjendesheim, turisthytte, Jotunheimen, Norway, nature, Norge, Noruega, hiking, trekking, senderismo Noruega, Russvatnet
A beautiful route

On to Day 2 – Glittenheim to Spiterstulen via Glittentind!

Or, go to read the overview of the circuit at Jotunheimen NP.

(Subscribe to the blog so you can be notified when the next post is issued OR bookmark this page and come back in a week or so!)

A Few Great Hikes in Acadia National Park

When it comes to beautiful places, I don’t mind repeat visits. This month, I was fortunate enough to return to Acadia National Park in Maine. In my first visit, I did some hiking but also explored more of Maine in the vicinity, such as the town of Belfast. This time, I was able to do more great hikes in Acadia than in the first trip as that was the focus of the trip.

St. Sauveur Mountain, hiking in Maine, hiking in Acadia, US national parks, Acadia Mountain, outdoors in Maine

What makes for a great hike

For me, there is no one ideal hike. In this trip over a half dozen or so hikes, what I loved the most was that most trails offered some level of uniqueness. Be it the spectacular views of the ocean and islands, or the challenge of rock-running, or the ravine option on a downhill, or the ladders & ropes on another, the variety that Acadia offers was quite surprising and welcome.

Also, what makes a hike great is reading about the options beforehand to help narrow things down. I use the AllTrails app (this is not a sponsored post!). I find its features super cool: visualizing the trail, elevation views, tracking moving vs total time, etc. It is also very easy to use.

So heading into a hike, I may not know what will be unique and surprising, but I feel it helps me pick hikes I will like, and how to do them. For example, do I want to do a loop clockwise or counter-clockwise.

Finally, a great hike also is made so by following your preference on going solo, hiking with a bud, or hiking a group. I prefer hiking with a friend as it allows for quality time and an alternative to endless selfies! And certainly, someone to goof off with along the way! Fun times.

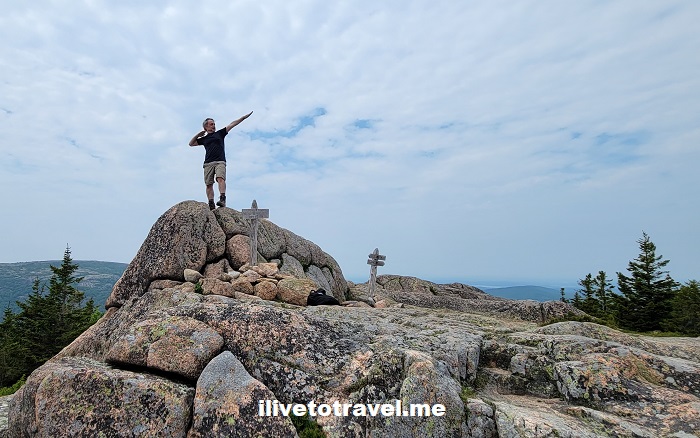
usain bolt in maine, hiker in maine, acadia hiking, stud in maine
Cuban Usain Bolt – and, for once, nature imitates art!
usain bolt in maine, hiker in maine, acadia hiking, stud in maine
hiking in acadia, pushups in maine, hiker stud, blue steel pose in maine
My “Blue Steel” look and trying to push the rock away with my pushup! (didn’t work!)

In no particular order, here are some of the great hikes in Acadia that I enjoyed in this trip (in no particular order).

Witch Hole and Pond Carriage

At 7.8 miles or so but little elevation gain, this trail qualifies as moderate. This trail is near Hulls Cove by the Park Headquarters. It passes small ponds along the route and it is a smooth trail good for hikers, regular bikers, and strollers. The choice to do this trail on day 1 was that it was supposed to rain and I thought it would be better to avoid rocky trails. I certainly was not going to let rain keep me from hiking but also wanted to be sensible!

witch hole hike, waterfall in maine, hiking in maine, acadia national park

St. Sauveur and Acadia Mountains

In researching these two mountains, I learned there was an easy way to build a loop hike that hit both and covered 4.5 miles or so. Neither mountain gets beyond 700 ft in elevation but, together, they are considered a moderate hike as the terrain is not smooth.

Acadia Mountain trail, hiking in Acadia, hiking in Maine
St. Sauveur Mountain, hiking in Maine, hiking in Acadia, US national parks

For those who may not want to go up a mountain twice in one loop, the Man O War trail allows a way to return to the trailhead off route 102.

St. Sauveur Mountain, hiking in Maine, hiking in Acadia, US national parks

We felt the counterclockwise direction turned out to be better once we had finished the hike. St. Sauveur Mountain was good but the views from Acadia Mountain were better. In addition, the uphill and downhill on Acadia Mountain were a lot of fun, and a great way to finish the loop hike! A lot of stones/rocks to run up (or down) added a neat challenge to the hike.

acadia mountain, hiking in Acadia, adventures in Maine, nature in maine, forest in maine
Come again? Am I running up that??!!
rock running, acadia mountain, hiking in Acadia, adventures in Maine, nature in maine, forest in maine
acadia mountain summit, views from acadia, hikers in maine, two guys hiking

Pemetic Mountain

This 5-mile hike starts at the restaurant on Jordan Pond in very flat terrain at the pond’s edge. A little more trafficked due to the popularity (and ease?) of the pond trail but, quickly, the trail to Pemetic veers off and then it was not as crowded (though we did run into people along the way).

Pemetic Mountain trail, hiking in Acadia, hiking in Maine, adonis in maine
Pemetic Mountain trail, hiking in Acadia, hiking in Maine, hikers in maine, two guys hiking
Pemetic Mountain trail, hiking in Acadia, hiking in Maine

A neat surprise on this one, on the downhill, was to go down the regular path OR to go down a ravine with the aid of two ladders. A no-brainer for this daring hiking duo: ravine!

Acadia National Park, hiking in Maine, trails with ladders, ravine
Acadia National Park, hiking in Maine, trails with ladders, ravine, Pemetic Mountain trail

A good bit of the downhill was rocky of the more painful kind: not the large rocks to jump your way through but the ones that, even if being careful, is very inviting to a twisted ankle.

Acadia National Park, hiking in Maine, rocky trail in Acadia, Pemetic Mountain trail

The hike ends up skirting the Bubbles (North and South) and you could decide to go up one or both of them. We skirted them and ran into a beautiful forested area. This was a very cool hike.

Acadia National Park, hiking in Maine, forest in Maine, palette of green, Pemetic Mountain trail

Bernard Mountain

On the last day of the trip, we had to squeeze one final hike. We wanted to do some other things later in the day before heading to Bangor to be by the airport for the 6AM flight the next day. We had hiked in that part of Mount Desert Island earlier and wanted to drive around that part of the island so Bernard Mountain was the choice.

bernard mountain, hiking in Acadia, adventures in Maine, nature in maine, forest in maine, Mount Desert Island
bernard mountain, hiking in Acadia, adventures in Maine, nature in maine, forest in maine

It was a beautiful and very quiet hike. We saw only one person as we started the climb. It was very green and not much of a view at the top but what made it a gem was all the vegetation. A rolling mist near the summit was a treat!

bernard mountain, hiking in Acadia, adventures in Maine, wood art
Art in nature – love the lines and curves
bernard mountain, hiking in Acadia, adventures in Maine, hikers in maine, two guys hiking
lobster roll, Maine, hiking in Acadia
THIS was reward – it made me VERY happy!

What to know about visiting Acadia National Park

Acadia is one of the top visited national parks in the United States and it earns that through the beauty of the scenery combined with the good food (lobster, anyone?!). One word of caution: at peak season, the place can be a madhouse of traffic and cars. I could see the buildup in early June but, for example, it was still easy to find parking along Ocean Path Trail (the one-way road along the coast). Two years ago, when I went at peak time, it was nearly impossible to find a parking spot along the road. So, if at all possible, avoid peak season to maximize the ease of enjoying the place.

Another key thing to do that I did on my first visit but not on this one is to go see the sunrise atop Cadillac Mountain. As the suggestion alludes to, it is an early start day… You can drive up to the summit (I think it is a 3-mi drive) and just sit up there on the rocks awaiting the earliest sunrise in the eastern seaboard. Be mindful though: you need to have pre-purchased a pass to get to this spot at sunrise. It is a HIGHLY popular thing to do and there is only so much parking up there. You must either buy it months in advance OR check at 10AM two days before the day you want to go. Thankfully, the pass is $6 so it will not break the bank. Now, of course, check the weather the night before lest you wake up to go and the sky is overcast!

I have been blessed to visit twice and hope I can visit again and enjoy Mount Desert Island and Acadia National Park some more!

Acadia, hiker, strong hiking legs, hiking, US national parks, outdoors in Maine

Checking out Cloudland Canyon State Park

On a very cold fall morning (actually, late morning as it was 11:45AM) I started what would be a super cool hike in Cloudland Canyon State Park in NW Georgia. NW as in the true corner of Georgia where it meets Alabama and Tennessee, in the Cumberland Plateau. A friend selected this state park, two hours’ drive away from Atlanta, for our Sunday hike. Excellent choice!

The state park offers several trails but the most epic one is the one that allows the hiker to properly appreciate the Cloudland Canyon: the West Rim Loop Trail. Oh, and worth noting the park offers fishing, horseback riding trails, picnicking and the like. For those not hard-core hikers, the Overlook Trail offers a way to see some of the beauty.

cloudland canyon state park, hiking, north Georgia, outdoors, nature, fitness
Approaching the trails from the parking lot

The West Rim Loop Trail

The trail actually starts with an in-and-out section that is about 1-mile+ long that crosses Daniel Creek. It is worth noting (and expressing gratitude!) that this state park is so well prepared for us hikers. It has excellent, readable signage (Iowa State University is a sponsor or supporter of these – thank you!) and very reliable trail markers (yellow for the West Rim Loop Trail).

There are some magnificent rock formations of different sorts, which are also seen further south in the trails of north Atlanta.  Certainly, one can envision how the natives in the area used those formations for their shelter.
Yellow marks the way!

Also, there are many well-prepared lookouts, many with very good and sturdy railings, and some vantage points just left open as nature set them up!

cloudland canyon state park, hiking, north Georgia, outdoors, nature, fitness
One of the many vantage points
There are some magnificent rock formations of different sorts, which are also seen further south in the trails of north Atlanta.  Certainly, one can envision how the natives in the area used those formations for their shelter.

At the end of it (35 minutes later), it meets up with the loop part of the trail, about a 2-mile hike reaching about 1,900 ft altitude. We completely guesses which way to go once we got to the loop and we opted to go left.

Good choice. Though it starts with a long uphill, the left side offered a great view over a plain-like area and a town that I believe was Trenton, Georgia. At some point, the loop hit a rocky promontory sort halfway through and then the trail turned to face to east rim and rockface of the Cloudland Canyon.

Checking out rock formations

There are some magnificent rock formations of different sorts, which are also seen further south in the trails of north Atlanta.

cloudland canyon state park, hiking, north Georgia, outdoors, nature, fitness

Certainly, one can envision how the natives in the area used those formations for their shelter.

hiking, rock formations, north Georgia, nature, outdoors, ilivetotravel
Not my home but in a bind…

The walls of a grand canyon

Wow! What a spectacular and long canyon-face! Certainly that was the part to see after passing the mid-point of the loop! One is rewarded with many lookouts (in-and-out very short trails) to enjoy the view.

cloudland canyon, georgia state park, nature, outdoors, hiking

Overall, the West Rim Loop Trail is 5 miles long. It took us 3 hours with the stops we made on the lookouts, random photos and snack/water breaks. There were other hikers but far from “crowded”.

One neat thing is that there are yurts and cabins in this trail. I think it would be awesome to do an overnight or two and see the scenery at different times of day.

Oh, and there’s more! Waterfalls!

Once we finished the trail, we went to see Cherokee Falls which is near the entrance to the trail. It is a spectacular climb down stairs (with the subsequent climb back up!) to get to it. The path that is not a staircase is much easier to handle!

cloudland canyon state park, hiking, north Georgia, outdoors, nature, fitness

One passes a MASSIVE boulder hanging over the trail (with a bench under it).

cloudland canyon state park, hiking, north Georgia, outdoors, nature, fitness
Don’t linger long under it!

The waterfall setting is well worth the trouble as were those at Panther Creek, another rewarding hike to a waterfall in north Georgia. My knees were a little sore when we finished the loop trail but, boy, did I make the right choice going down to see the waterfalls! The roundtrip to see the waterfall was a mile. Another mile roundtrip would have taken us to a downstream waterfall, Hemlock Falls. But, at 6 miles and my knees, I was glad to leave that for a future visit!

cloudland canyon state park, hiking, north Georgia, outdoors, nature, fitness
This is the reward – a spectacular spot!

If I were to return, besides trying to stay overnight at a yurt or cabin, I would certainly do it a little earlier in the fall because the color change of the trees would only add another level of spectacular to what is already a spectacular setting!

Hiking to the Best Views of the Dolomites: Lagazuoi

After spending a great night at Rifugio Kostner, who could be blamed for not wanting to leave such a cool spot? But, that is the trekking life, not staying in one spot.

sunrise, mountains, Dolomites, hiking, Italy, Italia, Lagazuoi
Red arrow points to our destination: Lagazuoi

Destination: Lagazuoi

So off we went to get to Lagazuoi, a mountain known as much for WW I history as for its beautiful setting. Lagazuoi sits at 9,301 ft – 2,835m, a short 18 kms from Cortina d’Ampezzo. The mountain had many tunnels dug by both sides (Italians and Austrians) as a way to protect themselves and/or try to surprise the opponent. All this land was part of the Austrian Empire until Italy attacked it early in WW I. You can read a little more about it here.

Starting the hike; bye Pordoi

We began the day with a great breakfast as is to be expected in these mountain rifugios (photo on my prior day’s post). Then, for the sake of getting to our next rifugio before sunset, took a little shortcut to come down from Pordoi: we took the chair lift down. Personally, saving a downhill is kindness to my knees so no complaints. And, like the day before, an easy start to a long day is nice.

sunrise, mountains, Dolomites, hiking, Italy, Italia, R. Kostner
Headed up to the chair lift.
sunrise, mountains, Dolomites, hiking, Italy, Italia, rifugio Kostner
One final look back at R. Kostner (middle left)

A different trail ahead

The start of the actual hike was very different than the rocky / pebbly trails of the prior day. I don’t know the technical terms for the landscape but low grasses and lots of green ruled the start of the day.

sunrise, mountains, Dolomites, hiking, Italy, Italia, Lagazuoi, Kostner
Beautiful trails
sunrise, mountains, Dolomites, hiking, Italy, Italia
Time for a break and absorb the views!

Many spots offered a view back to Pordoi (and Rifugio Kostner, if I zoom into the photo). It is a neat way to see where we’d been. Later, we would be offered another, even better viewpoint to watch the sun set.

sunrise, mountains, Dolomites, hiking, Italy, Italia, rifugio Kostner
R. Kostner marked by the red circle

OK, some rocks

We still encountered rocky terrain but no massive downhill covered with scree. But the paths, hugging the rock walls, were simply enjoyable.

dolomites, hiking in italy, lagazuoi, trekking,
dolomites, hiking in italy, lagazuoi, trekking, technical hiking
A few steps and rope were involved here but not too technical

Approaching Lagazuoi Mountain

We concluded the hike by approaching the Funivia Lagazuoi which would take us to the feet of our next lodging: Rifugio Lagazuoi.

My feet were pretty beat and I was in need of taking my boots off. When we reached the top, we still had a steep hill to climb but, guess what? That just made the big beer I got that much more savory!

dolomites, hiking in italy, lagazuoi, trekking, cable car
The view down from the ride; and the rifugio almost at hand…

Majestic views of the Dolomites

Lagazuoi also offered an outdoor deck with majestic views. This rifugio was bigger than the last one and the one from day 1. Many more rooms, a larger deck, and a much larger dining area. Our floor only had 2 showers for a large number of rooms so we took a number and just let each other know when their number was getting close to not lose the spot. Thankfully, no lack of hot water!

dolomites, hiking in italy, lagazuoi, trekking, rifugio in the dolomites
Part of the deck; my room was one of those balconies
dolomites, hiking in italy, lagazuoi, trekking, sunset
We would reach the top of the mountain on the right to watch the sun set

Just a little more hiking at sunset

But the one thing that set this rifugio aside was fantastic vantage point to watch the sunset a short up-hill walk away. The sun would set over the Pordoi massif where we had hiked and stayed the day/night before.

dolomites, hiking in italy, lagazuoi, trekking, sunset
Looking back to the rifugio on the way to the spot
dolomites, hiking in italy, lagazuoi, trekking, sunset
And now further away – what a setting!!!
dolomites, hiking in italy, lagazuoi, trekking, sunset
At the top – what a beautiful spot
dolomites, hiking in italy, lagazuoi, trekking, sunset
The cross and the background made for a great photo!
And now posing the in the other direction! I look tired…
dolomites, hiking in italy, lagazuoi, trekking, sunset, clouds, cloudporn,
This photo almost looks eerie… what do you see? I see an old woman’s head & hair
dolomites, hiking in italy, lagazuoi, trekking, sunset, sky, skyporn, yellow sky
A fellow trekker just soaking it all in…
dolomites, hiking in italy, lagazuoi, trekking, sunset

It was a peaceful place and it was well worth the walk up to the spot, despite tired feet. I am sure you will agree after seeing the sunset pics.

Oh, wait, but the food…

Yes, the food was really good. The double-carb first plate was absolutely perfect. The main dish was a little less impressive but the dessert made up for it!

dolomites, hiking in italy, lagazuoi, trekking, food, pasta, risotto
First dish
dolomites, hiking in italy, lagazuoi, trekking, sunset, food, main entree
The main entree
dolomites, hiking in italy, lagazuoi, trekking, apple strudel in Italy, dessert, sweets, foodporn
Perfect picture to end this post!

Stay tuned for the final posts about this trek in the Dolomites!

A Phenomenal Spot to Chill in the Dolomites

The third day of my hike in the Dolomites had me being driven from the Sasso Lungo area to a cable car (funivia) leading to Sass Pordoi. It is a nice way to ease into a hiking day to start with a short drive as, unbeknownst to me, this day was not going to be an easy one! But the whole day was full of experiences and views I would not trade as we made our way from Sass Pordoi (9,343 ft – 2,848m) to the Rifugio (Hütte) Kostner (8,366 ft – 2,550 m) at the Sella Group (east of the Langkofel, north of the Marmolada). Hiking and -then- chilling in the Dolomites is for me!

Dolomites, hiking, Italia, Italy, travel, outdoors
Here we are at the 25th switchback out of so many (I stopped looking)

The grandeur of the Dolomites

The views from the cable car exit point at Sass Pordio were fantastic. It was 41F (5C) when we got up there around 9:40AM but, with those views, who cares!

Dolomites, hiking, Italia, Italy, travel, outdoors, Sass Pordoi, funivia, terrazza delle dolomite
The entrace to the funivia and the board at the top
Dolomites, hiking, Italia, Italy, travel, outdoors
Look at that! The grandeur!!
Dolomites, hiking, Italia, Italy, travel, outdoors, Sasso Lungo, massif, funivia Sass Pordoi
Behind me, the Sasso Lungo massif where I stayed the prior night, Facing me, the sun.

The back trail to Rifugio Kostner

We walked a short distance and we got to a small rifugio (Forcella Pordoi). It was too early in the day’s hike for a stop so I knew we would continue along the nice trail ahead. Looking to the right, flanked by two large stone massifs was a path down that I assumed would be a black slope in the winter if not a double diamond. And then I learned that was the path we were going to continue one.

Forcella Pordoi, Sella Group, Dolomites, hiking, trekking, Rifugio Kostner
The gap through which we would descend…

I t was quite the sight… Ahead was a snaky path down over scree that required a lot of skill (we were reminded of the technique to handle the terrain). I can’t recall how long it took us to make it all the way down but I “mastered” the technique after like 10 mins when I decided I needed to pass those who had not quite mastered it yet as watching people take mis-steps sort of put me on edge and I was risking a solid slip-n-fall. I ended up catching up with two of my fellow hikers in the lead and we got a nice break while we waited for the rest of the gang to make it down to the lowest point we would hit, before hanging a left.

Forcella Pordoi, Sella Group, Dolomites, hiking, trekking, Rifugio Kostner
The gap and the descent; gets steeper as you look up to the right.

Rocks-n-Slopes ‘R Us

Right when we made the left, we hit a very rocky path along route 626. It would be on-and-off rocky / boulder-y which was a little scarier than the downhill scree as a fall would be potentially more painful / risky. I walked with good care and had a couple of almost-falls that felt painful on my left arm as I suddenly swung my hiking pole to prevent the falls. Those brusque movements contributed to a partial tear on my rotator cuff as I would learn weeks after the hike. But, no pain, beyond a fleeting moment, those couple of times or during the remaining part of the trek, thankfully…

Forcella Pordoi, Sella Group, Dolomites, hiking, trekking, Rifugio Kostner, Marmolada
The rocky path
Forcella Pordoi, Sella Group, Dolomites, hiking, trekking, Rifugio Kostner, Marmolada, route 626
Route 626 shows the way! Still rocky
Forcella Pordoi, Sella Group, Dolomites, hiking, trekking, Rifugio Kostner, Marmolada
Looking towards the Marmolada and a key part of the WWI frontlines
Forcella Pordoi, Sella Group, Dolomites, hiking, trekking, Rifugio Kostner, Marmolada
When it was not rocky, it was steep!
Forcella Pordoi, Sella Group massif, Dolomites, hiking, trekking, Rifugio Kostner, Marmolada
Look at the leg span and that guy is over 6 ft tall!
The path closely followed the massif wall. Finally, we were a tad more than an hr away!

We seemed to be hugging a large massif. At some point we ran into WWI barbed wire. This whole region was engaged in WWI skirmishes and battles on-and-off for three solid years; the highest altitude battle site of that scale. More died due to particularly bitter winters or due to avalanches… There were a few mountains that were partially blown-up for tactical reasons during those years. The next day we would stay atop one of those…

Forcella Pordoi, Sella Group, Dolomites, hiking, trekking, Rifugio Kostner, Marmolada
Barbed wire

In any case, at some point, we turned a “corner” and off in the distance we could see our rifugio for the night. It seemed so close… yet, it would take another hour to reach it. So close, yet so far…

Forcella Pordoi, Sella Group, Dolomites, hiking, trekking, Rifugio Kostner, Marmolada
The red oval marks the spot – can you see the rifugio??
Forcella Pordoi, Sella Group, Dolomites, hiking, trekking, Rifugio Kostner, Marmolada
A close-up. Do you see it now??

Perfect spot for chilling in the Dolomites

But what a reward for our efforts! Rifugio Kostner was my favorite of all the rifugios and that is saying a lot because I liked all. It is run by the Agreiter family and you can tell by looking at the staff that most are related. They were not the typical loud, smiley, friendly Italian but were very service-oriented and ran the place ship-shape; my kind of place! It was neat to see them take their dinner together after they cleaned up from our dinner.

Aaaaaahhh!!!
sunset, Sella Group massif, Dolomites, hiking, trekking, Rifugio Kostner, Marmolada
The dining room

It had a great outdoor deck to enjoy the views after finishing the hike, a generous piece of their apple strudel loaded with real cream, and some vino (we discovered Lagrein wine during this trip – it became one of my favorites).

 Sella Group massif, Dolomites, hiking, trekking, Rifugio Kostner, Marmolada, Veneto
Enjoying the deck and the sun!
apple strudel, Sella Group, Dolomites, hiking, trekking, Rifugio Kostner, Marmolada
That was DELICIOUS and DECADENT. All this hiking

Seeing that piece of strudel and the cream you may understand why after days and days of hiking I did not lose a pound of weight (thankfully, neither did I gain).

Lagrein wine, Sella Group, Dolomites, hiking, trekking, Rifugio Kostner, Marmolada
Nice Lagrein wine
wine, Sella Group massif, Dolomites, hiking, trekking, Rifugio Kostner, Marmolada
Hard to beat!

Sunset & sunrise in the Dolomites

The views were magnificent in broad daylight, sunset or sunrise as the pics below will show (though they will not do justice).

wine, Sella Group massif, Dolomites, hiking, trekking, Rifugio Kostner, Marmolada, sunset
Sun setting behind the massif
sunset, Sella Group massif, Dolomites, hiking, trekking, Rifugio Kostner, Marmolada
Looking across to the next day’s path at sunset
sunset, Sella Group massif, Dolomites, hiking, trekking, Rifugio Kostner, Marmolada
Continuing the view; and in the red circle, our next rifugio! Yikes.
sunrise, Sella Group massif, Dolomites, hiking, trekking, Rifugio Kostner, Marmolada
Sunrise the next morning – just stunning

Food at Rifugio Kostner

Of course, the meal deserved its own homage through this small collage – as did the breakfast…

dinner at rifugio, Sella Group massif, Dolomites, hiking, trekking, Rifugio Kostner, Marmolada
Everything was outstanding!
breakfast, Sella Group massif, Dolomites, hiking, trekking, Rifugio Kostner, Marmolada
Perfect to start a hiking day!
 Sella Group massif, Dolomites, hiking, trekking, Rifugio Kostner, Marmolada
Departing view. Such a cool place!

Want to read more about my hike in the Dolomites. Check out:

  • Day 1 – Rosengarten Massif
  • Day 2 – Sassolungo Massif

Hiking to the Sassolungo, an Impressive Massif in the Dolomites

On day 2 of my hike in the Dolomites, we left the Rosengarten to reach the Sassolungo, an impressive massif in the western Dolomites. Mt. Sassolungo (also known as Langkofel in German, or Saslonch in the local language) is the tallest peak in the massif at around 10,400 ft (3,180 m). Mt. Sasso Piatto (Plattkofel or Sas Piat) is another famous peak in the group of five peaks. Sassolungo seems to lord over the valley below and was the backdrop to the rifugio I would stay that night.

impressive massif, Sassolungo, Dolomites, Langkofel, hiking, trekking,
The Sassolungo

The day started with departing Rifugio Passo Principe. From the rifugio’s deck, while I was waiting for the group to leave, I noticed along that along the peaks next to us, there were trails that were pretty steep and rocky. I could not believe when I spotted a couple of hikers far along that trail on a zig-zaggy uphill. But then, it completely shocked me when I was told that we were going on that trail ourselves! This is the western flank of the Catinaccio d’Antermoia.

antermoia pass, dolomites, trekking, hiking, italy, rifugio principe, impressive massif
Can you see the trail? It ends at the top right of the photo.

We took trail 584 to head towards the Antermoia Pass. The trail was challenging but, actually, it was a lot of fun to take the challenge and get through it successfully (a few slips included but no falls for me!).

antermoia pass, dolomites, trekking, hiking, italy, rifugio principe, impressive massif
Looking back towards the rifugio

We got to the Antermoia Pass (Pas de Antermoa) at close to 9,100 ft (2,770 m). It was a great feeling to reach it and pause for a moment to absorb the view of peaks close and far.

antermoia pass, dolomites, trekking, hiking, italy, ilivetotravel, hiker

Soon thereafter we began a downhill that led us to different terrain. I don’t know how to describe it, really. Maybe the photo can convey this better…

antermoia pass, dolomites, trekking, hiking, italy
Headed towards Antermoia Lake

The trail would become flat and we would pass Lake Antermoia and Rifugio Antermoia (where we would stop for a short break).

antermoia lake, dolomites, trekking, hiking, italy
Antermoia Lake
rifugio antermoia, dolomites, trekking, hiking, italy, rifugio principe
Rifugio Antermoia
rifugio antermoa, dolomites, trekking, hiking, italy, rifugio principe
The path we took from R. Principe to R. Antermoia

From there we walked along beautiful terrain along 578 to Val Duron. Eventually we got our first glimpse of Mt. Marmolada which holds the only glacier in the Dolomites. We would see this mountain from different angles over the next few days.

Sassolungo, Dolomites, Langkofel, hiking, trekking,
antermoia pass, dolomites, trekking, hiking, italy, rifugio principe, marmolata
The tallest mountain is the Marmolada, with the glacier not too visible from this angle

Somewhere there we switched to 532 to stop for a nice lunch at Baita Lino Brach restaurant where many dishes were polenta base. The polenta was pretty bland but that is only to be expected of polenta. In any case, it was a very nice place to stop and eat outdoors.

Sassolungo, Dolomites, Langkofel, hiking, trekking, baita lino brach, val duron

After lunch, we walked down a flat path up until a point where a ride waited to take us to Campitello di Fassa (Campiedel) where we would take a lift from Campitello di Fassa to Col Rodela (at 2,484m). Campitello di Fassa is a small town about 70 km from Trento where most people speak Ladino, a unique language of these mountain valleys.

Sassolungo, Dolomites, Langkofel, hiking, trekking, campitello di fassa, funivia, cable car
Campitello from the cable car
Sassolungo, Dolomites, Langkofel, hiking, trekking, campitello di fassa, funivia

From Col Rodela we would finish our hiking day along trail 557 and Passo Sella to arrive at our lodging for the night: Rifugio Carlo Valentini, a very nice place!

Sassolungo, Dolomites, Langkofel, hiking, trekking, campitello di fassa, funivia, paraglider
One of like 30 paragliders flying above Campitello
Sassolungo, Dolomites, Langkofel, hiking, trekking, campitello di fassa, funivia
Sasso Piatto (L) and Sasso Lungo (R) from the rifugio

I greatly enjoyed my meal of spaetzle and pork tenderloin, right after a delicious and humongous salad (the photo shows also my breakfast the next day).

Sassolungo, Dolomites, Langkofel, hiking, trekking, campitello di fassa, funivia, trentino cuisine, food in northern italy
My two meals at the rifugio

We started the day at 8:30 AM and finished around 5 PM, covering around 8 miles. The meal above (and the wine I enjoyed) set me up well for a good night’s rest!


Missed day 1? Click here to see how the trek started in the Rosengarten (“Rose Garden”) massif.

Or move head to day 3 where we reached Rifugio Kostner over some of the more challenging terrain of the trek.

Challenge in the Dolomites: Hiking the Rosengarten

My first day of hiking presented a neat challenge in the Dolomites taking us from Carezza / Karersee to Rifugio Passo Principe (Grasleitenpasshütte). There we would spend the night after traversing the iconic Rosengarten Massif, near Bolzano, Italy. The massif contains several peaks with its highest elevation being at 9,849 ft (3,002 m).

The trek started with our early AM departure from Trento, where we had spent a few days performing service projects with Trekking for Kids, to Carezza / Karersee where we would catch a ski lift (the Paolina lift) to the start of our trail.

Hiking route in the Rosengarten

The trails we followed were: 539 (from exiting the lift to the Christomannos Monument) to 549 (to Rifugo di Vael) to 541 (to Rifugio Vajolet) and then, finally, to trail 584 on to Rifugio Principe at Passo Principe. I could not show it as well in one single map so here I broke up the day’s hike into two maps.

Started on the lift on the bottom left and made our way upwards…
Starting from the bottom we ended at the top of the blue line

Where to stay: rifugios!

By the way, rifugios are mountain inns or lodges that offer basic accommodations and can provide dinner and breakfast for an additional cost – which I may add, is well worth it.

Some rifugios offer double rooms, some offer group rooms, and some offer both. Also, they may offer shower facilities with some of the places having very basic ones and charging a euro for a few minutes for their use, and some having very nice rooms and bathrooms.

However basic they can be (or not), I have to say all my meals were phenomenal and I will share those along the way in these posts!

Rifugio Principe, Passo Principe, lodging in the Dolomites
Dining area is cozy – and now Covid-ready
speck, german food, rifugio food
My dinner: speck with fried eggs on a bed of potatoes!

At Rifugio Principe (re-built/renovated around 2008), our group of 15 split into two group rooms of eight people each. The setup was not the typical bunk beds but four mattresses laid side-by-side: one set on the floor and one set above those. It was hard to sleep with so many people around but a little harder being so close to each other. Our room was the “outside” room which was supposed to be colder but was actually warm enough (they provide you some serious blankets but I actually did not use them and, instead, just used the sleeping bag liner I had brought with me and warm clothing).

rifugio principe, passo principe, hiking in the dolomites, lodging in the dolomites
Facing the “outside” room from the sun deck

The landscape & views around the Rosengarten Massif

Trekking Dolomites, chair lift in Italy
It starts with a chair lift!
Rosengarten, hiking Dolomites, trekking, Italy
The best shot I have of the Rosengarten has me semi-posing…
Christomannos Monument, hiking Dolomites, trekking, Italy, Rosengarten massif
The Christomannos Monument
hiking Dolomites, trekking, Italy, Rosengarten massif
Beautiful trails; flat for this little stretch…

Uphill and Downhill ‘R Us

hiking Dolomites, trekking, Italy, Rosengarten massif
Slight ascent but still beautiful!
hiking Dolomites, trekking, Italy, Rosengarten massif
Sometimes the trails were the ones below and others up by the peaks!
hiking Dolomites, trekking, Italy, Rosengarten massif
The trails got steep and rocky at places – massive uphills on this day!
hiking Dolomites, trekking, Italy, Rosengarten massif
Always good to hike with friends! I think these were The Beatles
hiking Dolomites, trekking, Italy, Rosengarten massif
And those massive uphills became massive downhills…
This must be after conquering an uphill due to my smile!
hiking Dolomites, trekking, Italy, Rosengarten massif
One serious downhill (but no scree on this one, mercifully)
hiking Dolomites, trekking, Italy, Rosengarten massif
And back on up. You get the drift.
hiking Dolomites, trekking, Italy, Rosengarten massif
Despite the uphill ahead, the view was spectacular!

Let’s get technical

This day did offer a surprise: needing to cross a small section via steel cable. While it looked scarier than it actually was, I still paid attention to where every one of my 4 extremities was at every moment!

The ladders or cables were pretty new and sturdy. Some of the fighting in World War I took place around the Dolomites and, back then, cruder ladders and cables were used by the soldiers to move around – grateful things have improved since then (and are more peaceful!).

hiking Dolomites, trekking, Italy, Rosengarten massif, technical hike
From the top: Going down the rope-assisted path
hiking Dolomites, trekking, Italy, Rosengarten massif, technical hike
From the middle: The steel cable was well anchored and the “rope” pretty thick
From the bottom: The drop was not too big – but glad no one had a mis-step!

A mirage or our rifugio?

Well, along the way, it is not uncommon to pass rifugios which are not our destination. Normally OK as it means we are taking a break. But not always… Sometimes you pass them like passing ships at sea… After a long, long climb, the rifugio on the photo below would have been a GREAT stop. However, and thankfully unbeknownst to me, we had a lot longer to go so a leisurely stop would have place our arrival at our rifugio at dark… So on we went with more uphill terrain as you can appreciate from the picture… No matter how tired I got, the view was always magnificent!

hiking Dolomites, trekking, Italy, Rosengarten massif, technical hike
Rifugio Vajolet
hiking Dolomites, trekking, Italy, Rosengarten massif, technical hike
This was the uphill BEFORE that rifugio we didn’t stop at 🙂

End of day 1 hike at Rifugio Principe

Rifugio Principe, Passo Principe, Hiking Dolomites, trekking Dolomites, Rosengarten massif
This one was OUR rifugio for the night!! Happy to arrive! (Photo credit: K. Sundin)

We covered around 7.5 miles after a mid-morning start and around 6 hours of hiking. The group took a little longer than expected, likely the change in altitude from where we had woken up (Trento, at slightly more than 600 ft elevation) to where we ended (at around 8,600 ft). But, I for one was ecstatic about finishing what was a hard last 2 hours of that day’s hike!


Read about day 2, its tricky start and getting to the Sassolungo!

How to Explore Crater Lake National Park

Oregon is known for many great landscapes from its magnificent coast to the Cascade Mountains, to the Willamette Valley, to the Columbia River Gorge, etc. But one of its most spectacular sights has to be Crater Lake.

Crater Lake, since 1902 part of Crater Lake National Park, serves as witness to the incredible story of earth’s forces at work. Mount Mazama, the original volcano on that site, blew up about 7,700 years ago. The top of the volcano collapsed inward after all the contents spewed out (non-technical terms!) and created a caldera that has filled up with water since then from rain and snow melt.

Crater Lake, Mount Scott, hiking Crater Lake, Oregon, outdoors, nature. exploring Oregon
View towards the west from Mt. Scott

The lake is between 4.5-6 miles across and about 1,943 ft deep. It is considered the deepest lake in North America. And another bit of trivia: it holds almost 5 TRILLION gallons of water. Lots of H2O.

Though no streams flow out of this lake, the water level remains fairly constant because water does seep out or gets absorbed. The water has very little in terms of sediment flowing in (again, no streams feeding it) which helps give it its unique color. It is an intense, beautiful, entrancing blue.

Do the Crater Lake rim drive!

Today, one can drive all around the rim of the lake, a 33-mile drive, dotted with stopping points offerings great views all around the volcano’s caldera. Well, one can as long as it is between mid-October and June as the road closes the rest of the year due to snow… There are two entrances to the park, one approaching the park from the south via route 62, and another from the north.

Crater Lake National Park map, Oregon, national park service, hiking in Crater Lake, overlooks in Crater Lake
In red ovals, some of the places mentioned

We came in through the southern entrance which is where Park Headquarters and the Visitor Center are located. This southern shore of the lake hosts the Rim Village with an overlook, café, and Crater Lake Lodge (which was closed during my visit thanks to Covid).

Let me share with you the places I explored in my visit along this great drive and let you decide which offered the best views of this incredible lake. Hopefully these suggestions will help you plan your own visit!

Phantom Ship Overlook

We did the rim drive counterclockwise. Starting from the southern entrance in this direction, the first part of the drive is a long of windy road with no views of the lake for the most part but still a beautiful ride. Sometimes the curves do not have guardrails so mind your driving!

But soon, than changes and the rest of the rim drive is mostly just going around the edge of the crater. That means lots of great places to stop to admire the beauty of the lake and see it from another angle.

The first stop we made was at the Phantom Ship Overlook. There are a couple of stops you can make before this one (Sun Notch which offers a nice direct view down to Phantom Ship, and Dutton Cliff) but we decided to make Phantom Ship Overlook our first stop. Phantom Ship is a tiny island on the southern side of the lake – quite photogenic, especially with the trees on the edge of the lookout framing the view nicely.

Phantom Ship, island in Crater Lake, hiking in Oregon, Crater Lake National Park

After the Phantom Ship Overlook come a couple of small stops: Pumice Castle and Cloudcap Overlook (which looks straight due west onto Wizard Island in the opposite side of the lake). Nice, brief stops and – as usual – with views that do not disappoint.

Mt. Scott: The highest point at Crater Lake

There are a few mountains or peaks rising out of the area around the rim at Crater Lake. Mount Scott offers the tallest point around Crater Lake, and is a great hike taking you to 8,929 ft. The hike is about 4.5 miles round-trip.

Crater Lake hikes, hiking Mount Scott, Crater Lake park in Oregon, trails in Crater Lake
Mount Scott, tallest point in Crater Lake, hiking in Crater Lake
Cleetwood Cove, Mt. Scott hike,  Crater Lake, Oregon, hiking in Crater Lake, outdoors, cold water swim
Nice zig-zags!

Though steep (the elevation gain is 1,200 ft), it is a beautiful path and doable without gear (though I always carry my hiking pole to ensure my knee is not pounded too much!).

Crater Lake hikes, hiking Mount Scott, Crater Lake park in Oregon, trails in Crater Lake
Nice day with clear views!

It is a neat hike and one gets rewarded with a nice short walk at the top with many spots for photo opps while making one’s way to the peak itself.

Crater Lake hikes, hiking Mount Scott, Crater Lake park in Oregon
I think the lake is that way. Or the other… No Columbus here!

And the peak area is not a bad place to eat your lunch while soaking in the views!

Crater Lake hikes, hiking Mount Scott, Crater Lake park in Oregon, trails in Crater Lake
Taking a break for the view!
Crater Lake hikes, hiking Mount Scott, Crater Lake park in Oregon, trails in Crater Lake
Brought my family with me, as usual 🙂

Skell Head Overlook

After getting off Mt. Scott, a good stop to follow is the Skell Head Overlook.

Skell Head overlook, Grotto Cove, Crater Lake, Oregon, hiking
Grotto Cove on the right and towards Cleetwood Cove (not visible here)

Plenty of parking and space to – once again – soak the views of the lake and have some photos snapped (always better than a selfie!).

Skell Head overlook, Grotto Cove, Crater Lake, Oregon, hiking

Cleetwood Cove Trail – swim in the lake!

For those wanting to jump in the water, there is only one spot where it is legal to jump into the lake. And it requires a steep 1.1-mile down hike (with the corresponding 1.1-mile steep hike back up…) so it may not be for everyone. If it is up for you, know that the elevation difference is 700 ft. This is what the hike looks like:

Cleetwood Cove, swimming in Crater Lake, Oregon, hiking in Crater Lake, outdoors, cold water swim, hike map
The vertical line at the top is walking across the parking lot!

It is worth noting this is one of the best parking areas on this northern and eastern parts of the rim. Two structures at either end of the large parking lot offer restroom facilities though be ready for the basic type of restrooms… Plenty of parking for a busy August day so that certainly was well-thought out for this most popular stop on Crater Lake’s rim road.

Cleetwood Cove, swimming in Crater Lake, Oregon, hiking in Crater Lake, outdoors, cold water swim
The trail is mostly shaded but not always

Once down there, there is no sand beach. Just lots of rocks to climb over and then to walk on to get into the full water. There is one spot down there from where it is allowed to jump into the water and save the rock walking (well, you have to do those to get out of the water). I suggest wearing water shoes as the rocks under water can be slippery but you may feel safer with your naked feet.

Cleetwood Cove, swimming in Crater Lake, Oregon, hiking in Crater Lake, outdoors, cold water swim
Beautiful water colors – and lots of rocks
Cleetwood Cove, swimming in Crater Lake, Oregon, hiking in Crater Lake, outdoors, cold water swim
The beautiful water lies… it’s coooold!

In mid-August the water just completely freezing so not sure how it feels at the beginning or the end of the season, though I imagine it likely does not change much… I waited for my buddy to try the water before I went in. I sloooowly made my way in…

Cleetwood Cove, swimming in Crater Lake, Oregon, hiking in Crater Lake, outdoors, cold water swim

I went in but there was a strong current right by the rocks so I stayed in the water on the rocks. “Stayed” is a generous term equivalent to no more than 10 seconds. But I got my hair wet! Then, I laid back on those warm rocks to cool and dry off. Very nice!

Cleetwood Cove, swimming in Crater Lake, Oregon, hiking in Crater Lake, outdoors, cold water swim
“Raul on the rocks”

Of course, the hike up was work but I didn’t carry much with me save water and a couple of other things in the small backpack.

Cleetwood Cove, swimming in Crater Lake, Oregon, hiking in Crater Lake, outdoors, cold water swim
Just. Don’t. Look. Up. While. Going. Up.

Merriam Point

Merriam Point is a small stop as the rim drive continues. It is also the point at which the northern entrance to Crater Lake National Park hits the rim road. It is a good point to look southward toward Wizard Island, which will be much closer on the next stop on the route…

Crater Lake, National Park, Wizard Island, panoramic view, hiking, Oregon hiking, great outdoors
Awesome panorama view of the lake and Wizard Is.
Crater Lake, National Park, Wizard Island, panoramic view, hiking, Oregon hiking, great outdoors
A very short walk to the viewpoint

Watchman Overlook and Watchman Peak

A short drive south of Merriam Point is Watchman Overlook. Watchman Overlook is almost at the westernmost point of the lake and was our final stop that day on the Crater Lake rim drive.

Crater Lake, Oregon, National Park Service, deepwater lake, deepest lake, Watchman Peak, Watchman Overlook, rock formation at Crater Lake
View looking left from Watchman Overlook

Watchman Overlook offers a great vantage point to see the lake and Wizard Island. And, for those inclined to tackle a good incline, it also offers a hiking trail up to Watchman Peak.

Crater Lake, Oregon, National Park Service, deepwater lake, deepest lake, Watchman Peak
Watchman Peak and the trail as seen from Watchman Overlook

It is a 0.8-mile walk up a steep path but the view is a very nice reward.

Crater Lake, Oregon, National Park Service, deepwater lake, deepest lake, Watchman Peak trail
The trail
Crater Lake, Oregon, National Park Service, deepwater lake, deepest lake, Watchman Peak, hiking Crater Lake
Excellent view of Wizard Island from the peak

After Watchman Overlook, had we had more time that day, we would have gone towards the lodge where a trail goes to the top of Garfield Peak which, at 8,054 ft, is just slightly taller than Watchman Peak. Garfield Peak is on the south edge of the lake so it would have offered a totally different vantage point so you may want to check it out. Of course, you don’t have to climb the peak to see the views north as the Rim Village would offer a similar view but just from rim level.

If you have not gathered yet, I thoroughly enjoyed Crater Lake National Park and all the views and activities that if offers. I have not visited many of our national parks but they are certainly a great treasure and I hope to be planning visits more often than I have before!

Crater Lake, Oregon, National Park Service, deepwater lake, deepest lake, cobalt blue water
Goodbye, Crater Lake

%d bloggers like this: